** Check out other self-drafted patterns at Wood Child Designs! **
I’ve gotten quite a few DM’s on Instagram and comments on my posts asking about how to get started with sewing a linen top. The beauty of these designs is they are so simple, both design-wise, but also construction-wise. They are a great introduction to sewing your own clothes (no gathering, zippers, buttons, interfacing — all that scary stuff!) and super-rewarding.
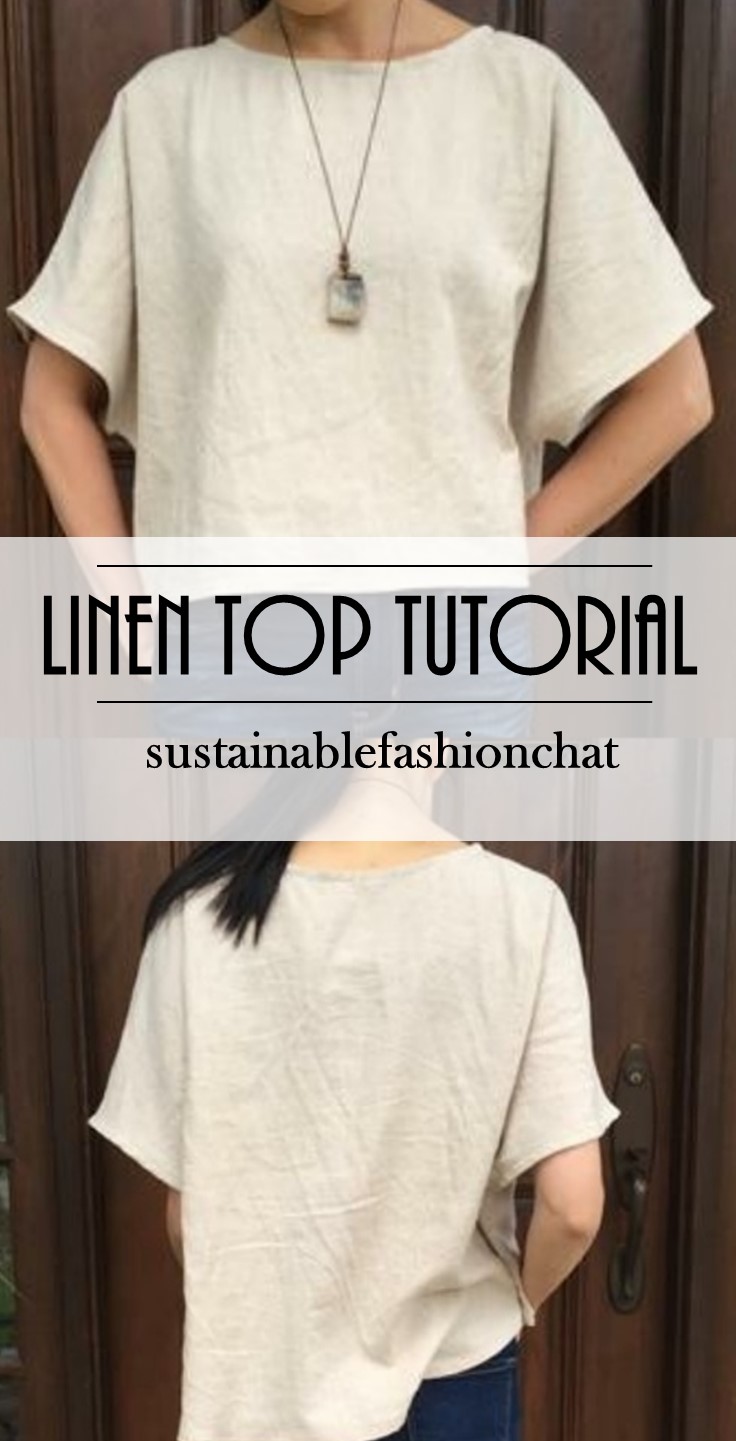
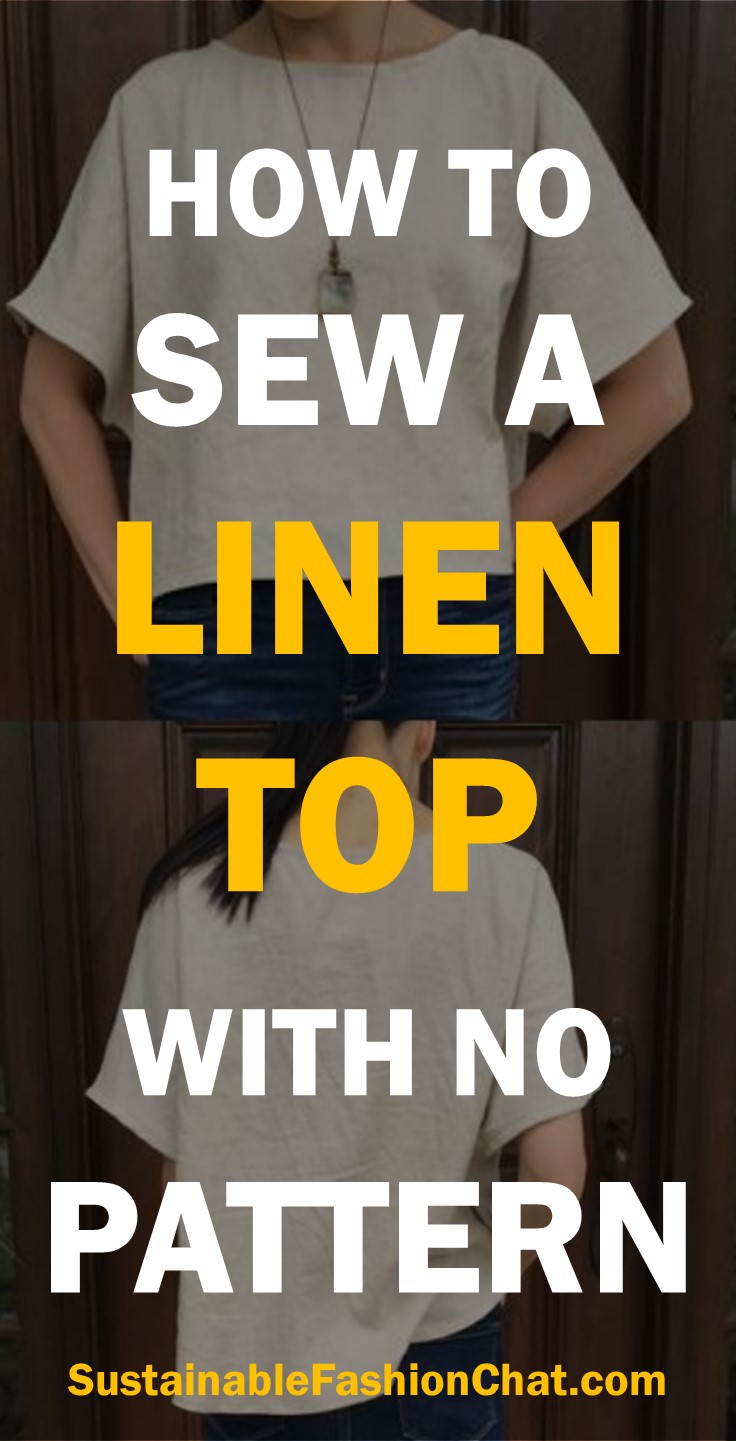
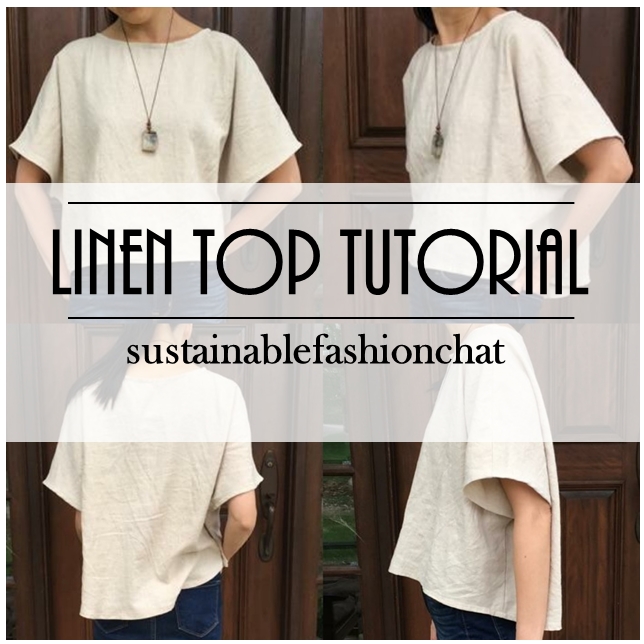
For this tutorial, I’m going to teach you how to sew a top that is somewhat similar to Elizabeth Suzann’s Linn top. I’ve never owned one of these tops, so none of the measurements are directly from ES’s design, just the overall idea and aesthetic.
I’ll put a bite-sized step in each response to this post. If you’re intimidated, just do one of the steps at a time, and soon you’ll be wearing your very own creation!
Ready? Ok, let’s get sewing!
Step 1: Gather your materials
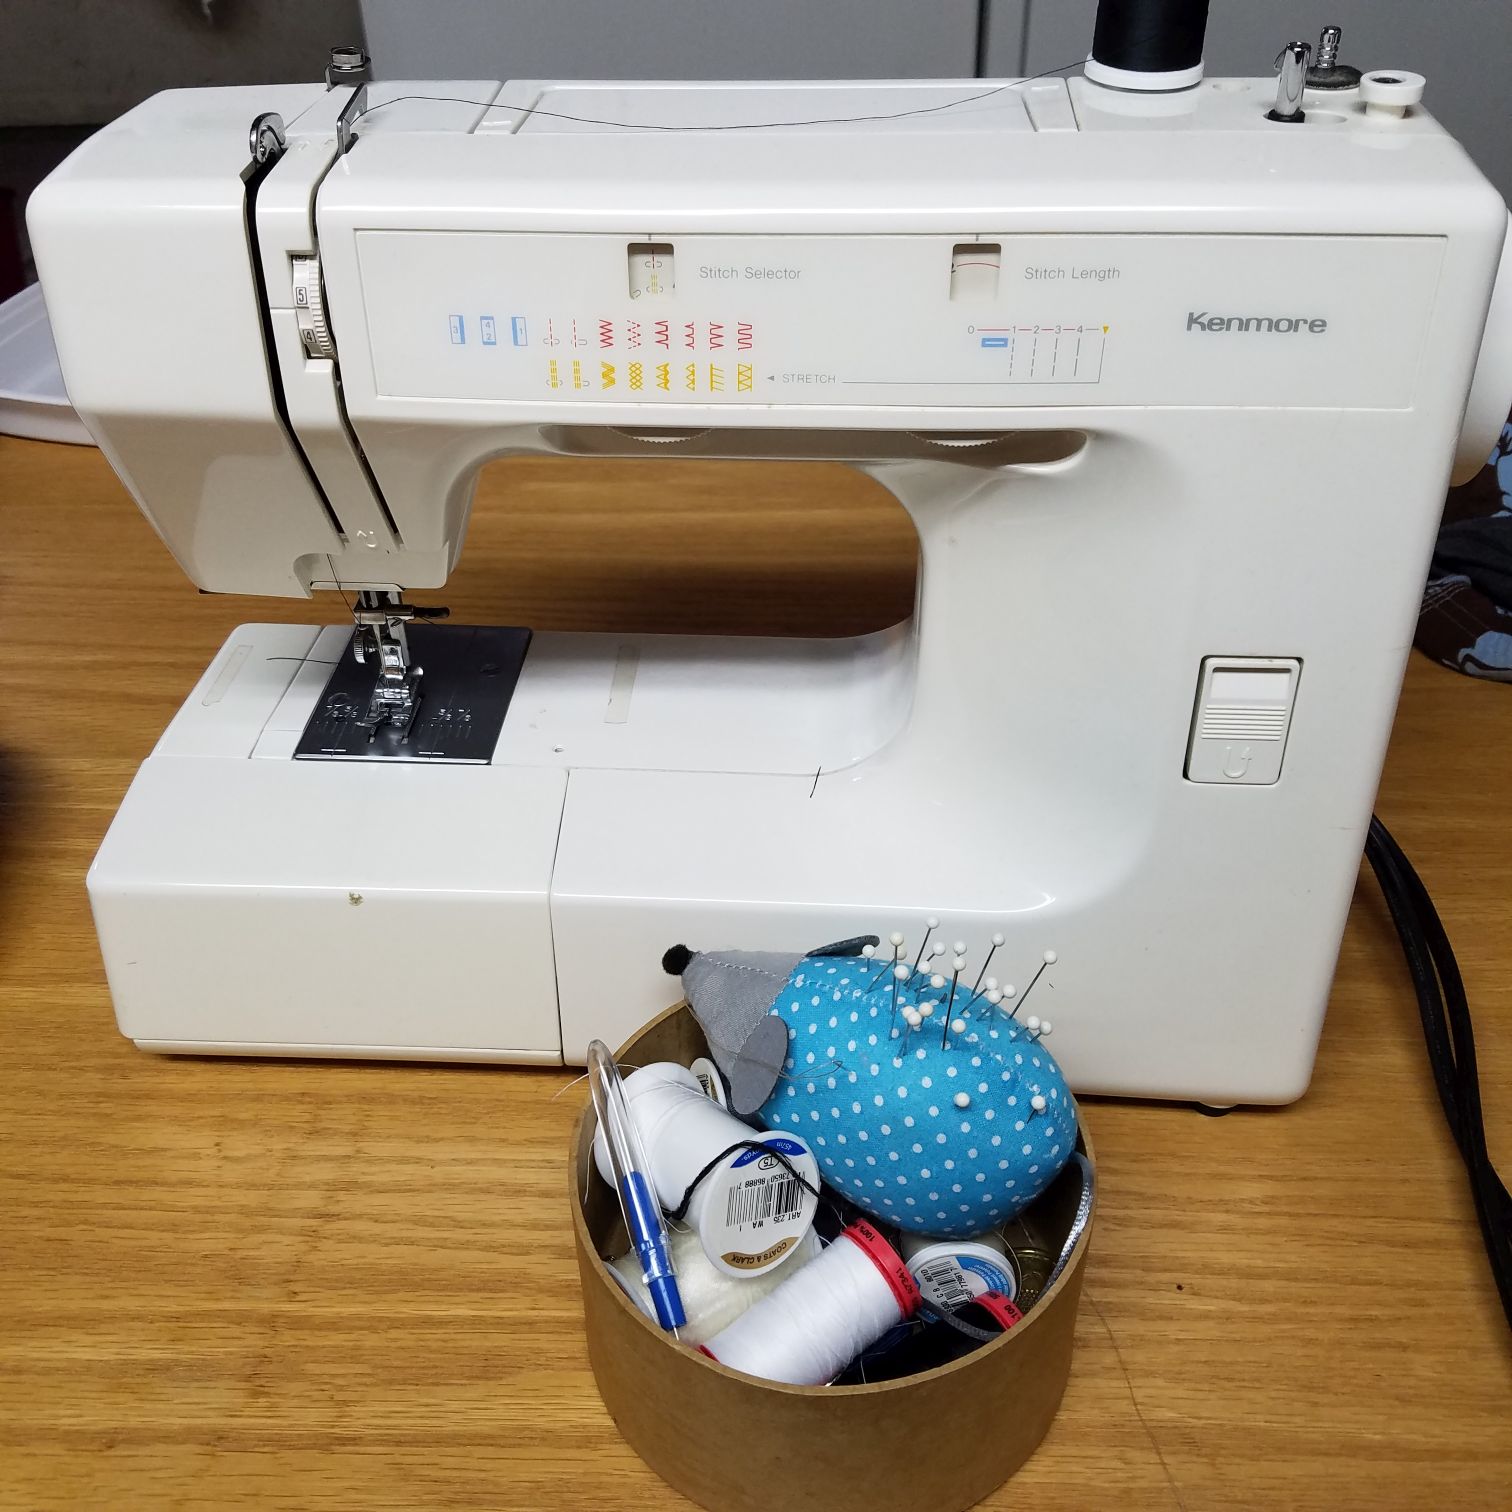
- First off, you’ll need a sewing machine. No need to buy one if you’re just trying this sewing thing out for the first time. See if you can borrow one from a friend, co-worker, acquaintance, etc. Many people have one stashed away that they never use
 It doesn’t have to be anything fancy. My sewing machine is one I picked up at Sears, over 20 years ago, for about $150. It’s as standard and simple as they come, and I’ve used it to make clothing, quilts, stuffed toys, you name it.
 - Next, you’ll need some pins. They will make your life much easier, trust me.
- Iron and ironing board. Again, it’s worth having them. You’ll see

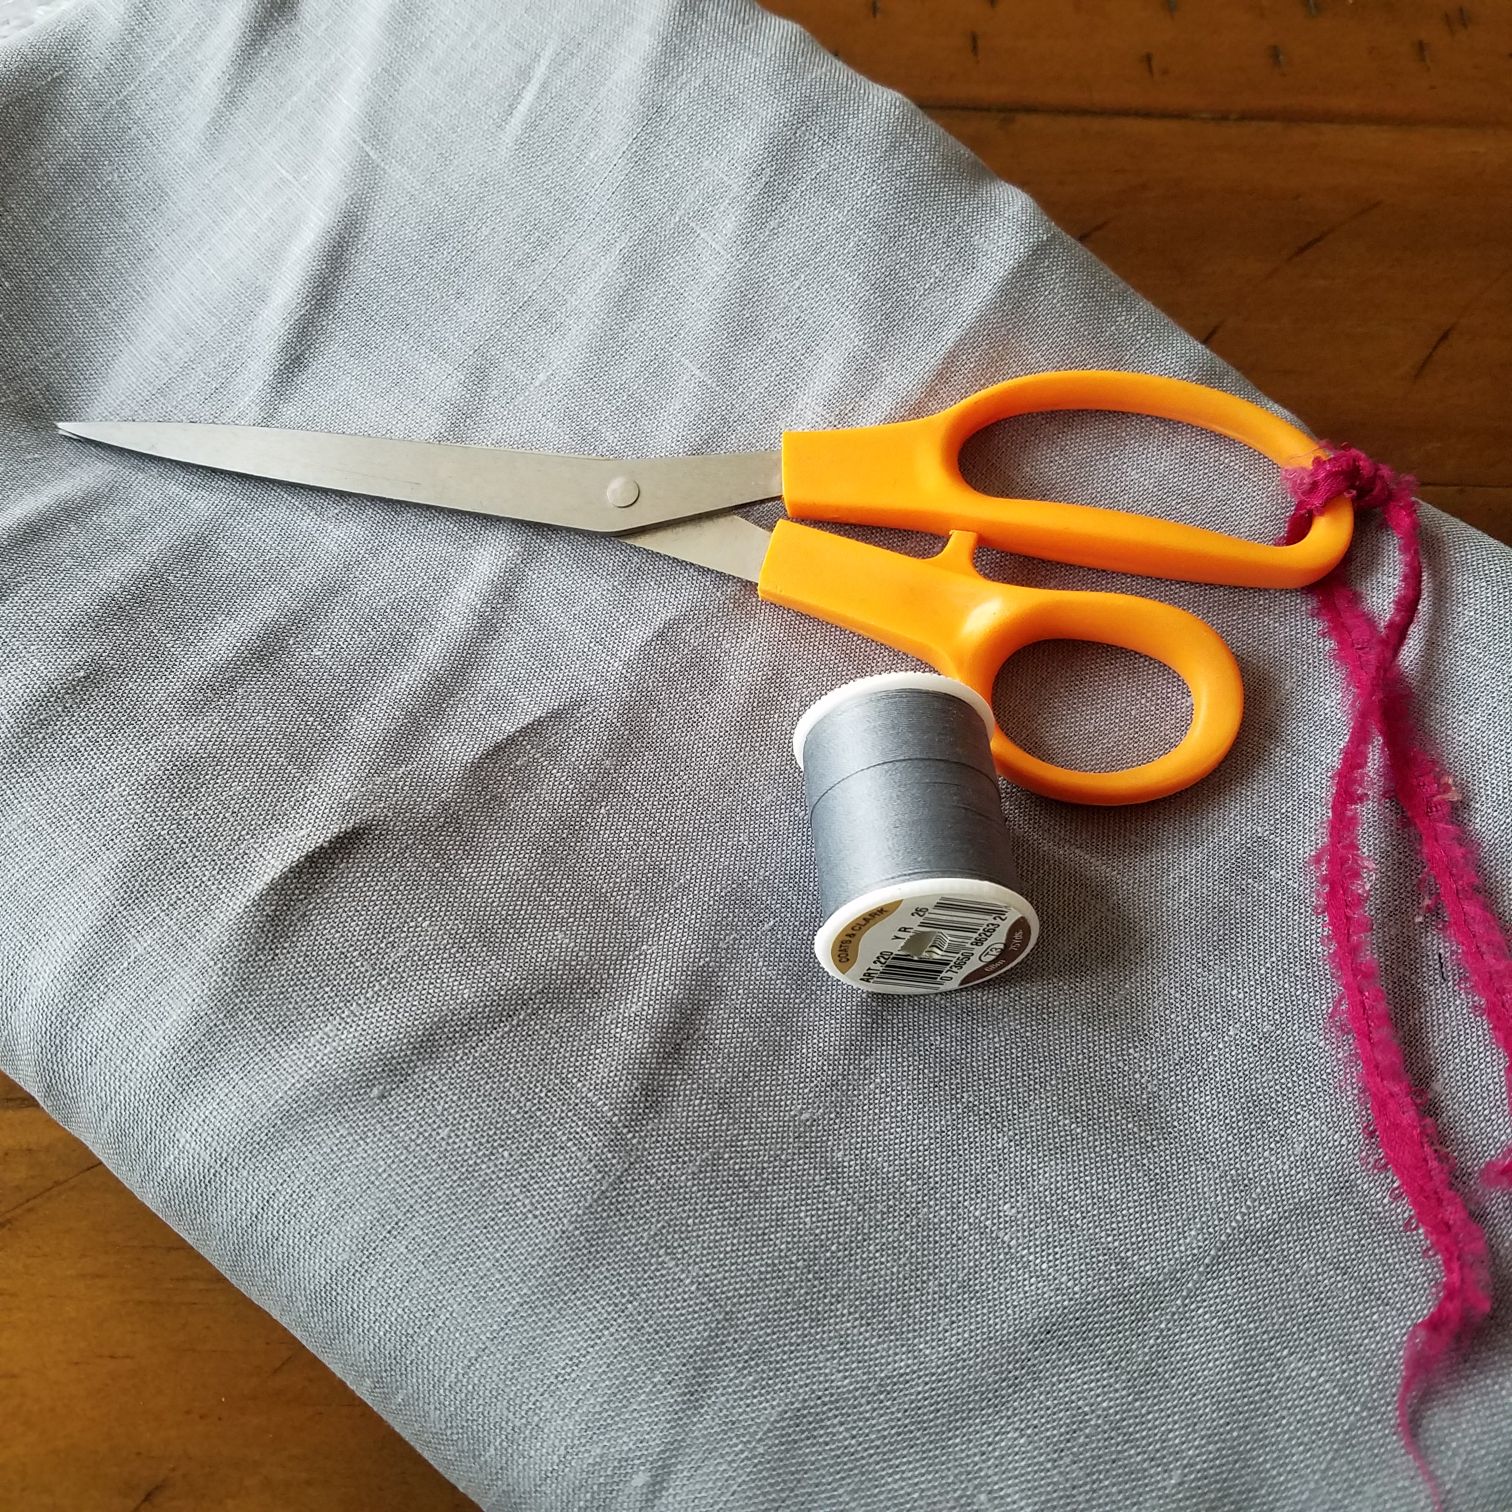
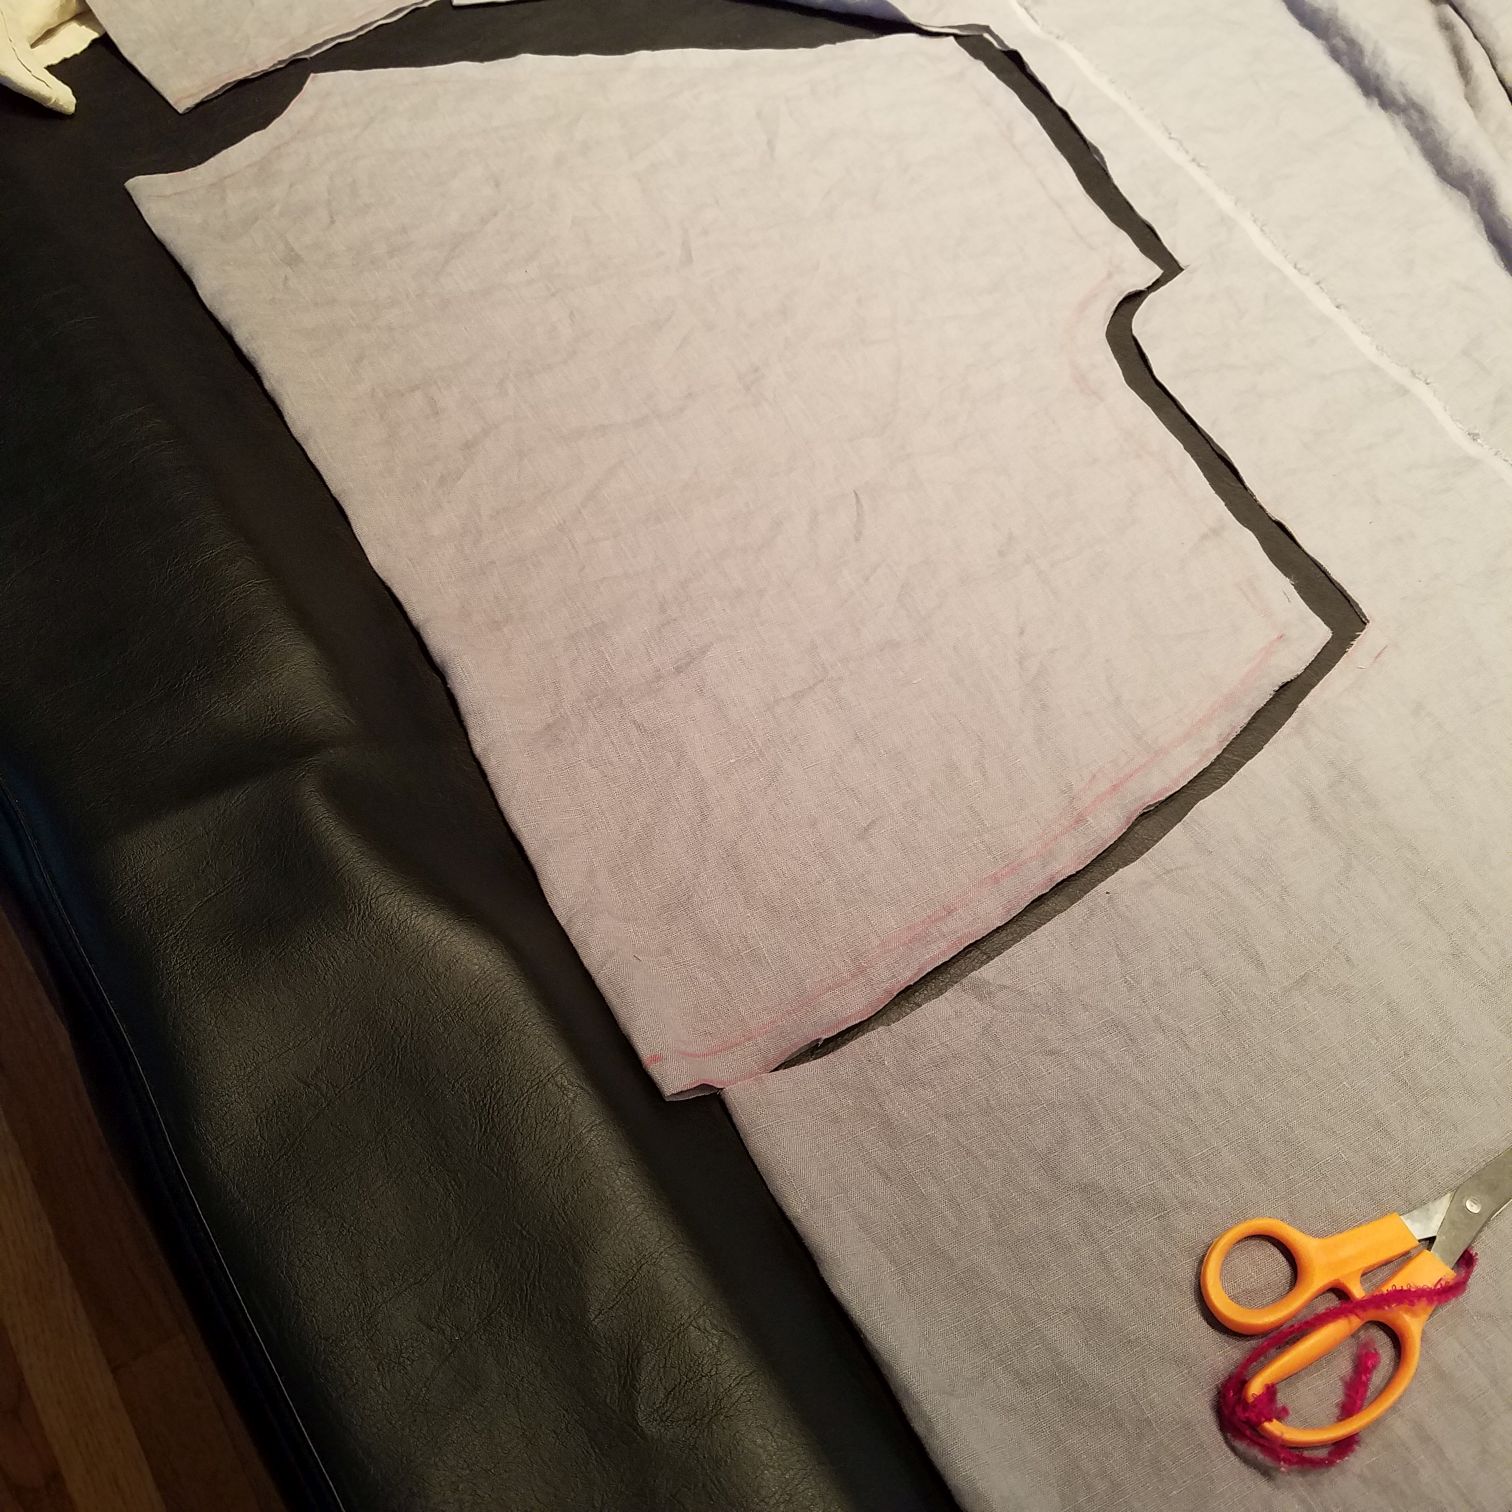
- Scissors. If you don’t have a pair of fabric scissors set aside, it’s worth buying a new pair of shears and saving them only for fabric cutting. They’ll stay nice and sharp and won’t fray the edges of your fabric when you cut. As you can see, I have mine marked with a ribbon so they don’t get used for anything but fabric.
- Now the fun part – fabric. Some great fabrics for this top are pure linen, linen blends, and raw silks. You get to choose the fabric, color and pattern. This is one of the best parts of sewing your own clothes I picked up a linen fabric from my favorite local fabric store, Silk Road Fibres. If you don’t have the benefit of a good local store, I’ve heard good things about Fabrics-store.com . For this top, I bought 1.5 yards, which should be a generous amount unless you want to make a longer top.
- Thread. An all-purpose thread in a matching color will do nicely. I read some internet advice that silk thread should be used to sew silk fabrics, but I had bad luck with silk thread breaking in my machine and honestly, with thicker raw silks (vs. delicate silk crepes), I think the all-purpose thread is fine.
Step 2: Wash and dry your fabric
That’s pretty self-explanatory, but can be a pretty hard step if you’re excited to get started. You don’t need much detergent at all, just a smidge, and go ahead and dry the fabric on high heat to get it to shrink as much as it’s going to. That way your shirt will stay the same size after you’ve sewn it.
Your fabric will come out of the washer and dryer with all sorts of unraveled knots and tangles coming off if it. Just cut them off.
You may want to iron your fabric if it’s super-wrinkled. But if you get it out of the dryer soon after it’s dry, it should be relatively wrinkle-free.
Step 3: Trace and cut your pieces
One of the great things about this top is that it is just two easy pieces. The sleeves are integrated into the body of the top so you don’t have to deal with separate pieces there.
Tracing and cutting your pieces without a pattern may sound intimidating, but this type of top is super-forgiving, so don’t sweat it too much. Here are a few things you can consider:
1. Go through the tops you currently own and see if you want to use any of them as reference. If you really like the neckline on one, for example, you can use that as a guide. If you like the width of another, you can use that as well. Just remember, the width of this piece largely determines the sleeve length, so if you go narrower, you’ll get at top with shorter sleeves.
2. I’ve included the measurements I used for the top on this example here:
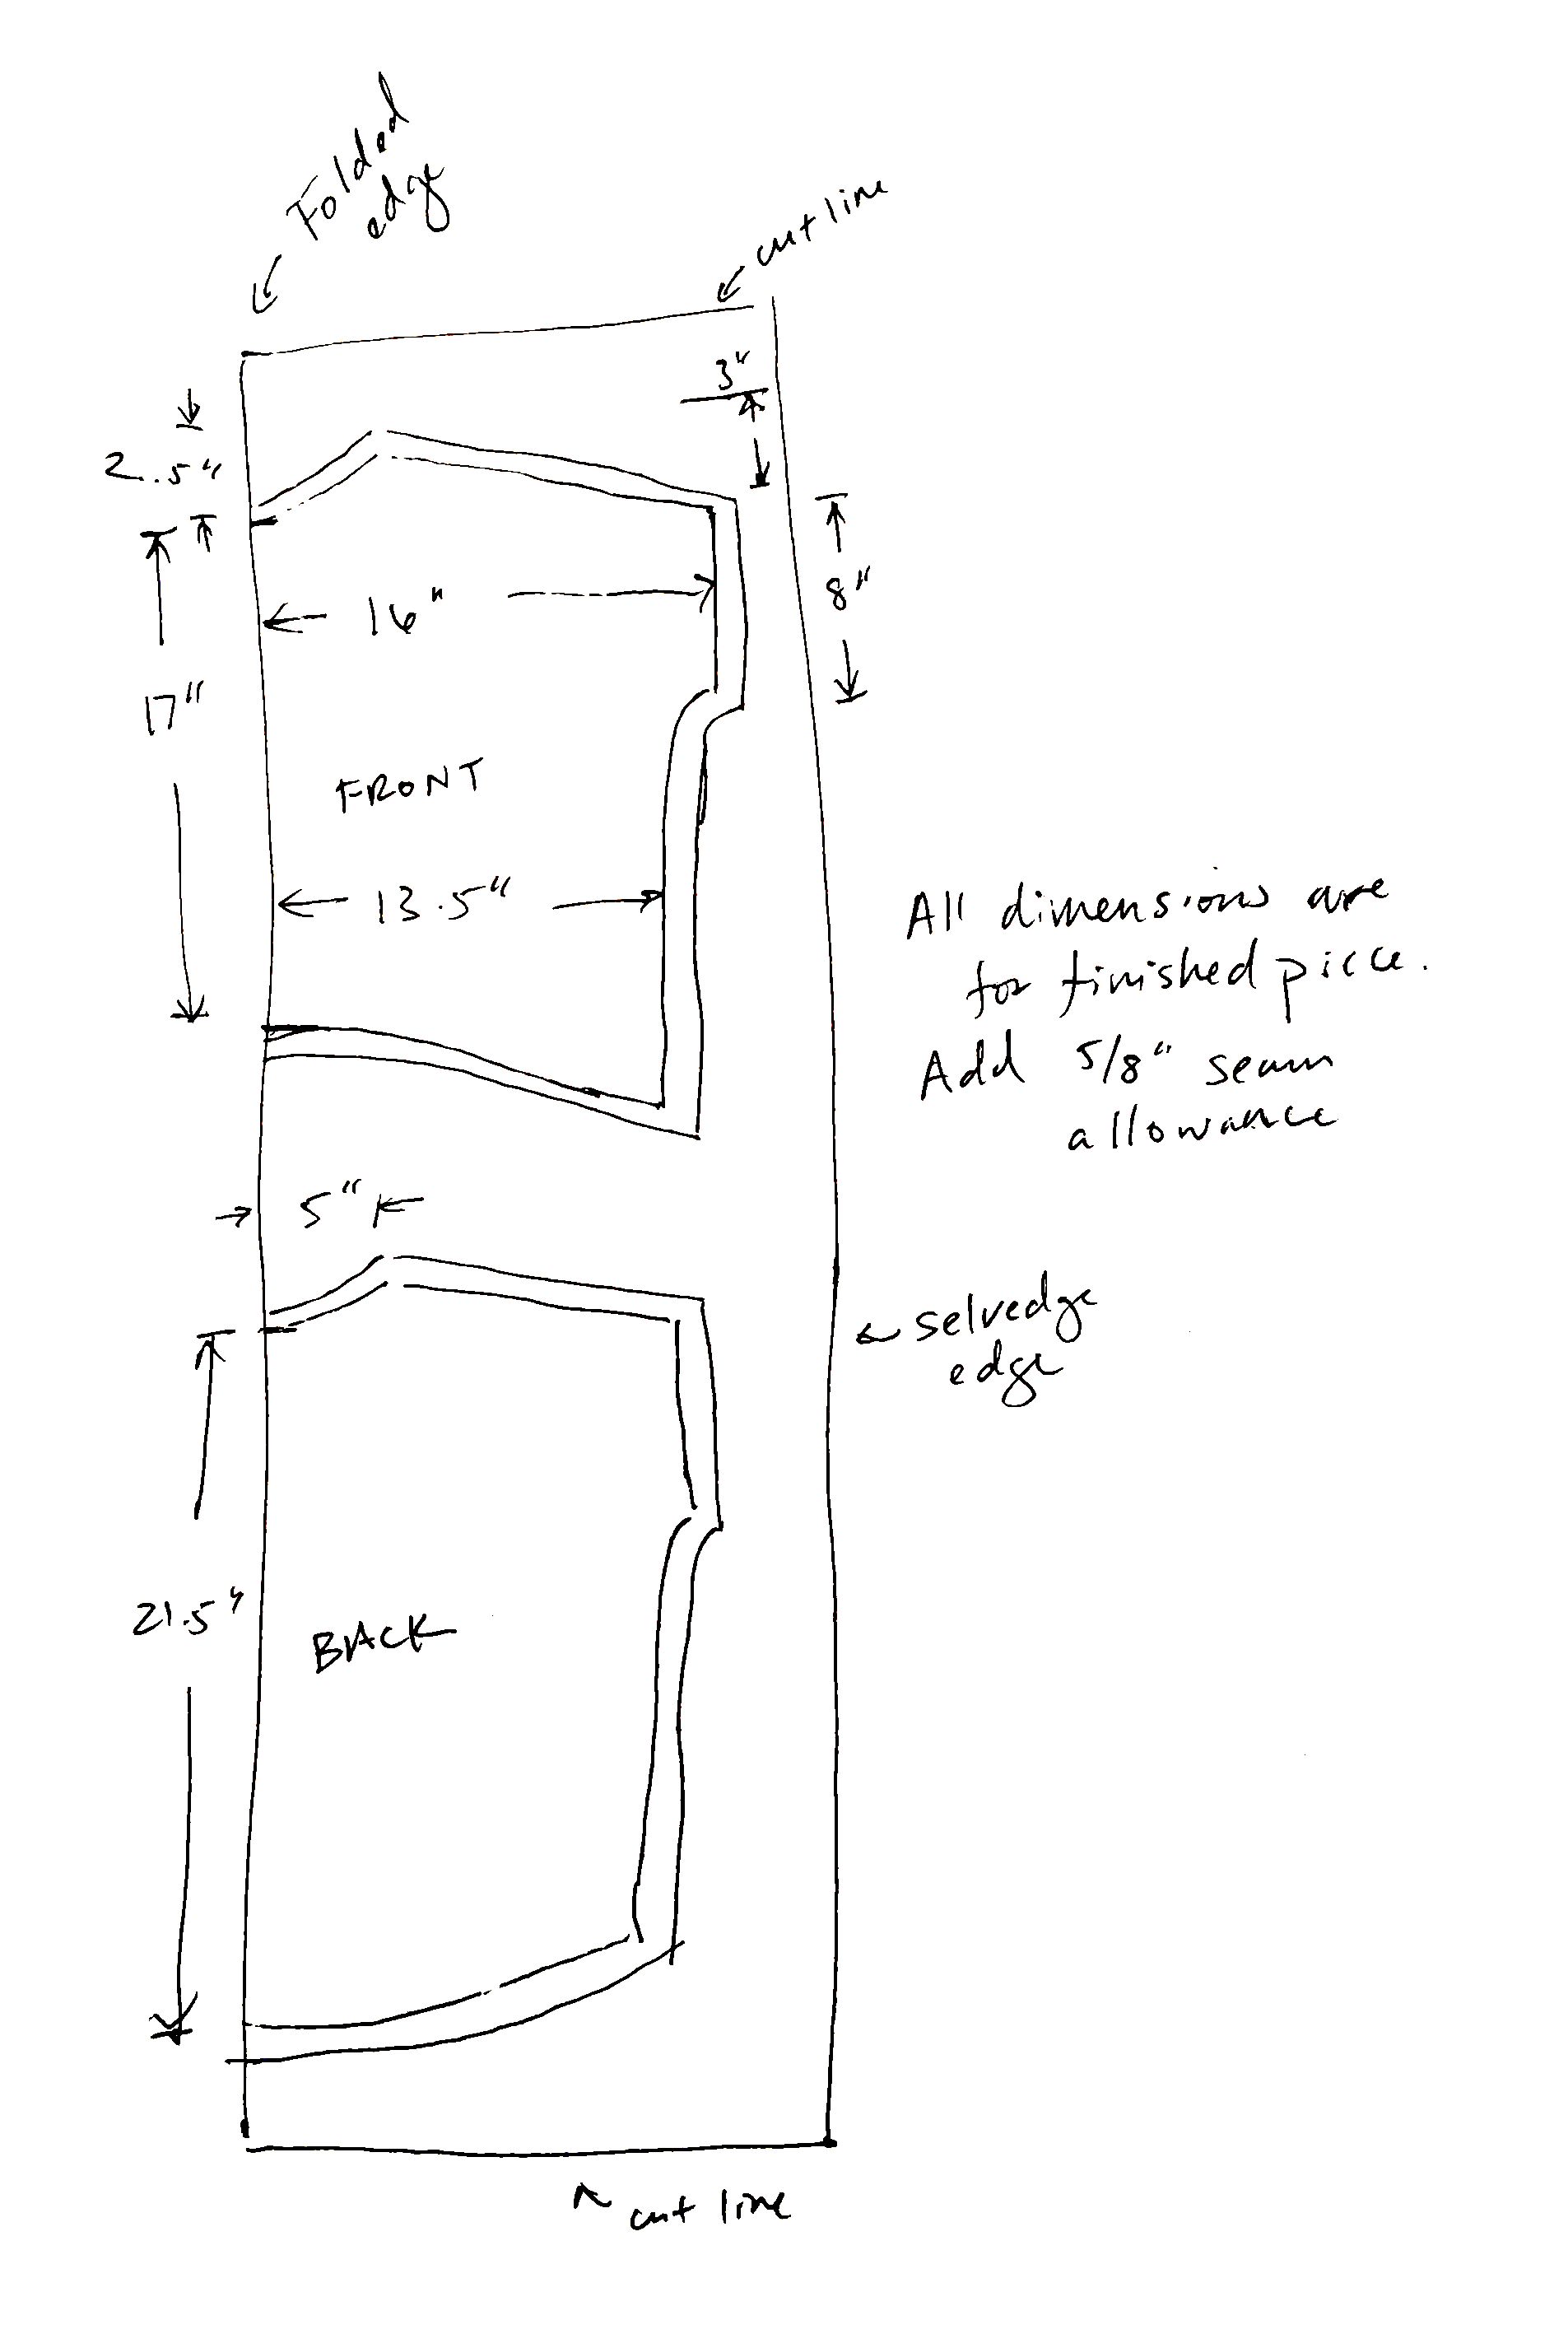
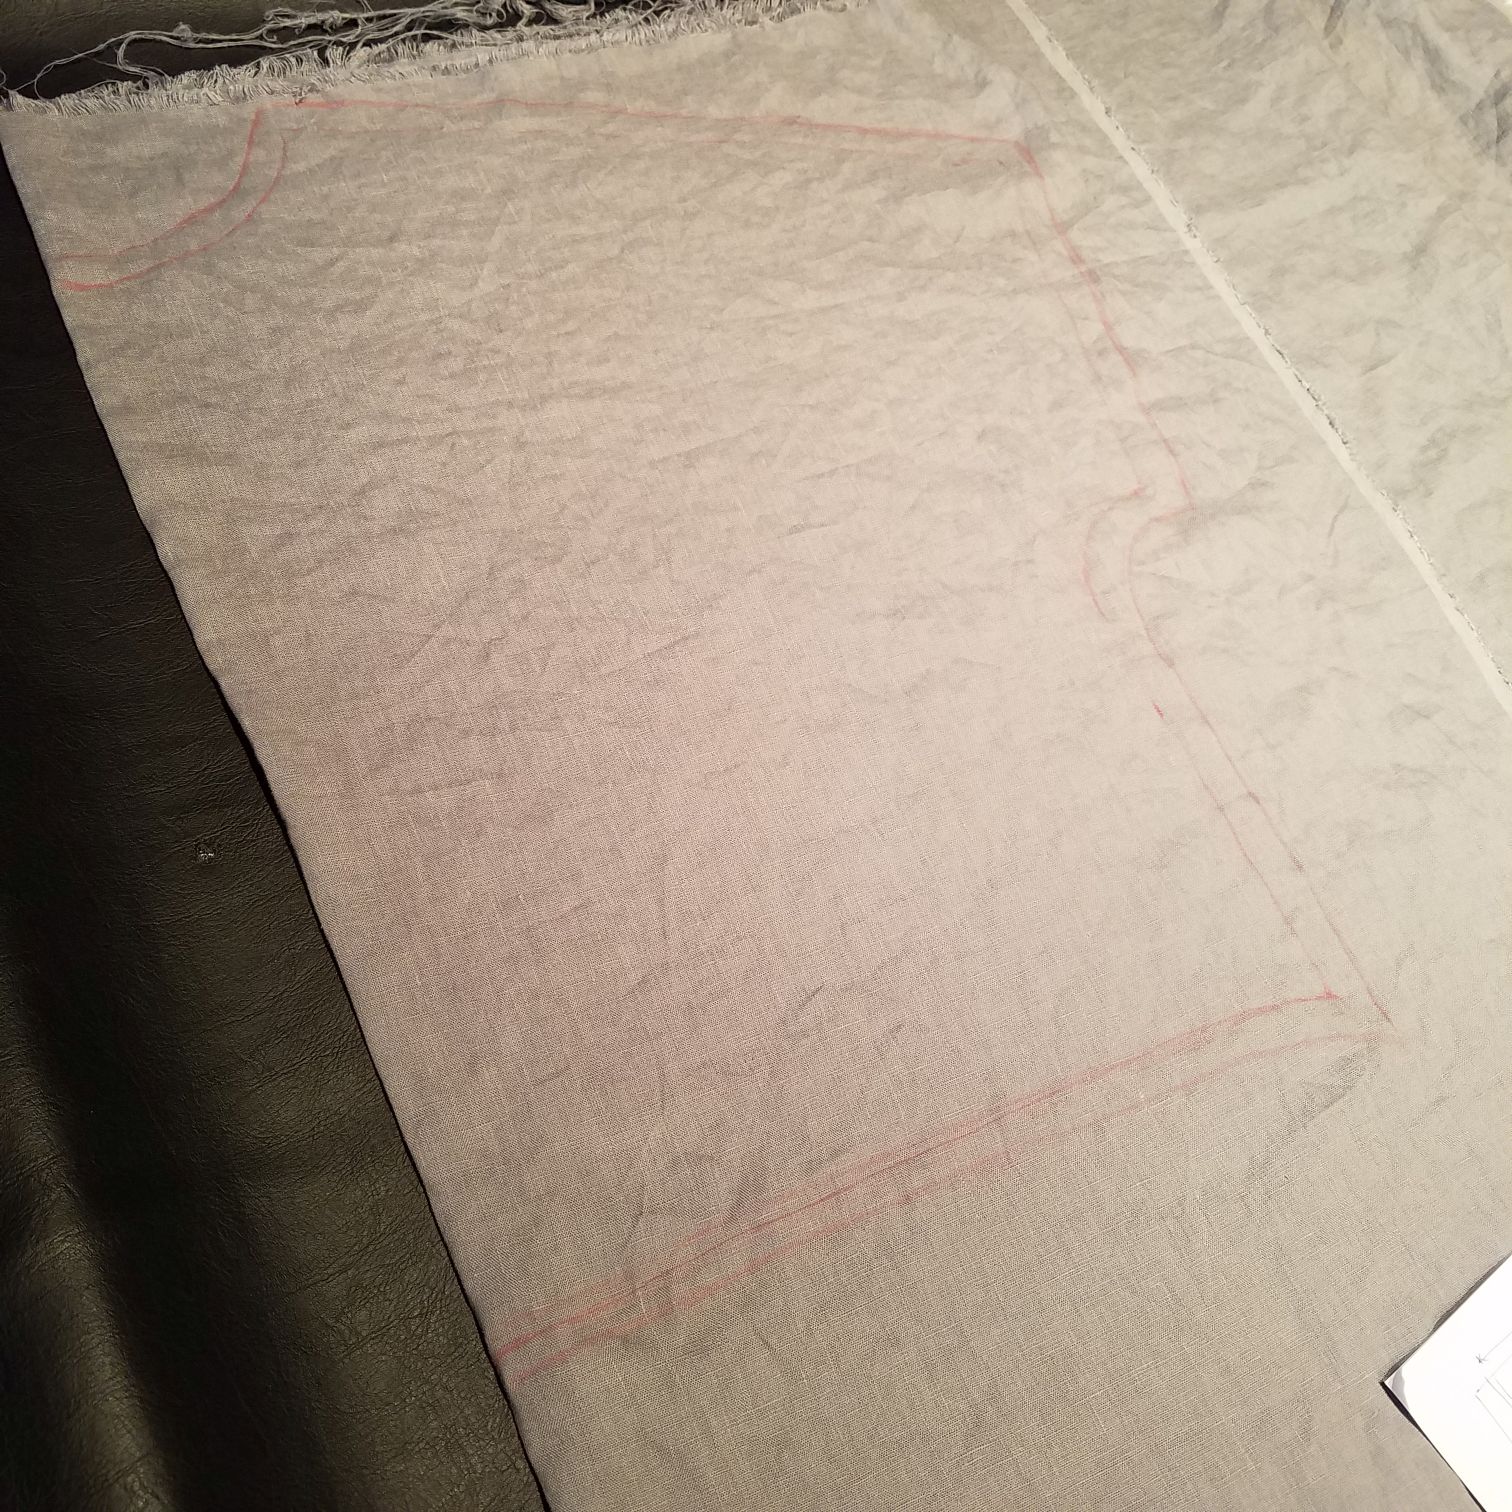
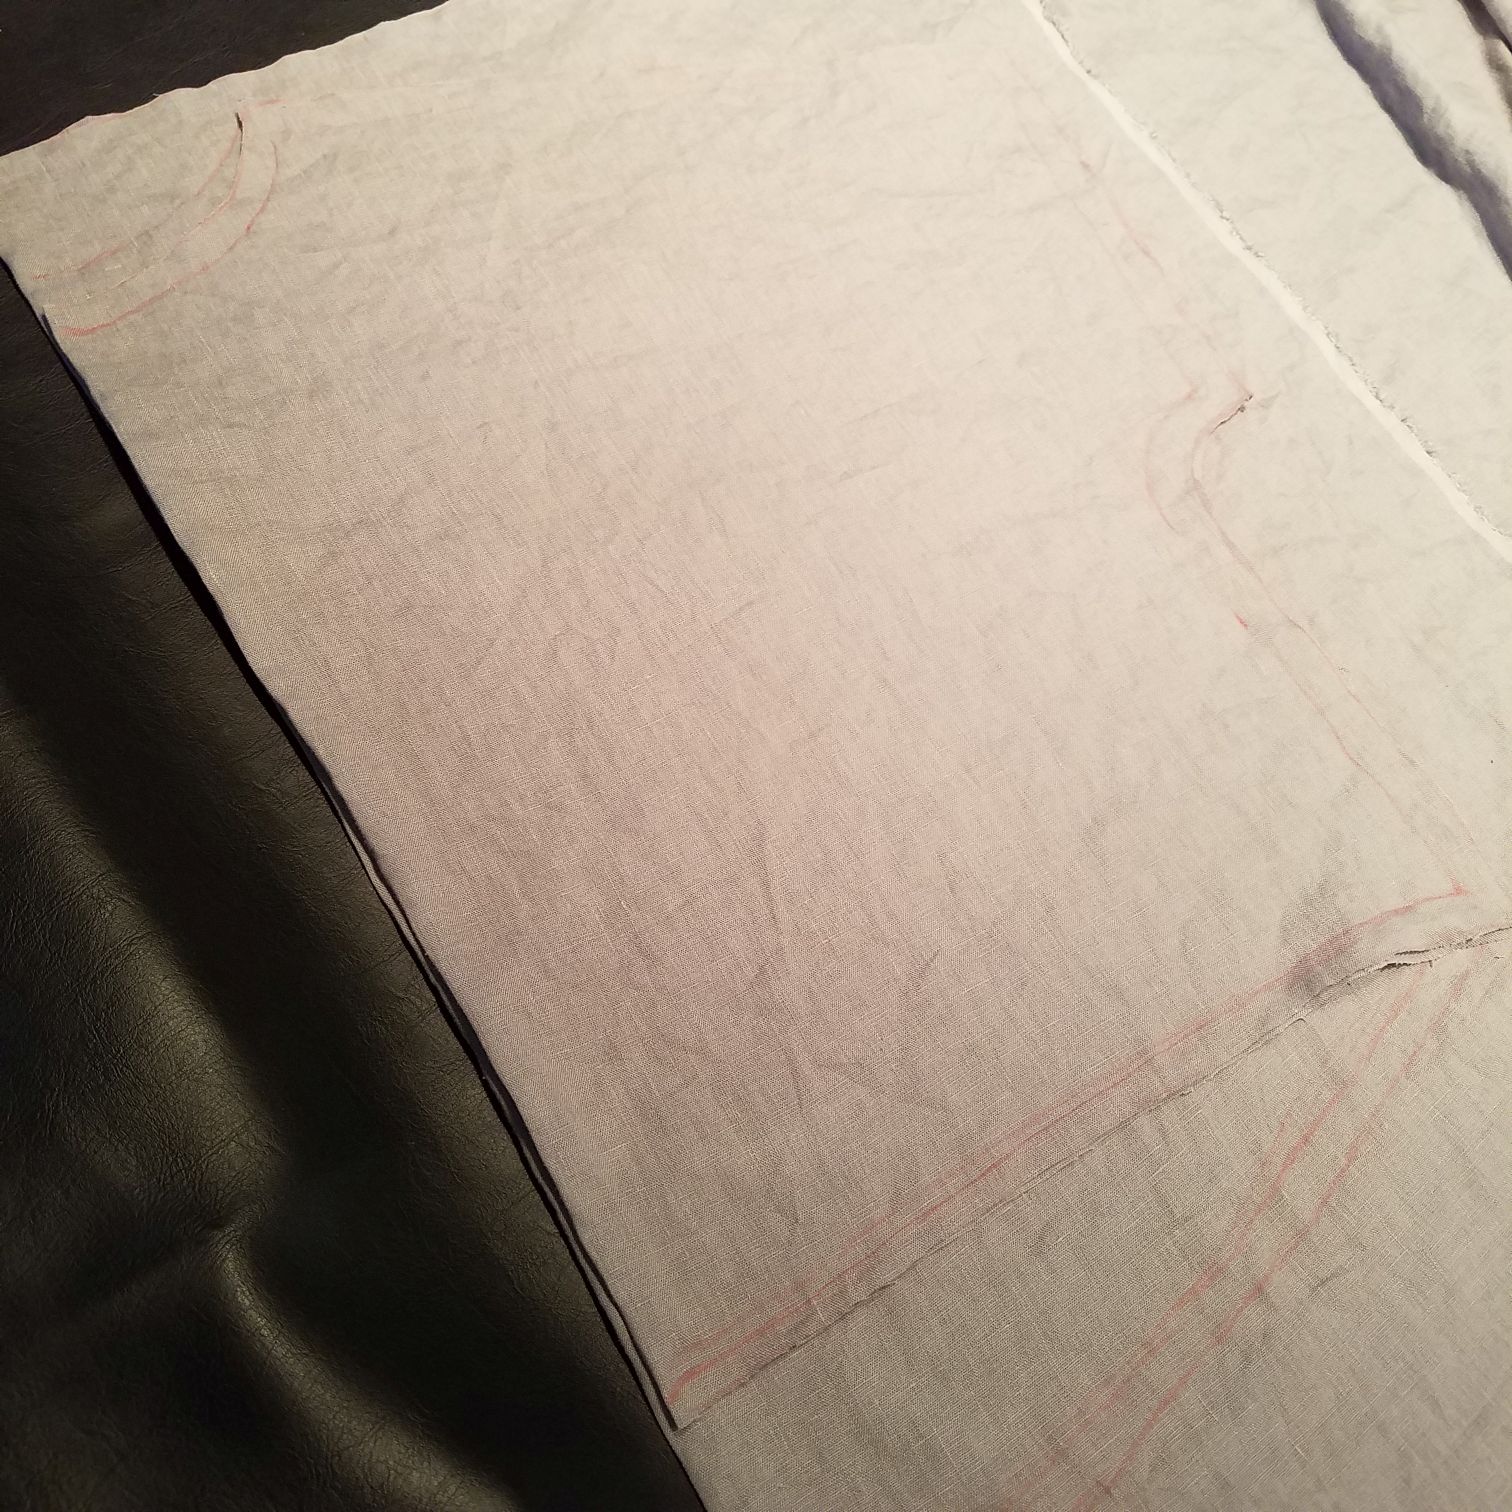
You’ll want to fold your fabric in half length-wise. Then sketch out the front of the shirt. I find using a colored pencil in a contrasting color works well. Sketch a line for the actual edge of the shirt, then sketch another line 5/8″ outside of that which will be your cut-line.
Wherever your line meets the fold, try to ensure it is perpendicular right at that point, or you’ll get a slight “v” when you unfold your piece.
Sketch it out, making adjustments until you like it, and it matches your desired measurements. Just do the front piece first. Then, take a deep breath, and cut 🙂
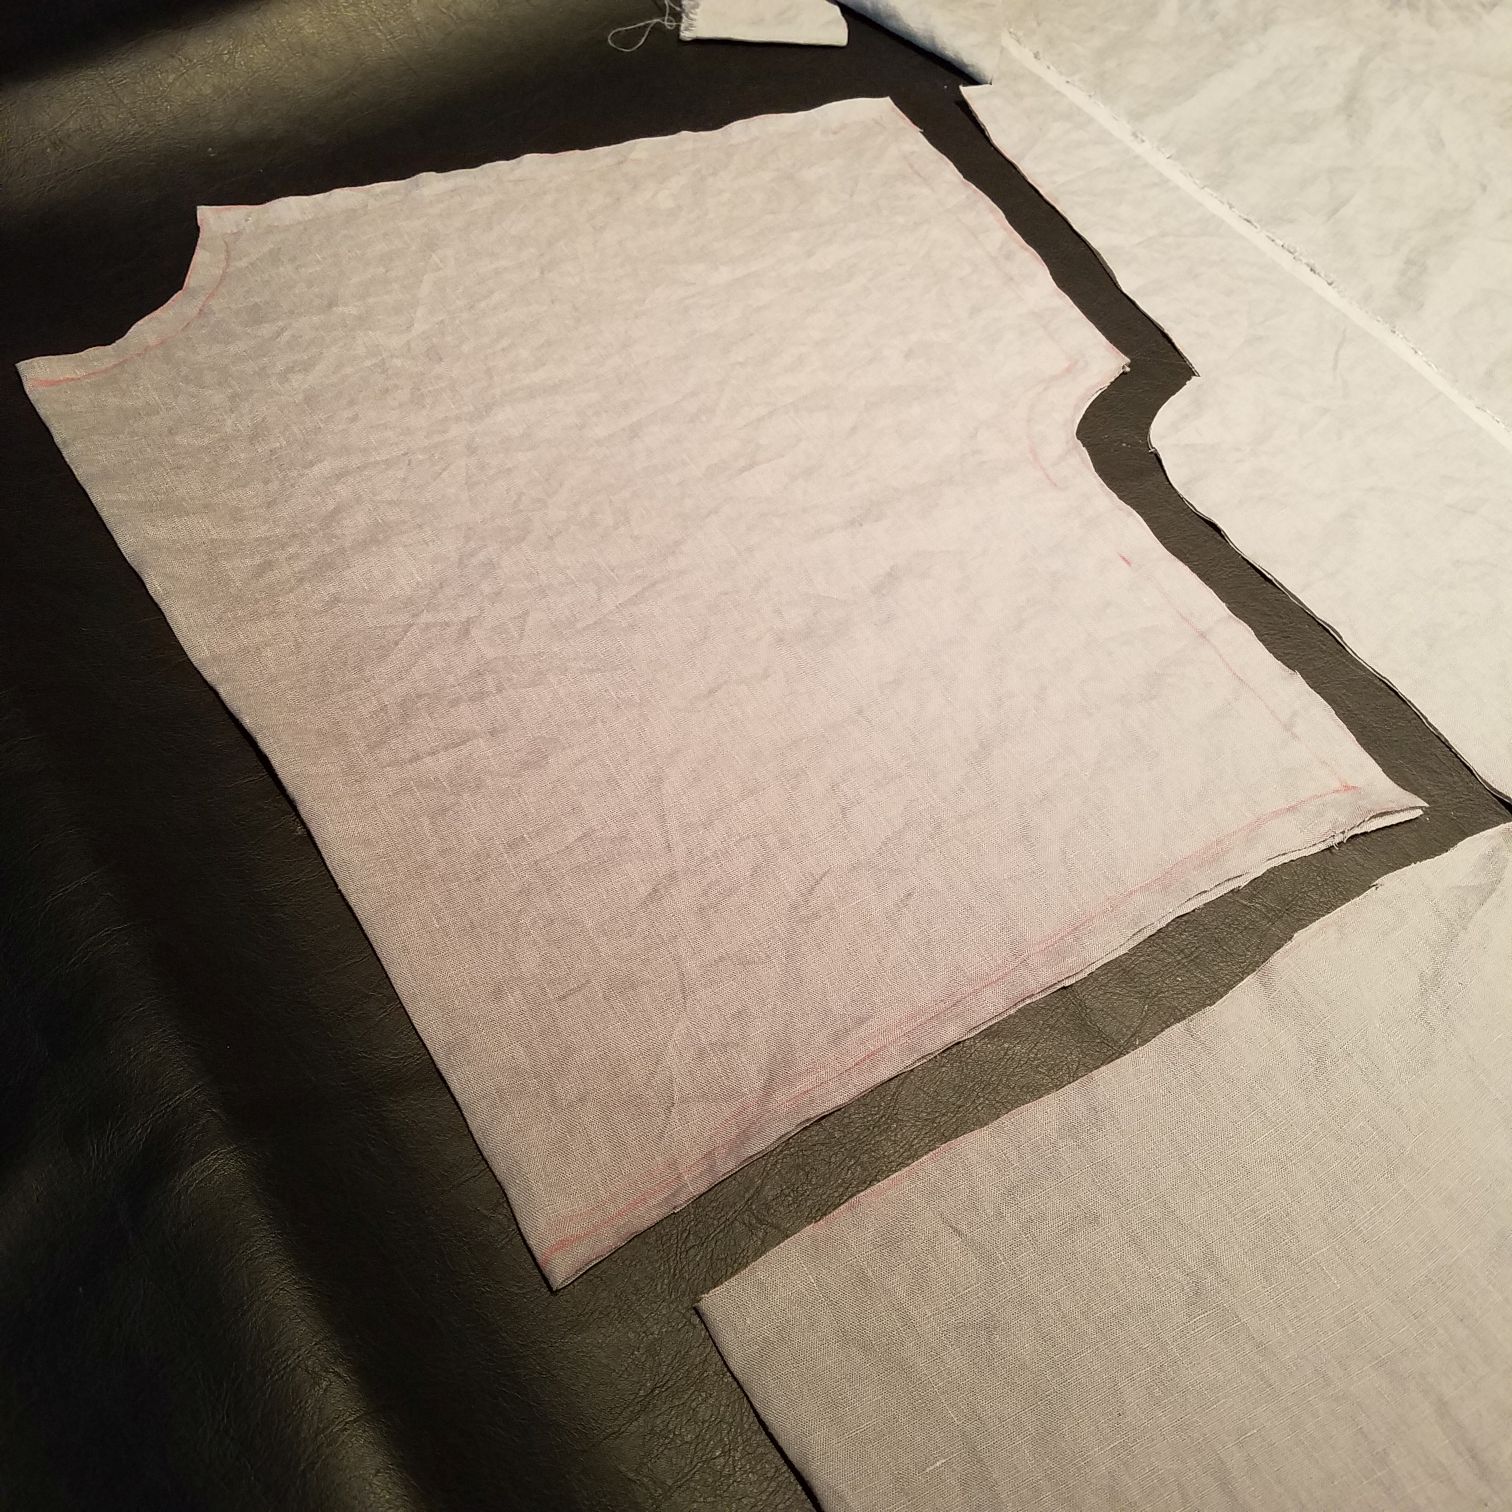
Now, take the piece you just cut out and using it as a guide, trace out a piece for the back. The shoulder, sleeve and side will the the same as your front. The neckline will probably be a bit different (usually, I have about a 1″ difference between how far the neckline dips in the front vs. in the back.) And the hemline will be different since this top has a high-low hem. In this case, the back hem is about 5″ longer than the front.
I usually go back and also draw the line sewing line 5/8″ inside the line I just traced around the piece, for consistency’s sake. Again, take a deep breath, and cut 🙂
Step 4: Sew the shoulder and side seams
Ok — if you’ve never used a sewing machine before, either read the manual or get a friend to help you figure out how to thread it, fill the bobbin, and sew both a straight and zig-zag stitch. You can practice on the scraps of linen you have from step 3. Once you’ve got that figured out, we can move on to sewing our first few seams.
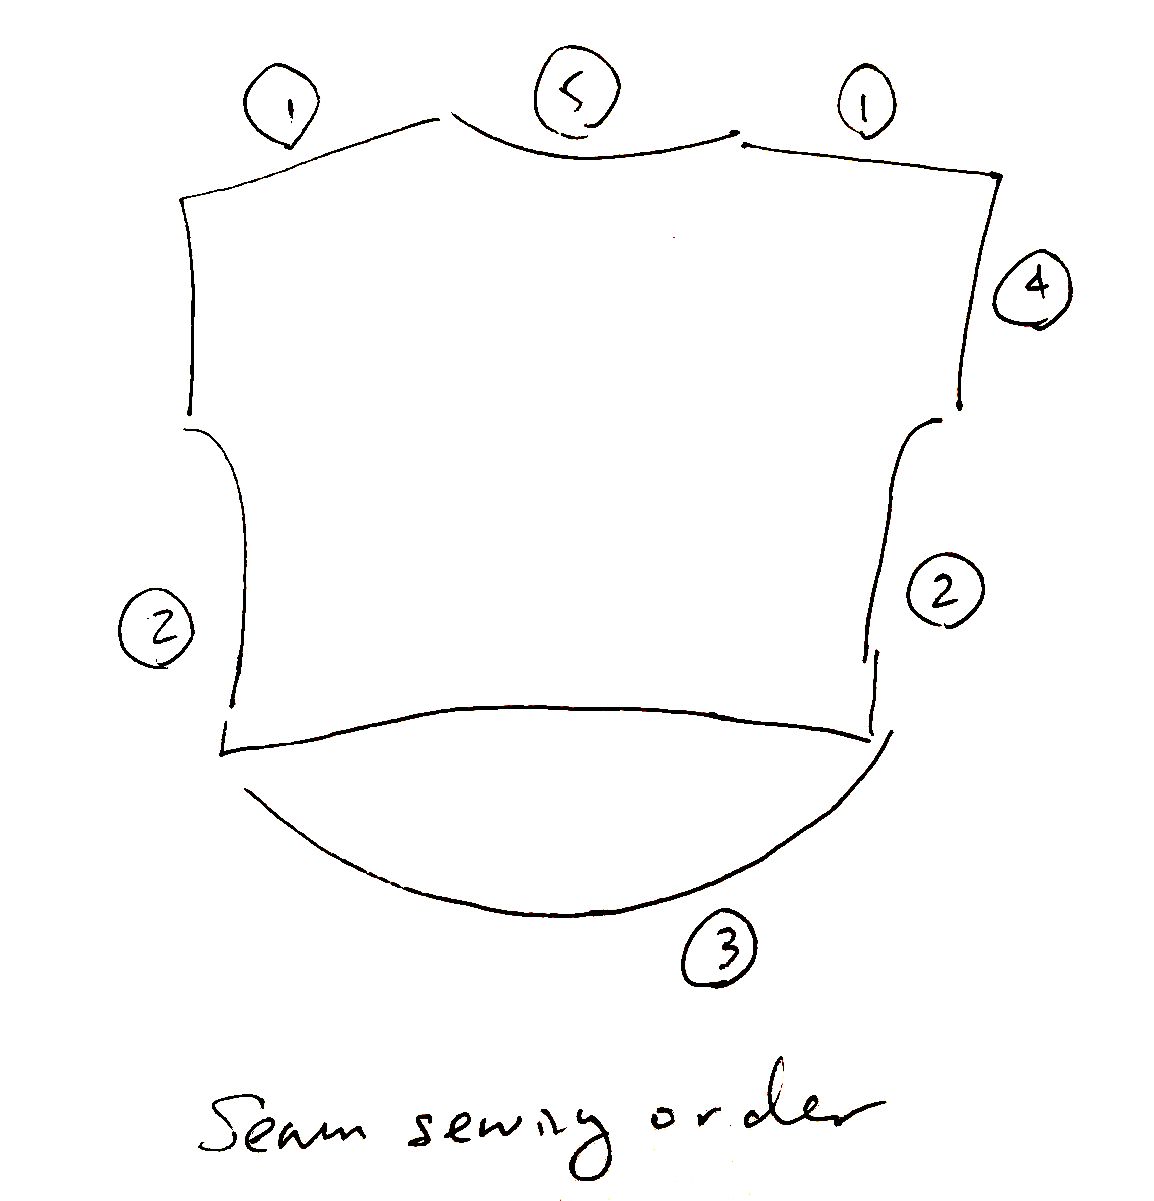
We’re going to sew the seams in this order:
- Shoulder seams
- Side seams
- Bottom hem
- Sleeve hems
- Neckline
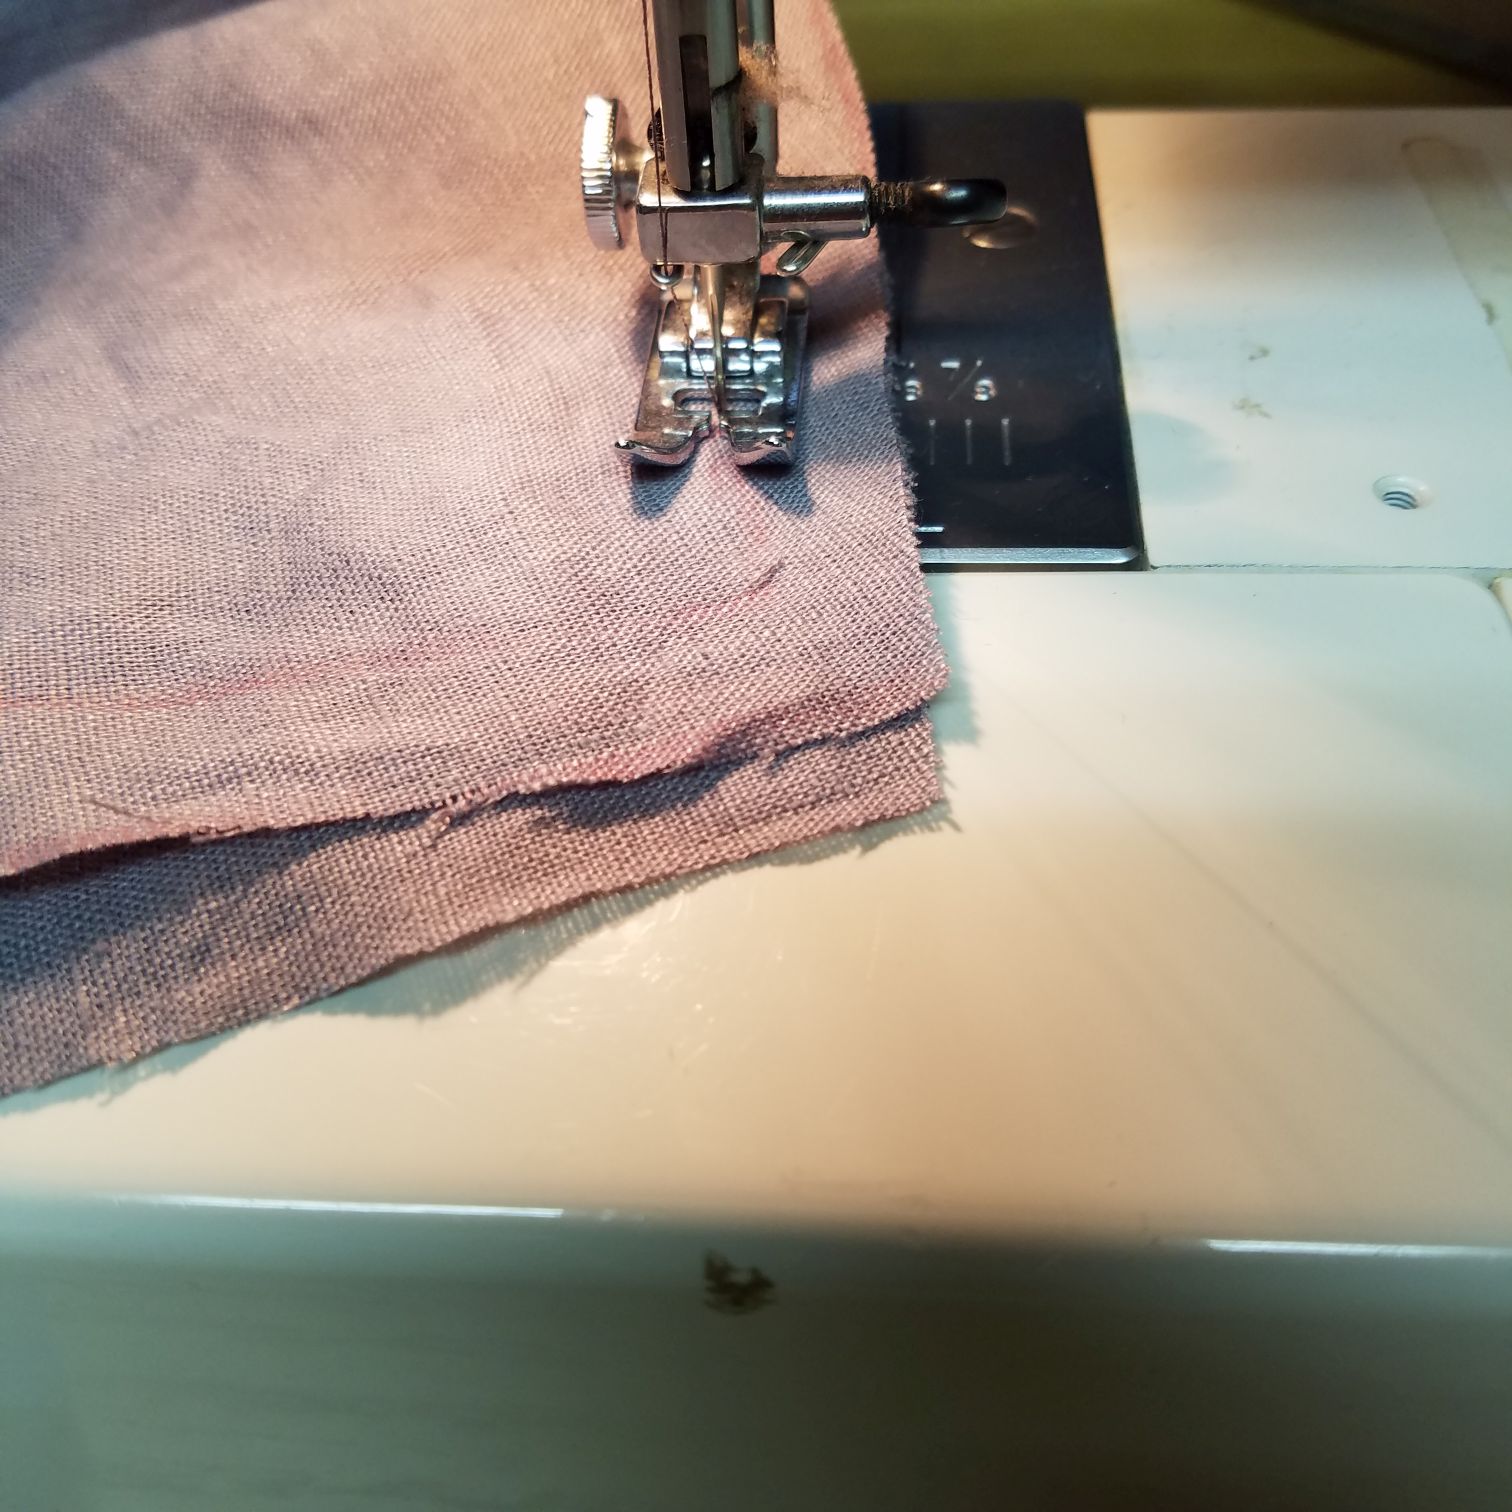
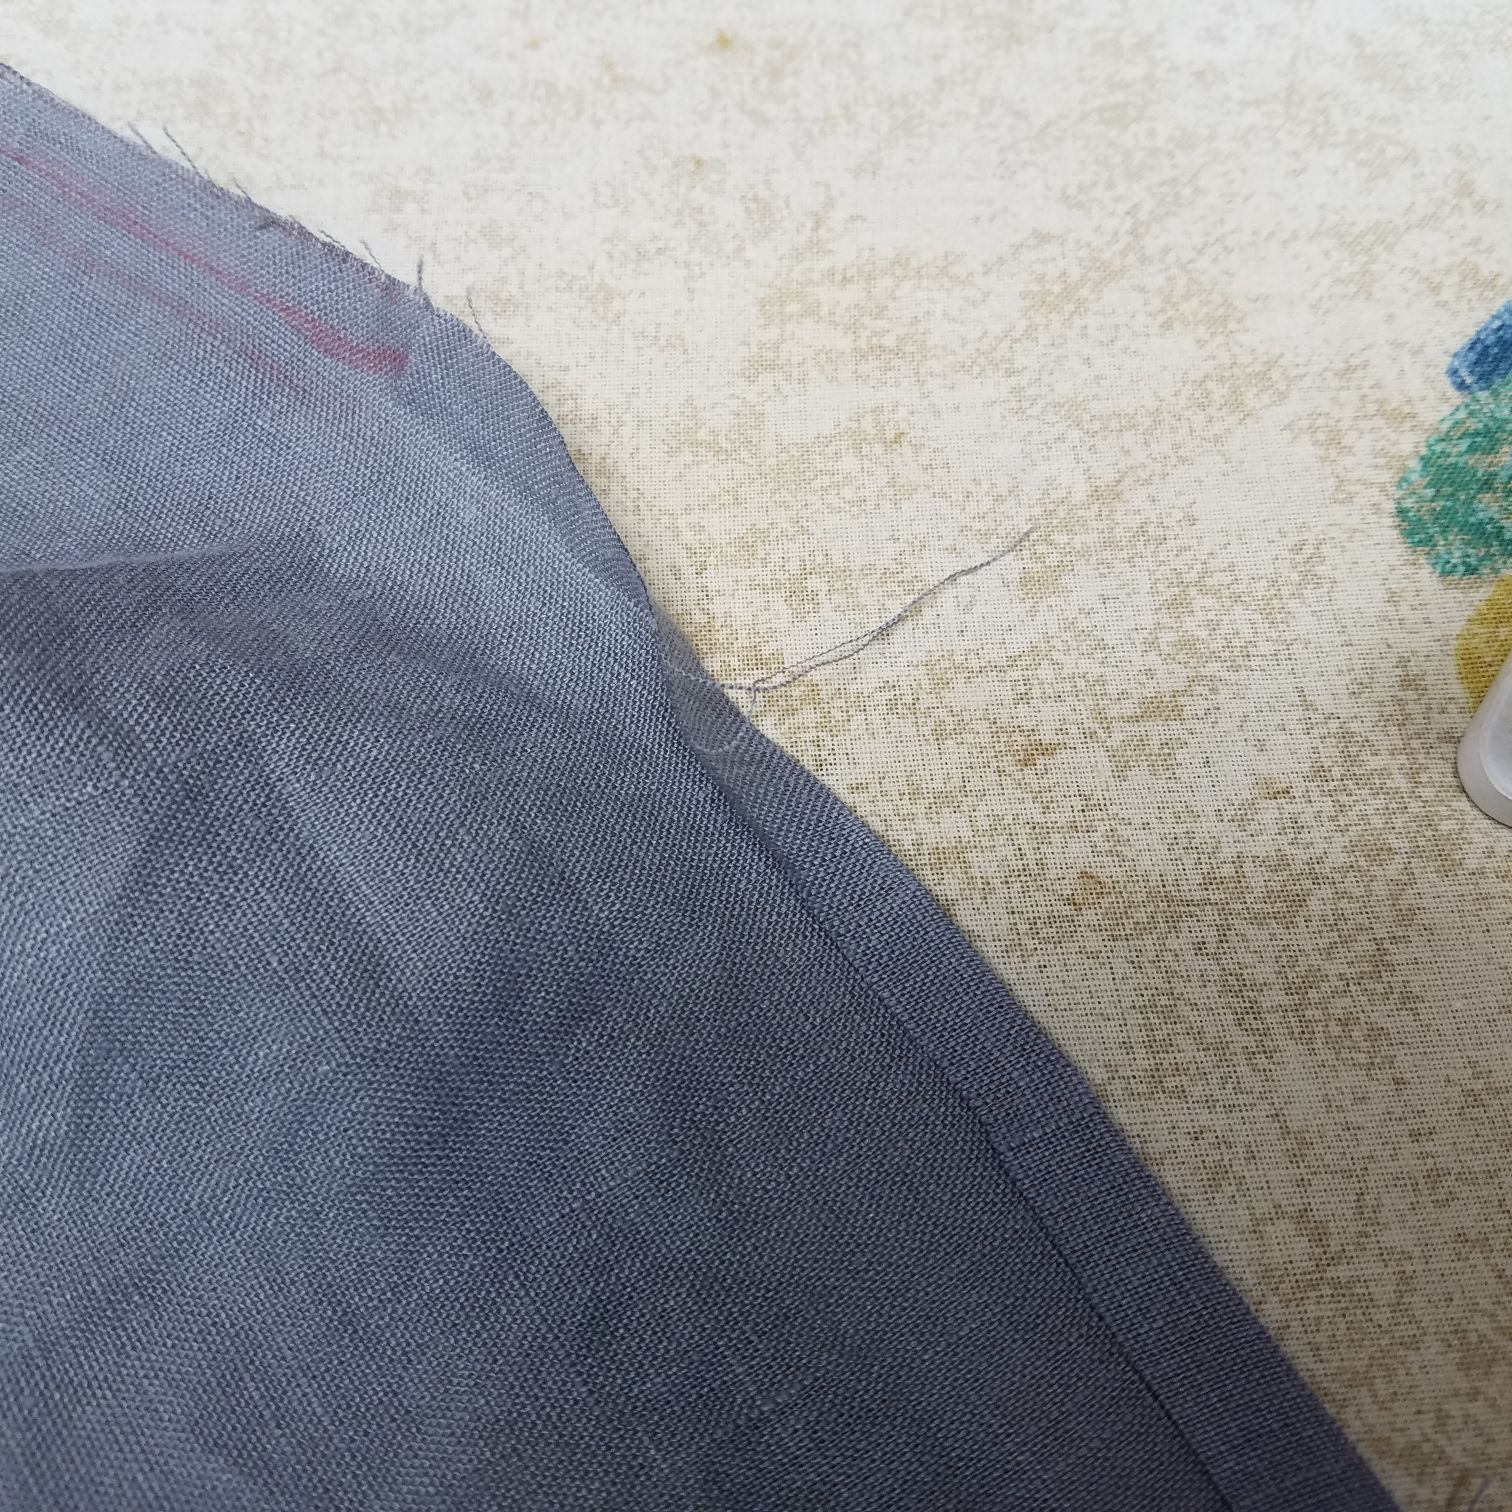
So let’s start with the shoulder seams. Put the right sides together (your lines from drawing out the shape of the pieces should be facing outwards.) You might want to pin the seams, just so the fabric doesn’t slip out of place while you’re sewing. I didn’t do that in these pics because linen usually has enough friction to stay in place.
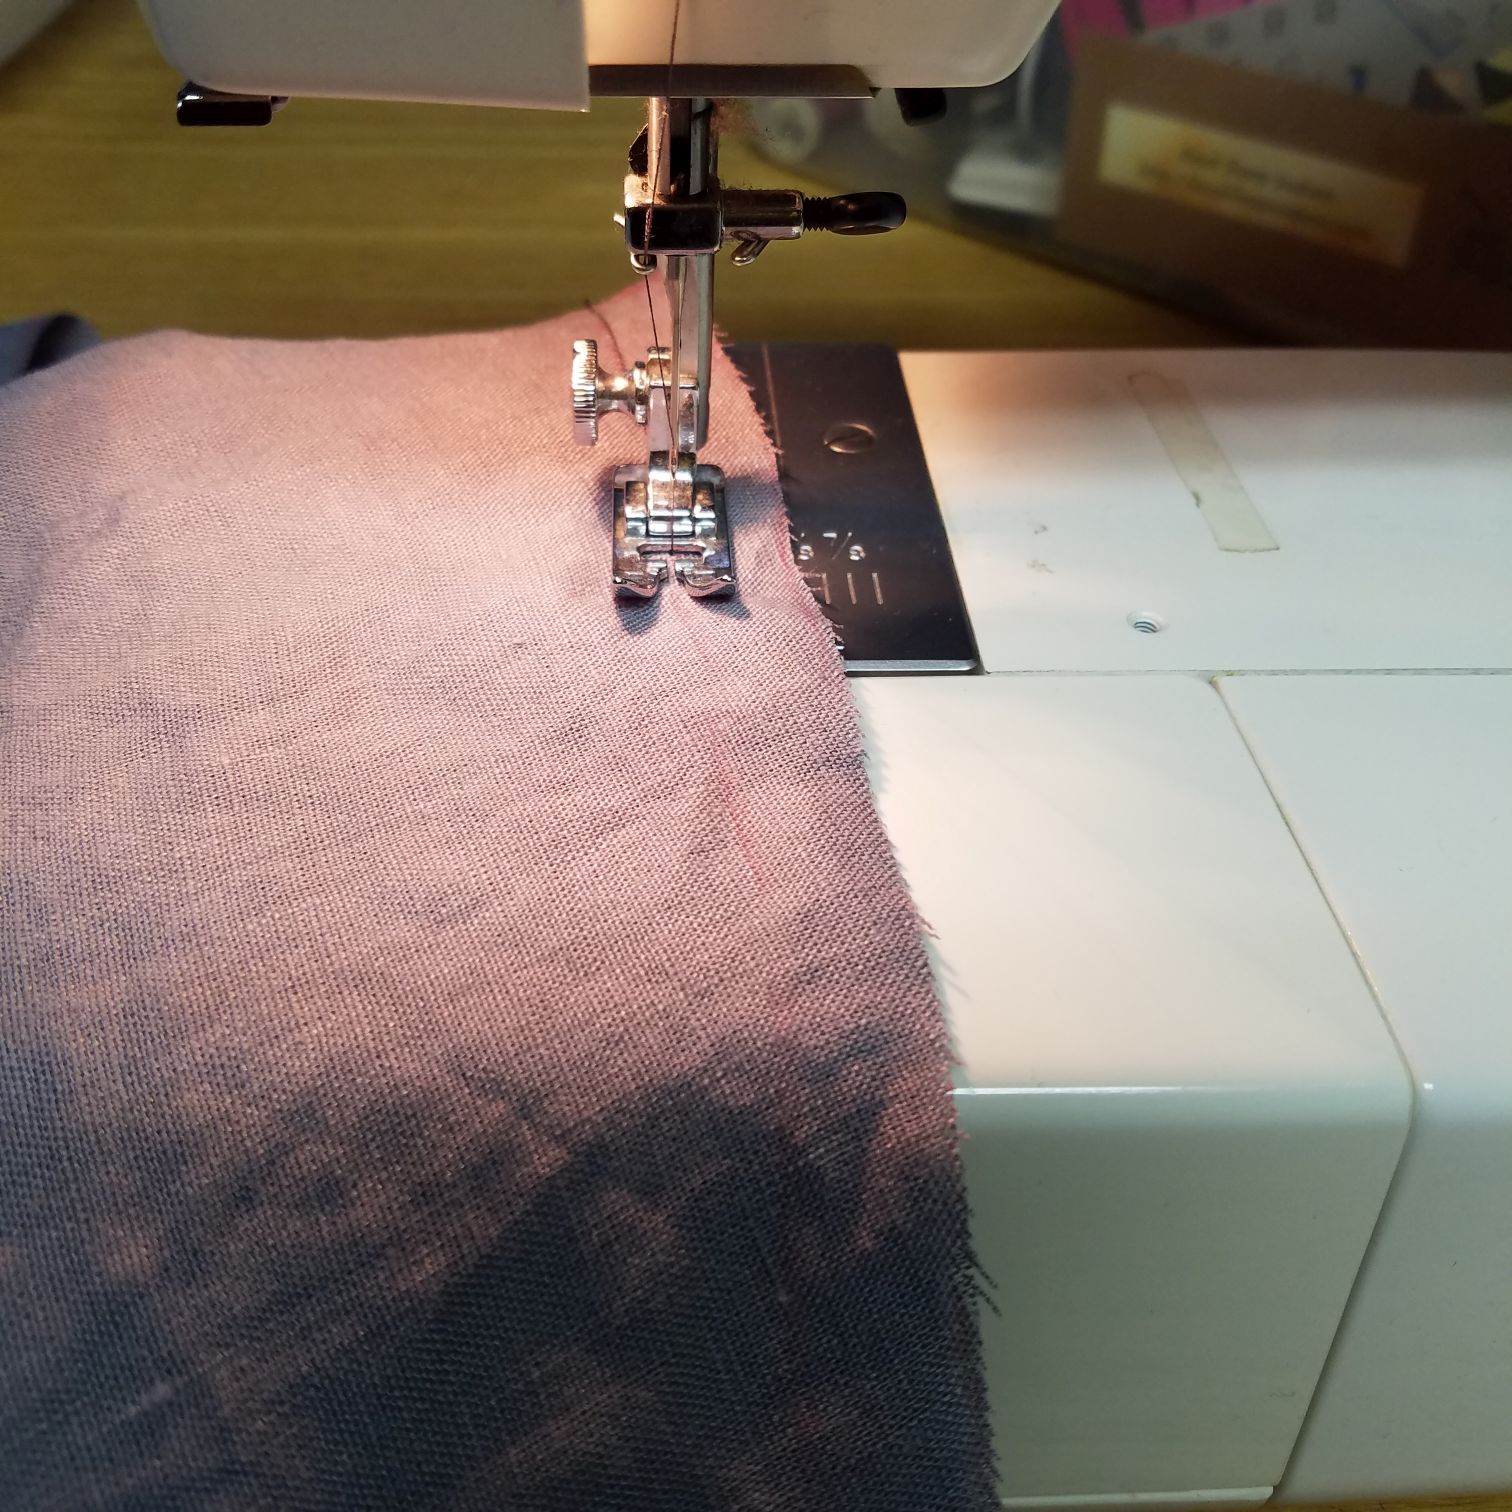
You may find that edges don’t line up 100% when you get to the end (hey, we’re only human!) Don’t sweat it, just trim the edges even after you’re done sewing (yes, this is fly-by-the-seat-of-your-pants sewing. That’s why it’s so fun!)
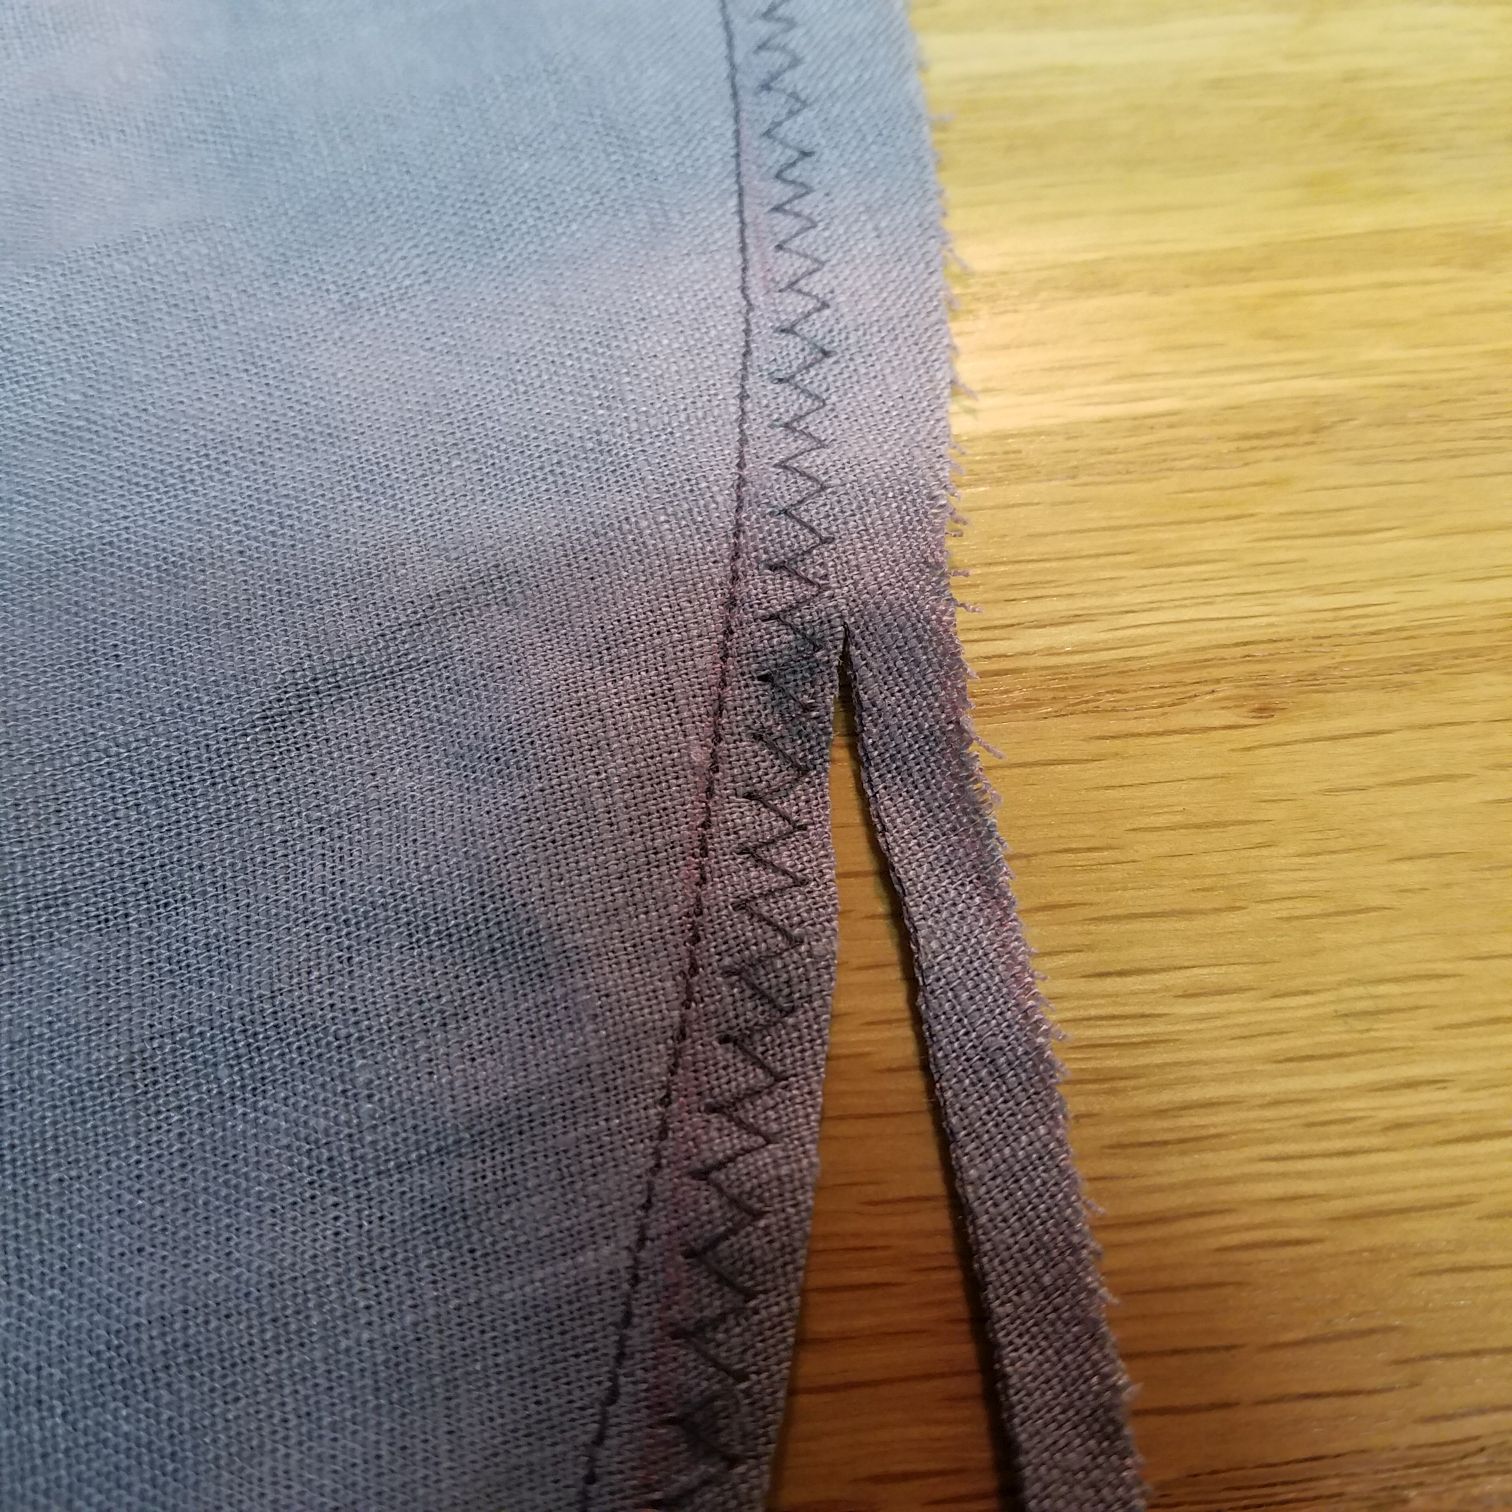
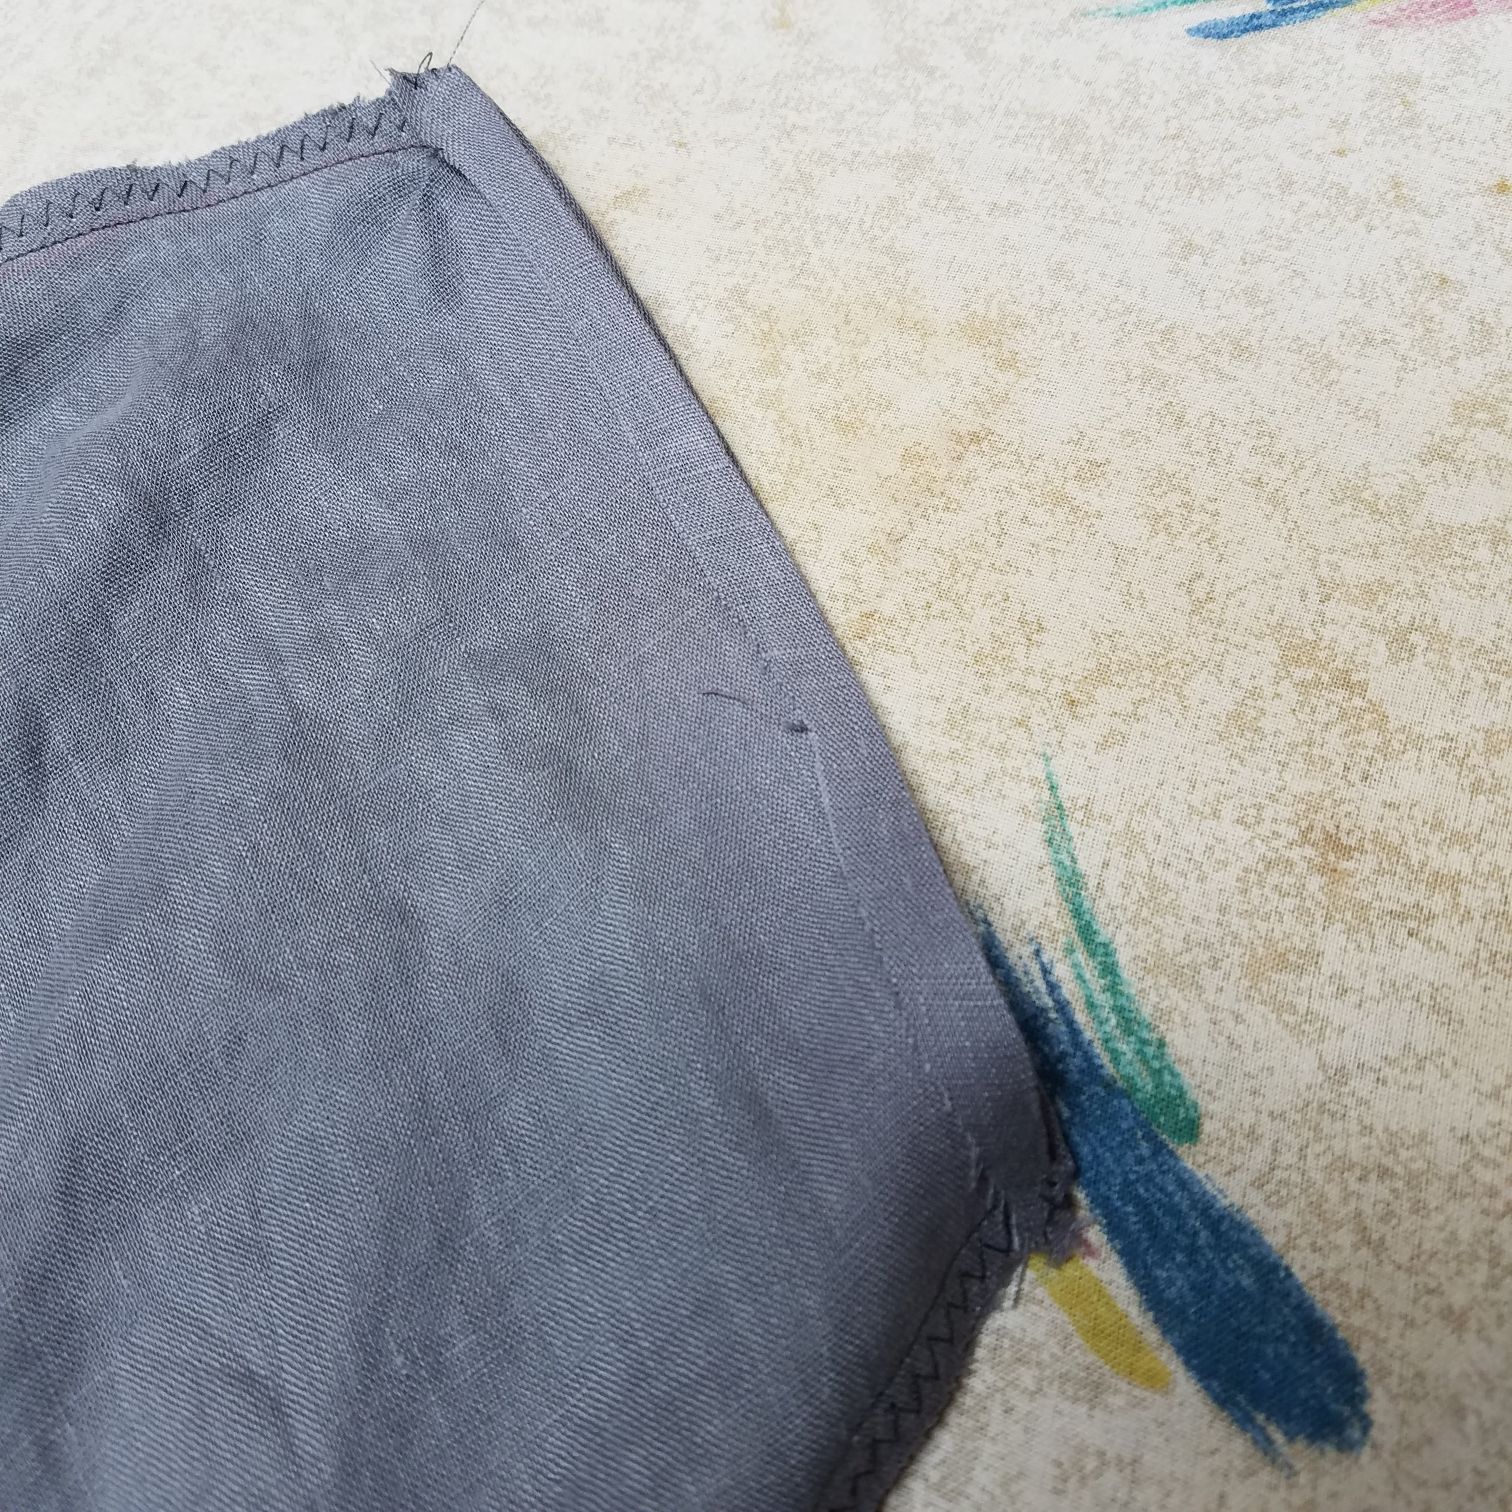
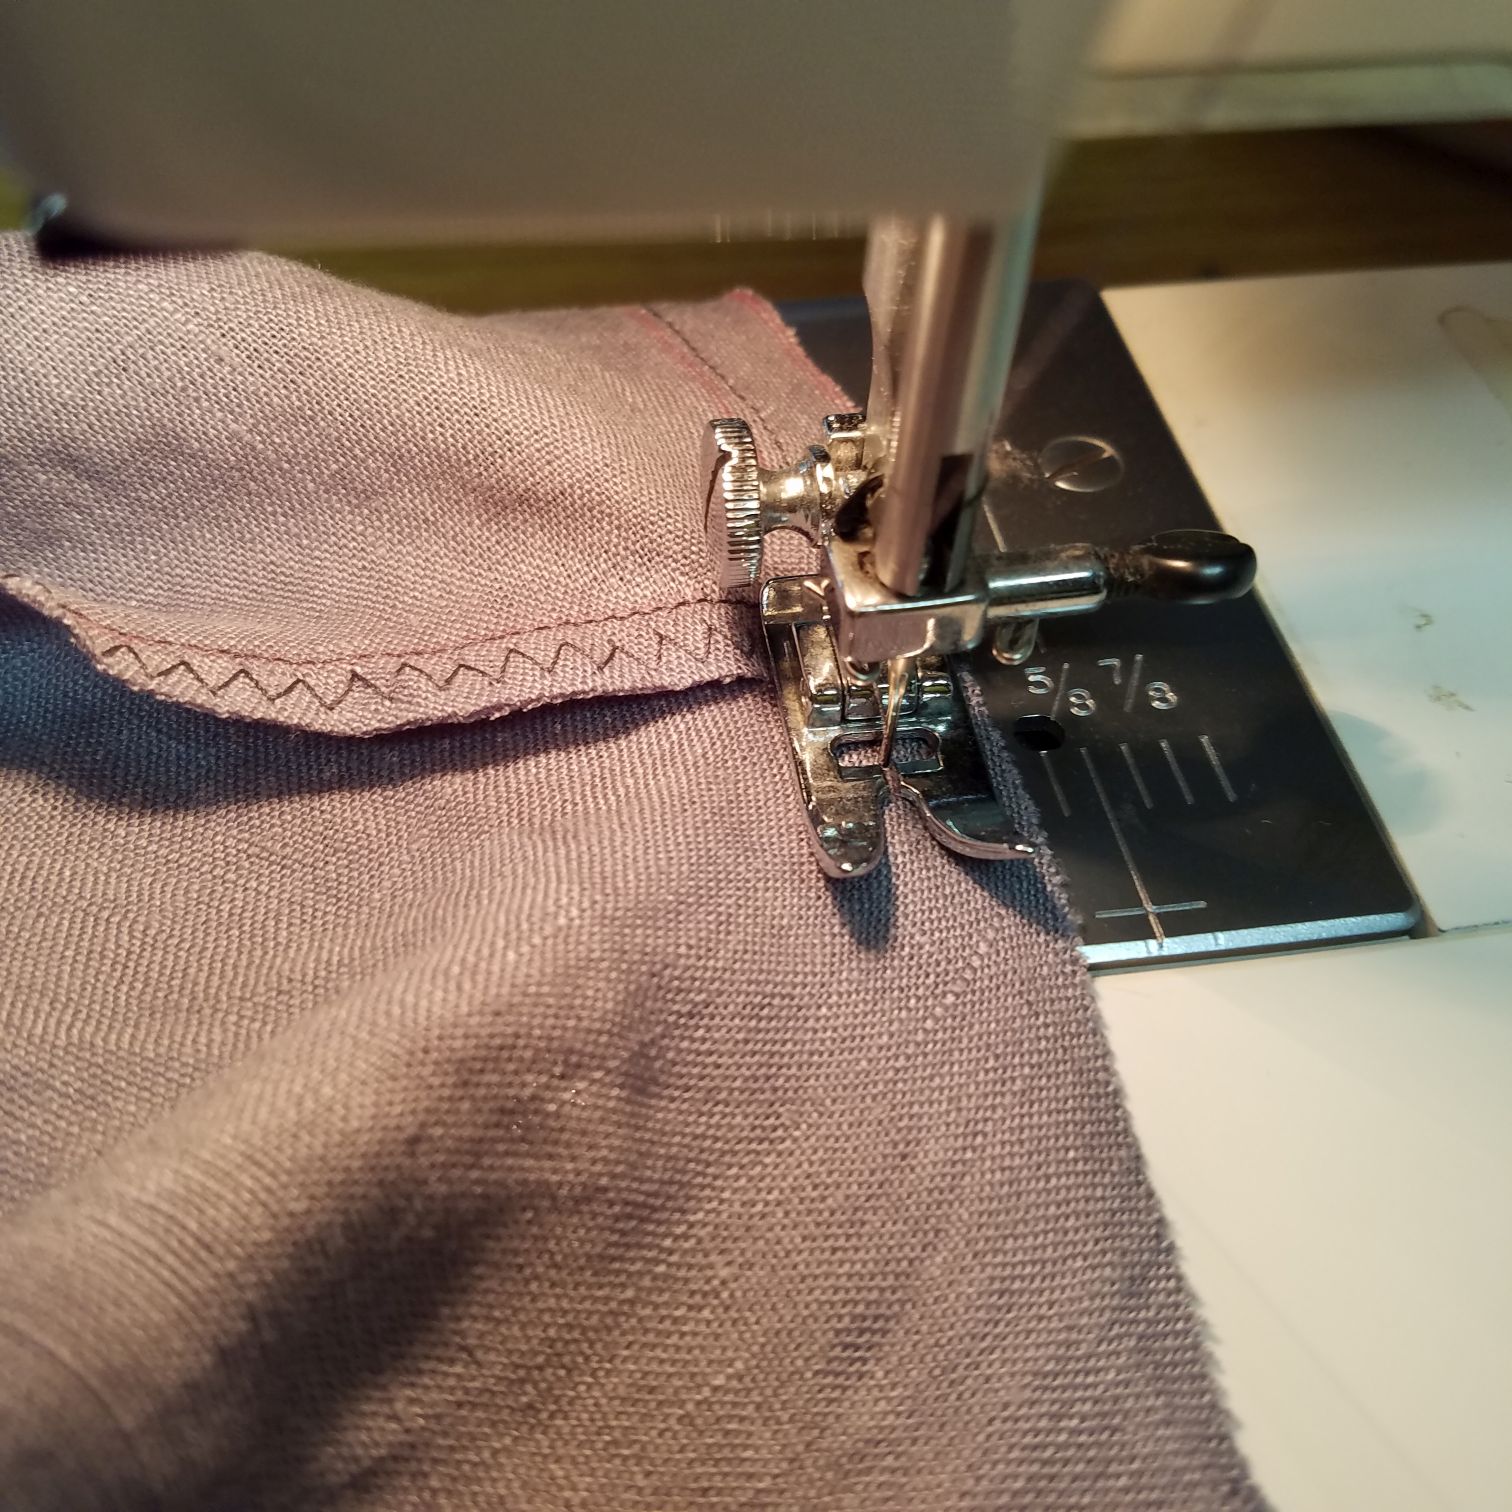
After sewing the shoulder and side seams, go back and zig-zag stitch in the seam allowance. That will keep the linen from fraying too much. If you have a serger, you can, of course, skip this step. Here’s how my seams look after the zig-zag stitch:
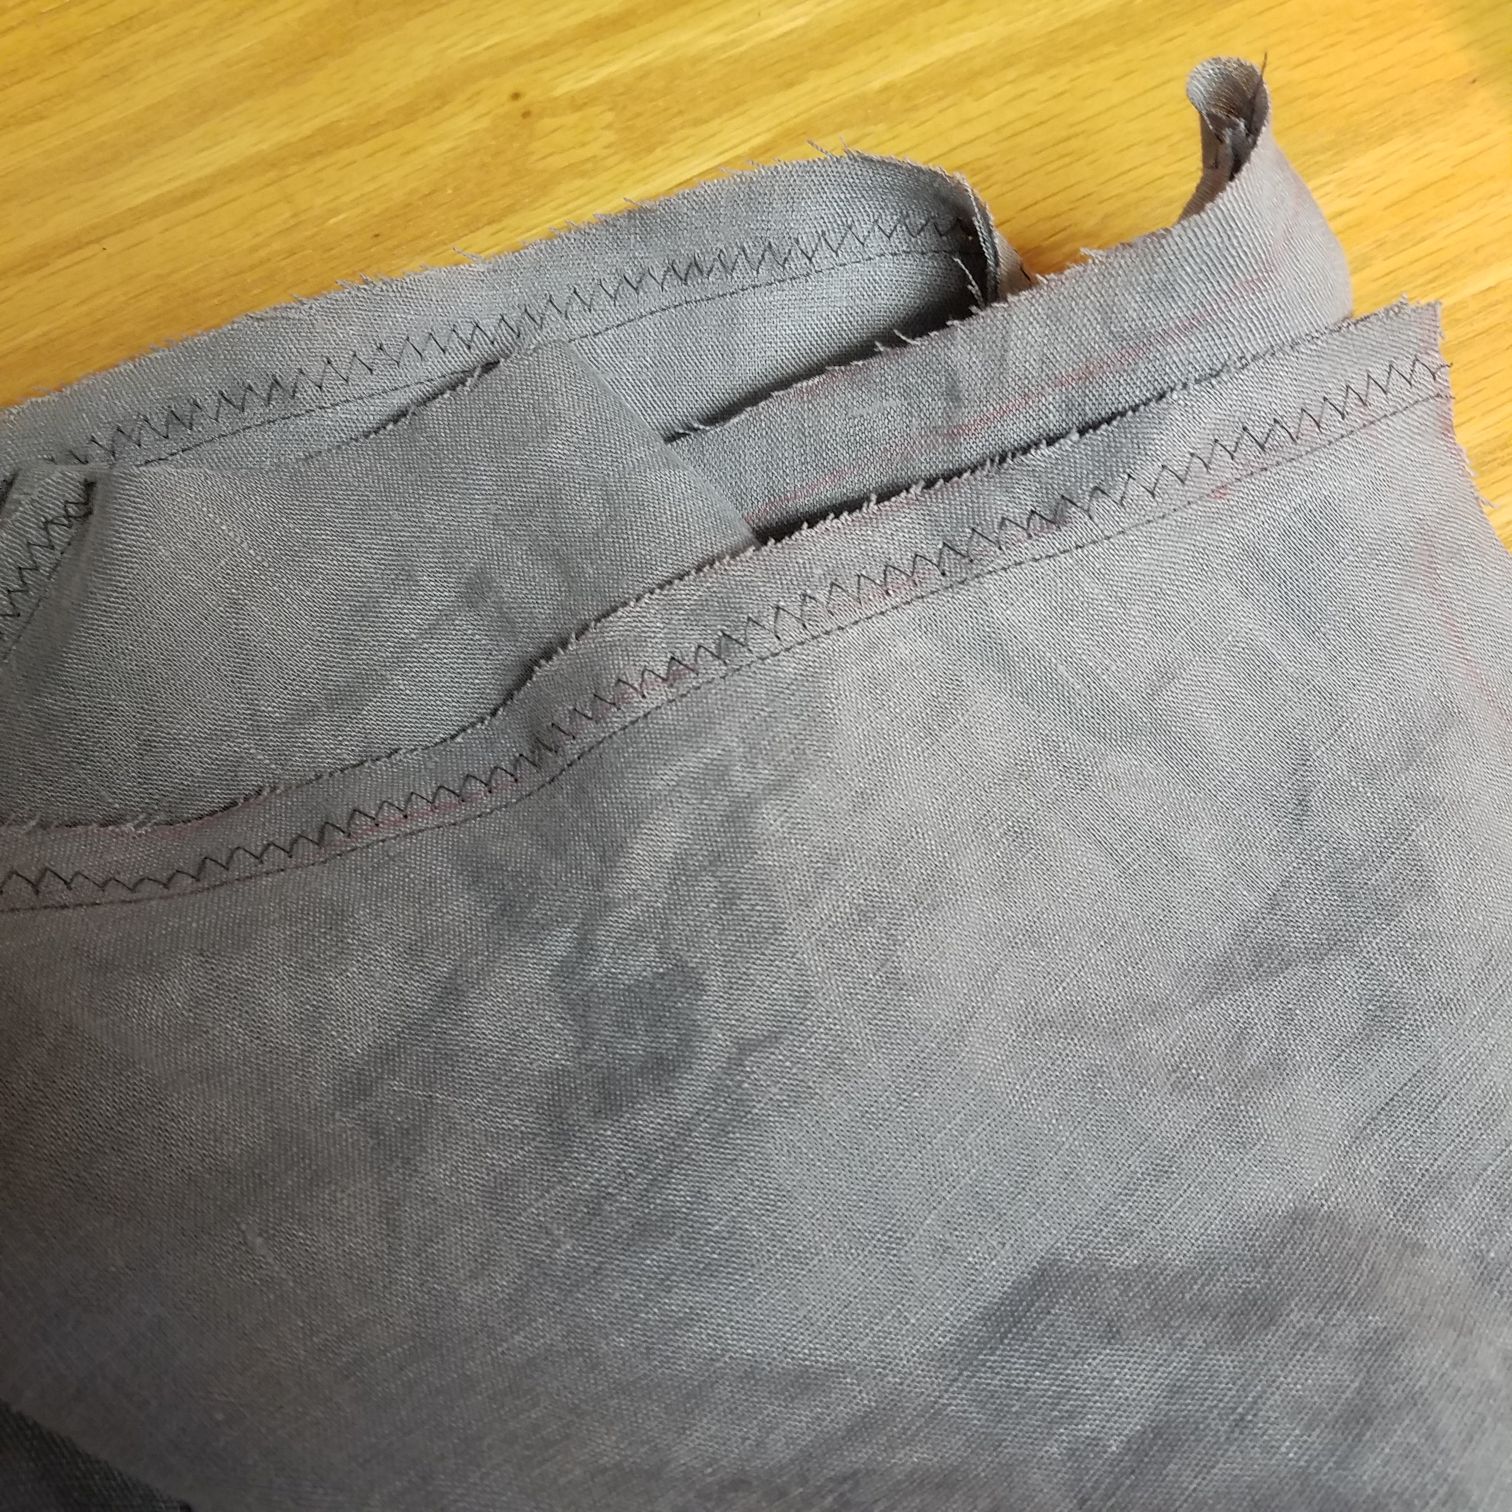
Then go back and trim some of the excess from those seams.
Step 5: Press and sew the bottom and sleeve hems
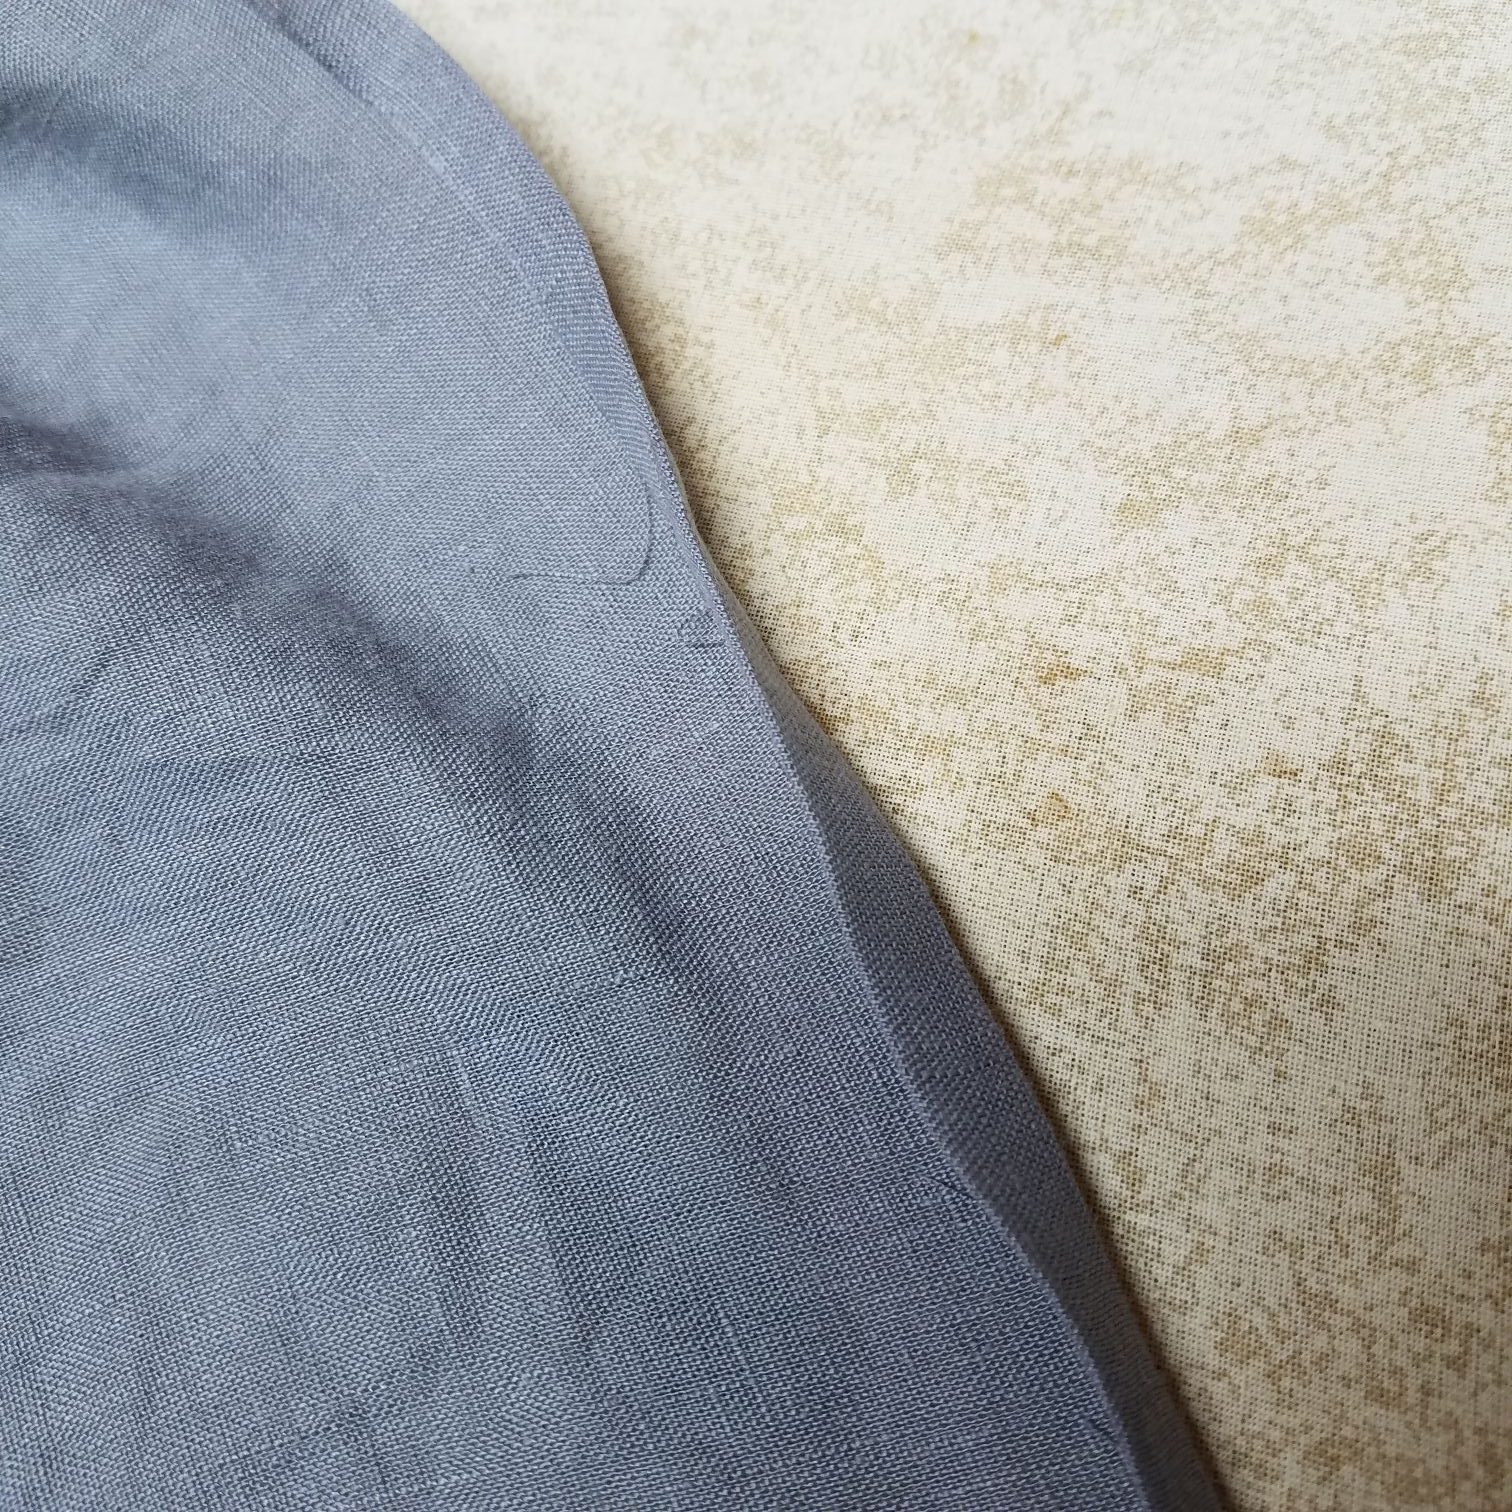
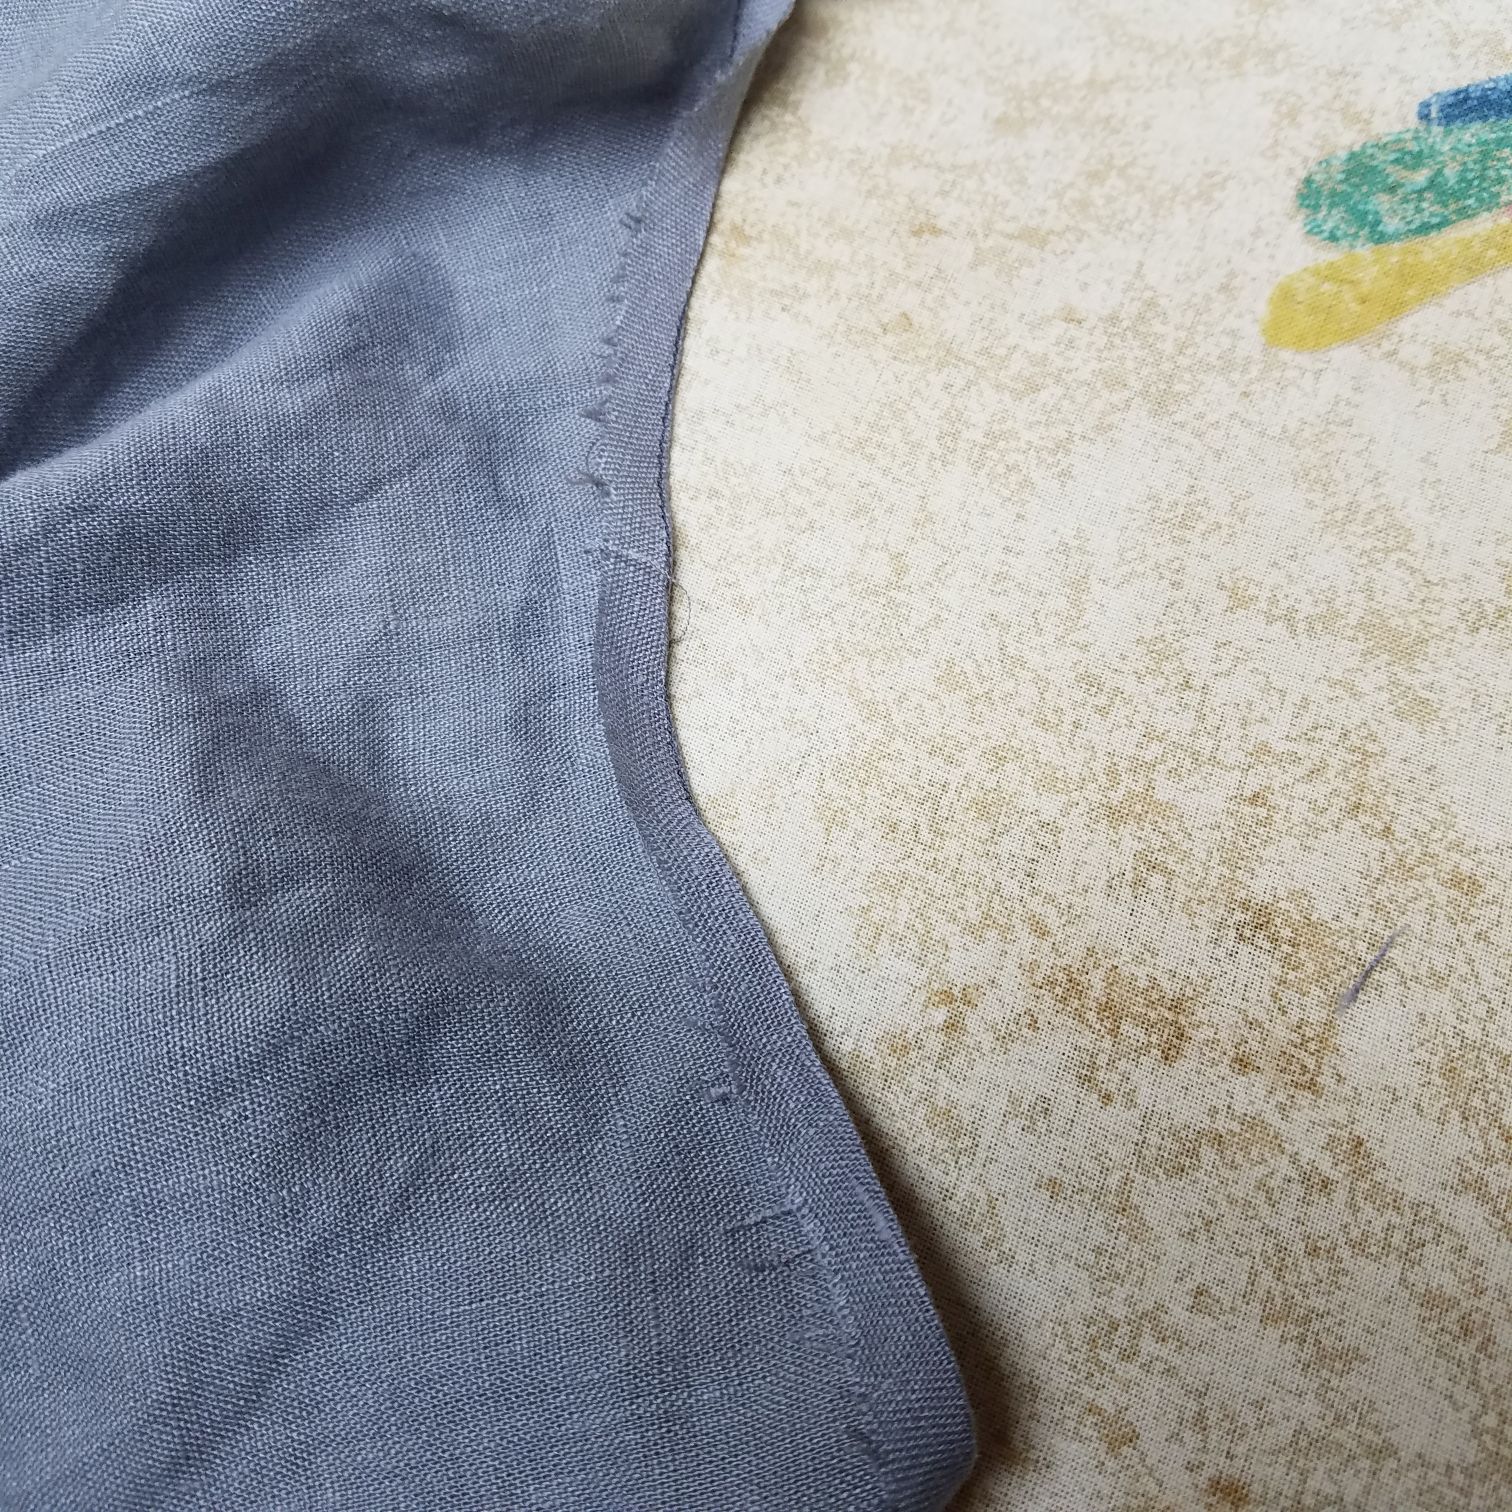
It’s time to get that iron out. If you’re using linen, go ahead and let it get nice and hot. It will put a beautiful crease in the linen. We’re going to do a double-fold hem, which is just like it sounds. Go around the bottom edge, folding and pressing about 1/4″ of the raw edge towards the wrong side of the top:
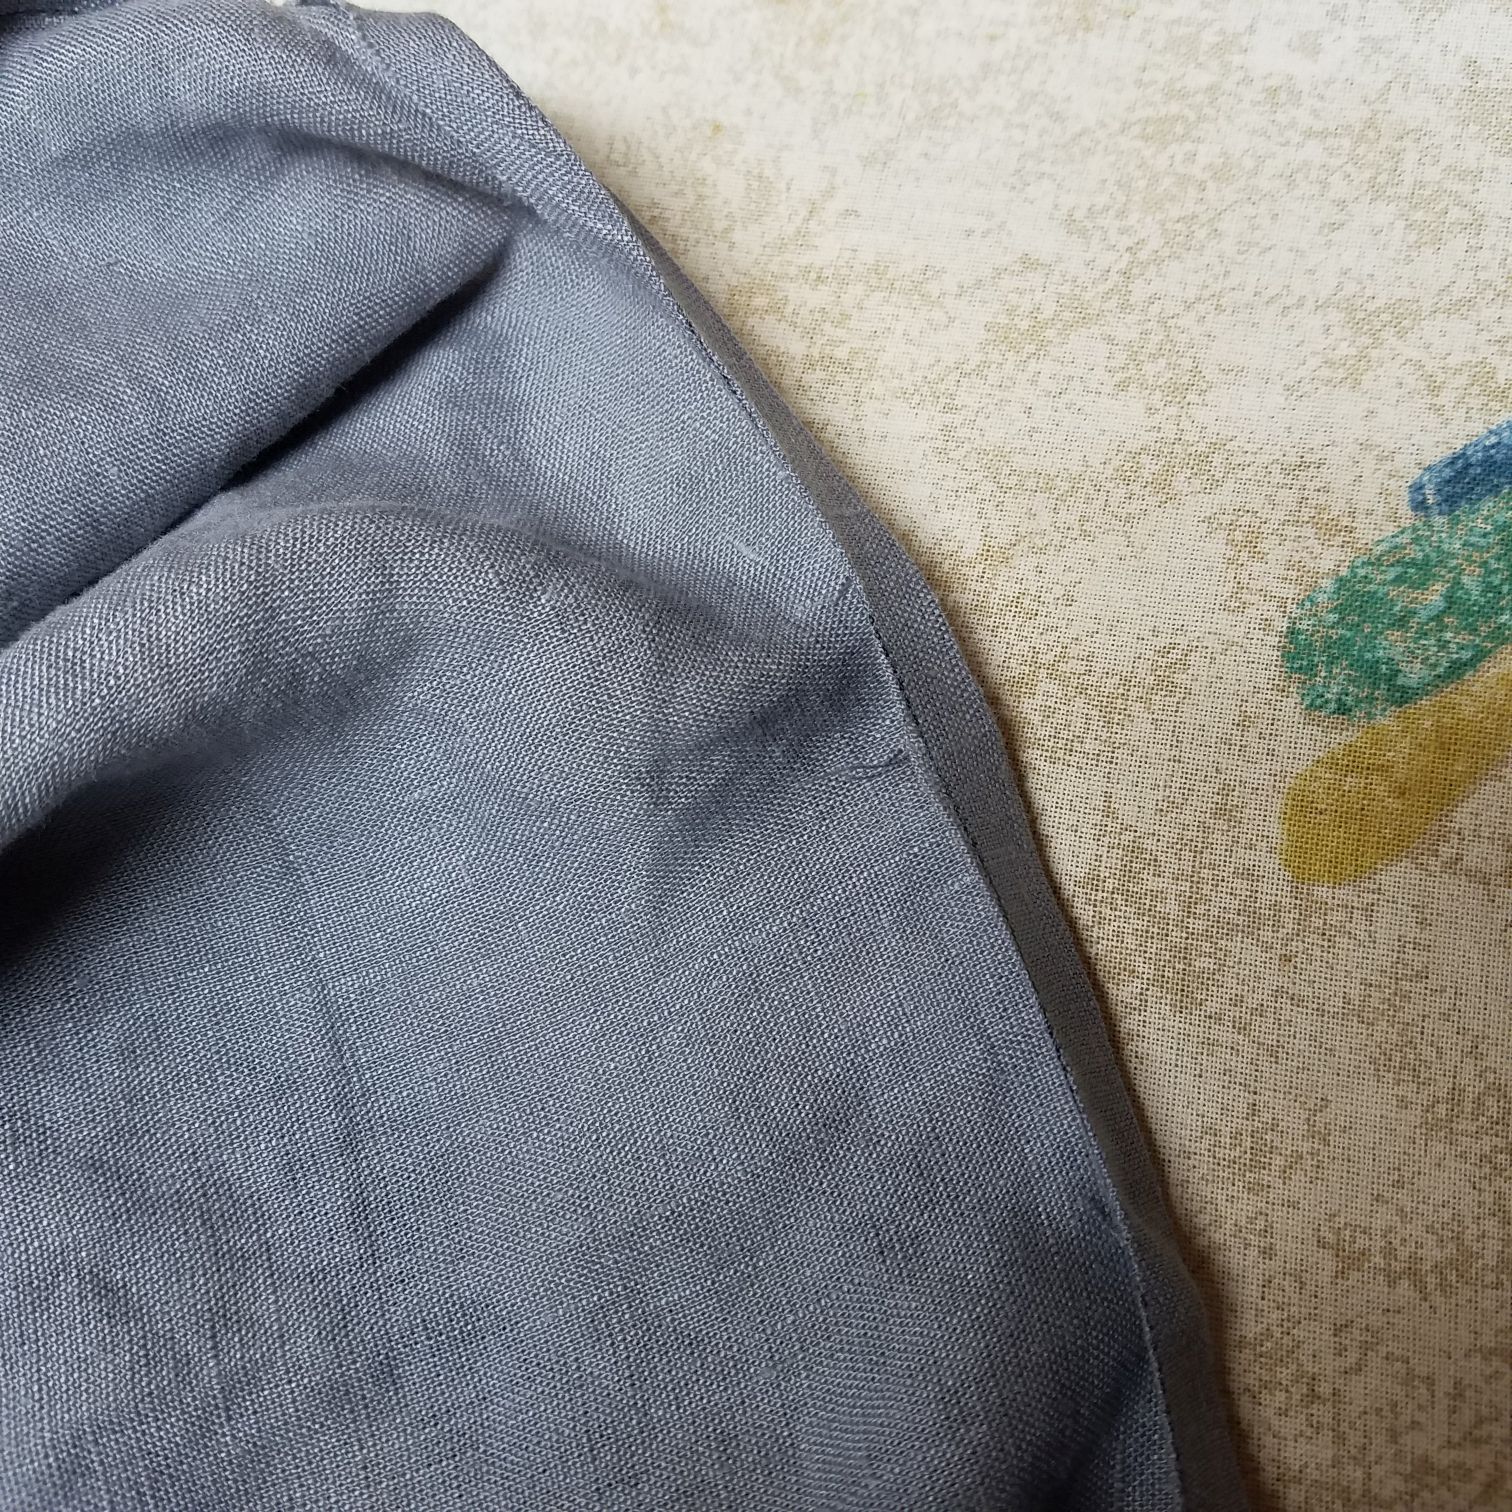
Once you’ve gone around, do it again, folding and pressing again towards the wrong side. This will hide the raw edge inside the hem:
Next, do the armholes. They are a bit trickier, so don’t sweat it to much. I’ve found the best technique is to get some tension on them, and flip the edge over, holding it down on the ironing board and pressing. My edges usually wobble a bit between 1/4″ and 1/2″. Just press it nice and neat. That’s the important part! Do it twice, same as you did with the bottom hem.

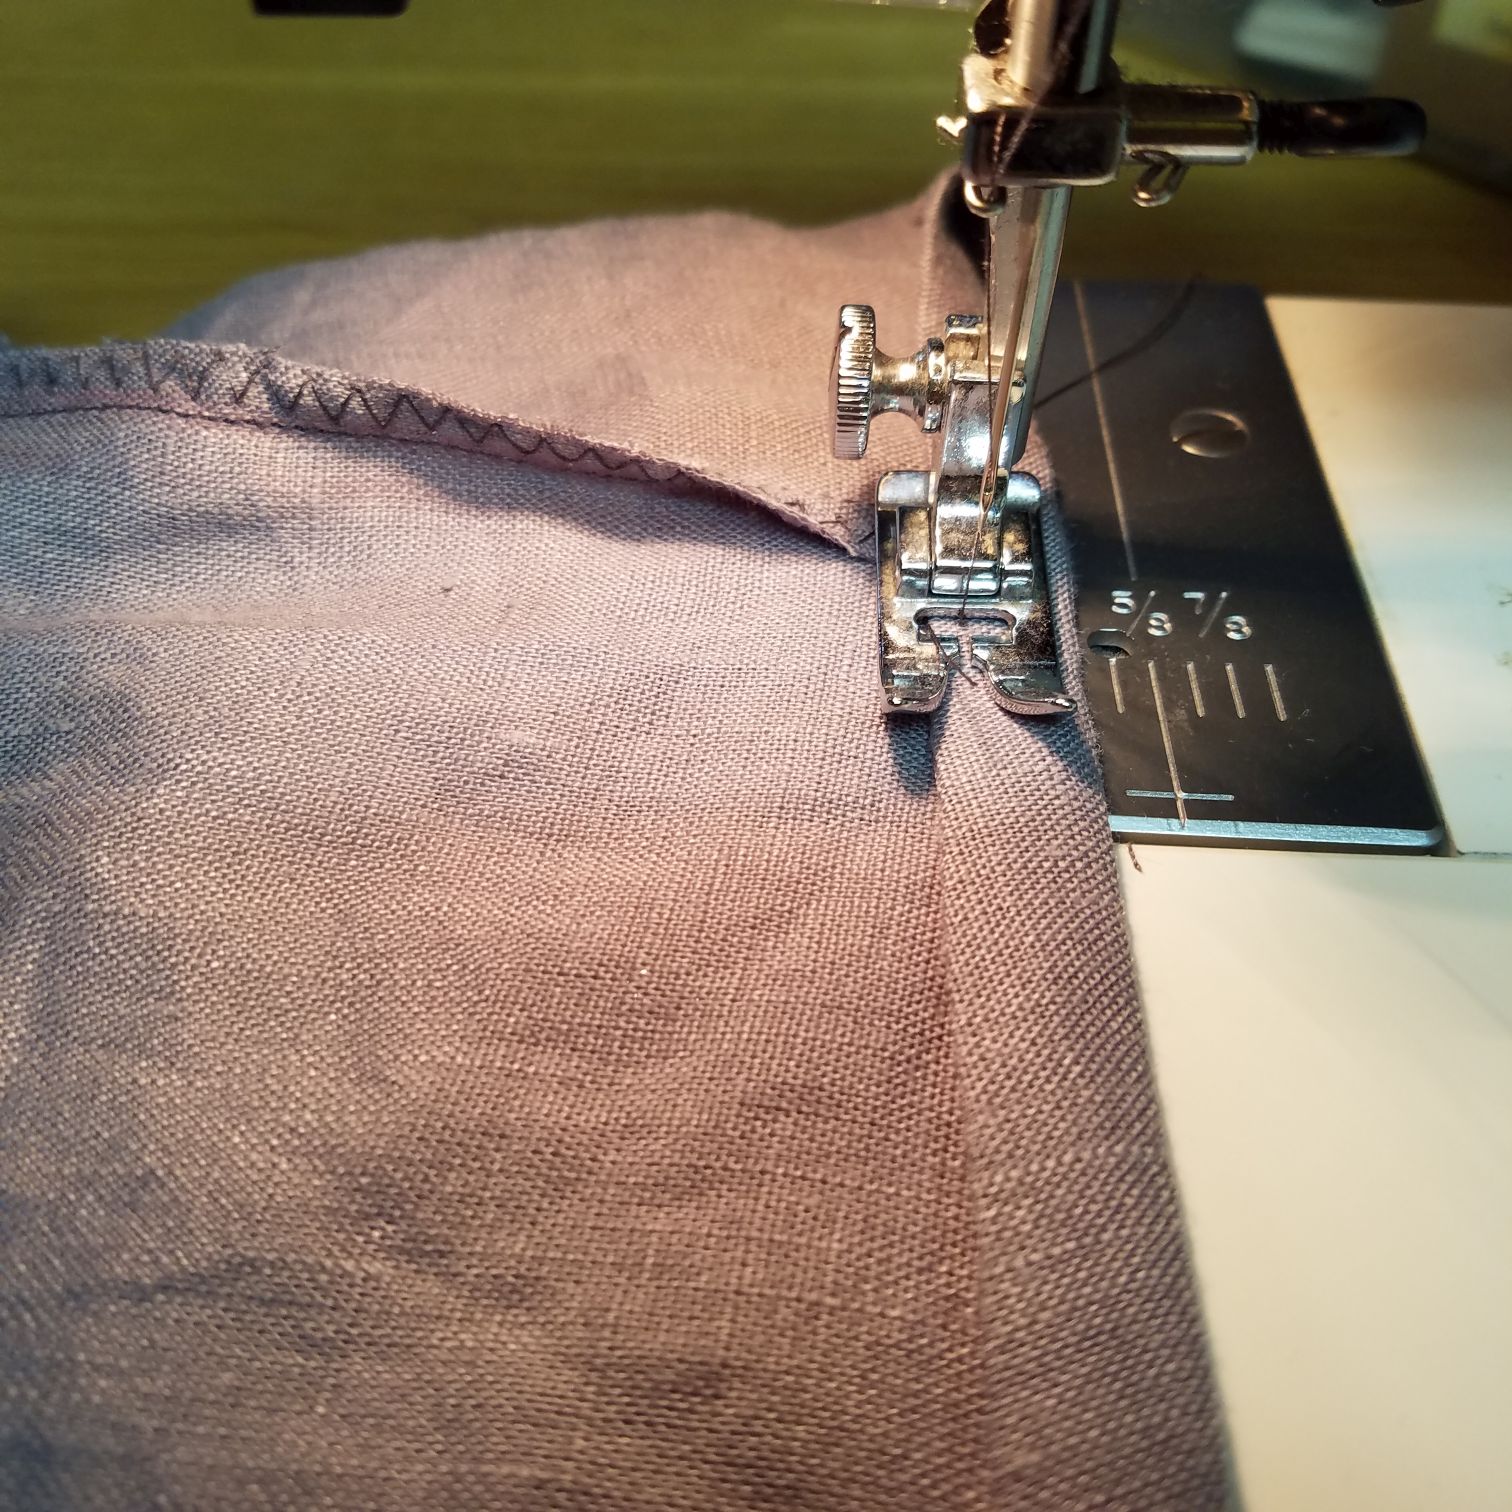
Then, sew the hems down, following about 1/8″ in from the folded edge. Again, if you’re a beginner, you might want to pin them before sewing. If you’re more experienced, linen is pretty well-behaved and you can probably skip the pinning.
A few things to think about when you sew the armholes:
- Be obsessive about checking whether you are sewing the other side of the armhole into your seam. You only want to be sewing the seam allowance, but the other side of the sleeve has a way of sneaking under the sewing foot. Don’t fret if you do sew it in, Just rip the seam out where you’ve caught the other side, and then continue on your way.
- Consider starting to sew the hem from the armpit and then around. Then, if you have any extra gathers or pleats, they’ll be in a more inconspicuous part of the shirt.
Step 6: Pre-sew, press, and sew the neckline
This is the trickiest step, and the one where I’m breaking from the ‘proper’ way to sew a neckline. What you should really do is a bias binding here. I’m just lazy. Still, the necklines on my shirts lay reasonably well, and I don’t have to fiddle with making the bias tape,
First step is to pre-sew an edge all around the neckline. Just go around the neckline, about 1/4″ in from the edge. You aren’t sewing anything to anything here. Just running the sewing machine through a single layer of fabric:
OK, then get your trusty iron out again. Using the sewn line as a guide, press the fabric in towards the wrong side. When you get all the way around, fold and press again (just like the double-fold hem for the bottom and armholes.) It’s pretty curvy, but just take it in short increments and it should be fine.
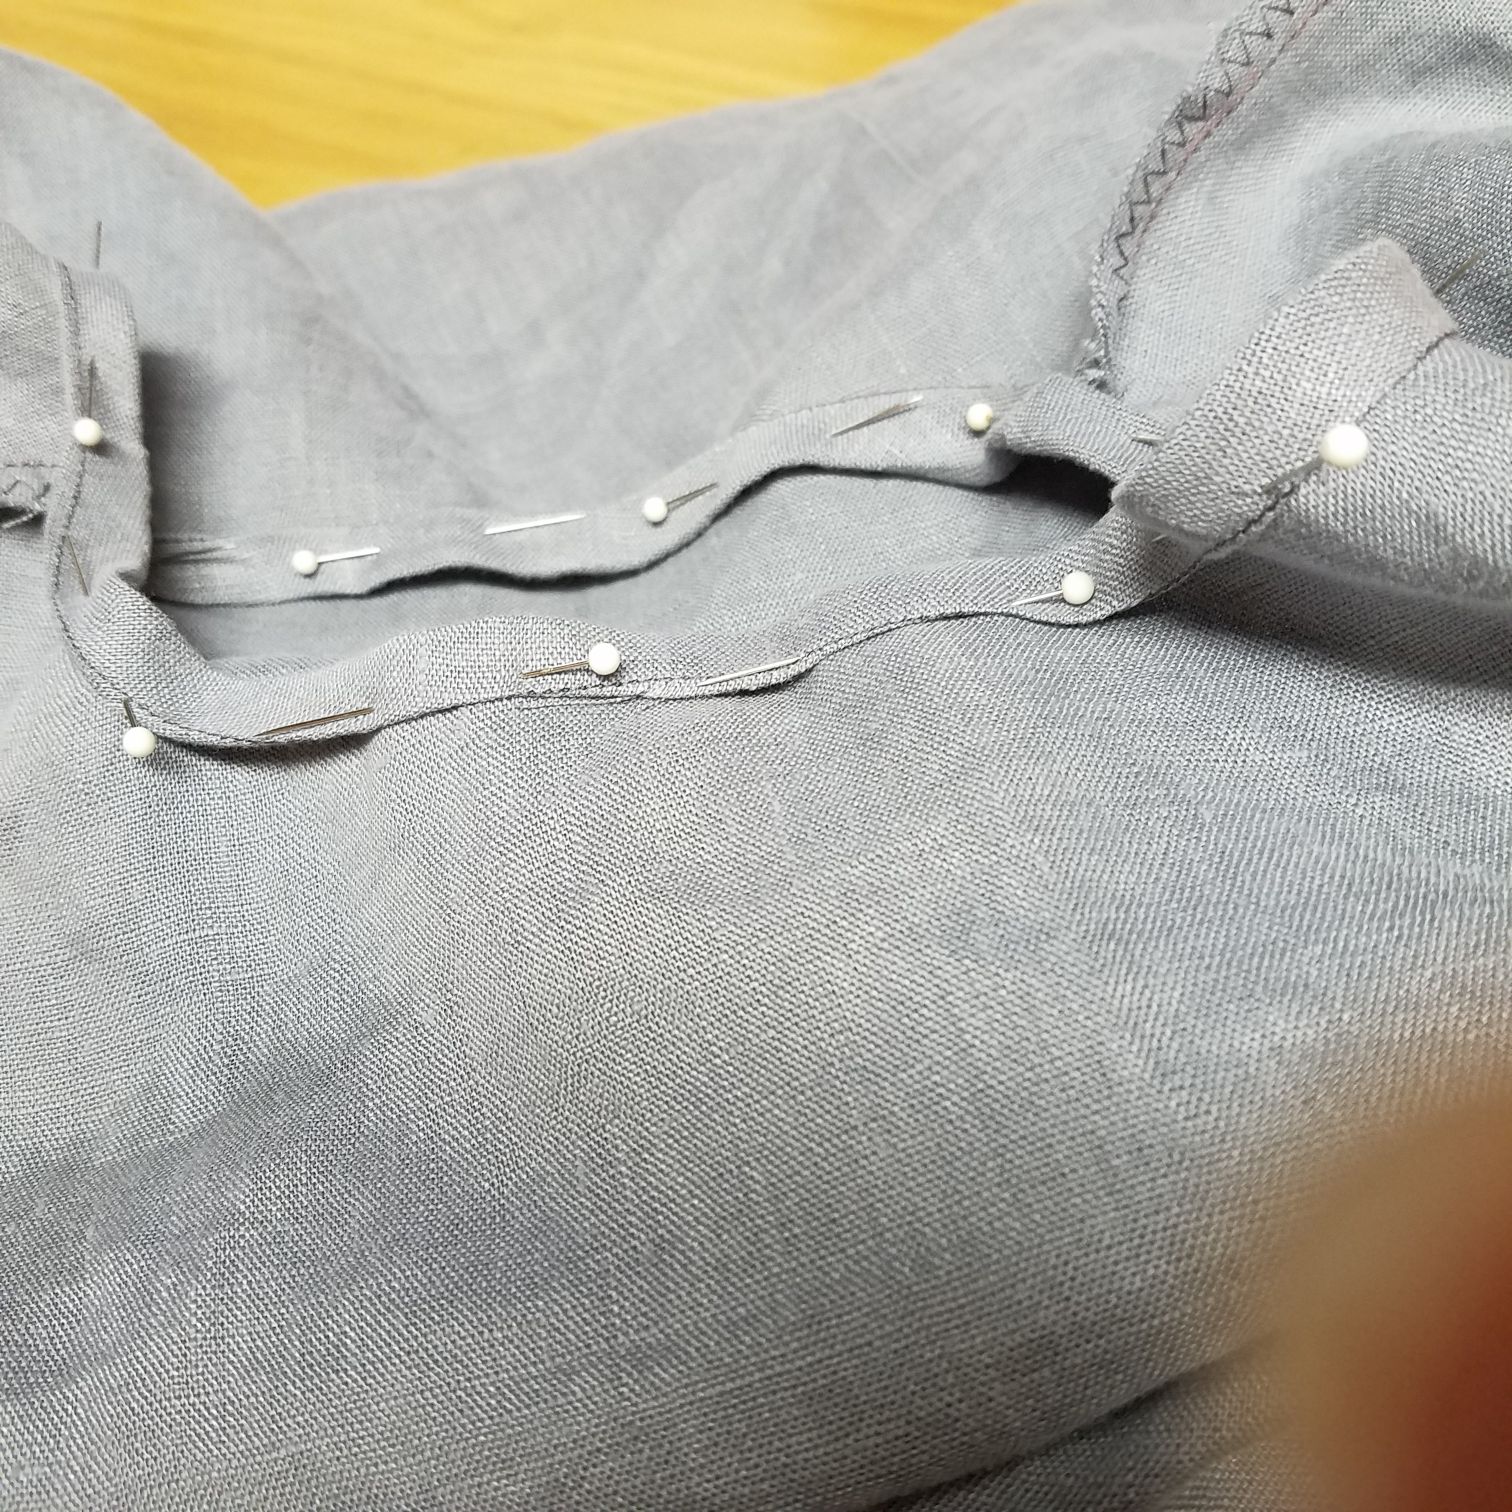
Now here’s where you really want to use pins. Pin the edge all the way around. It’ll look something like this.
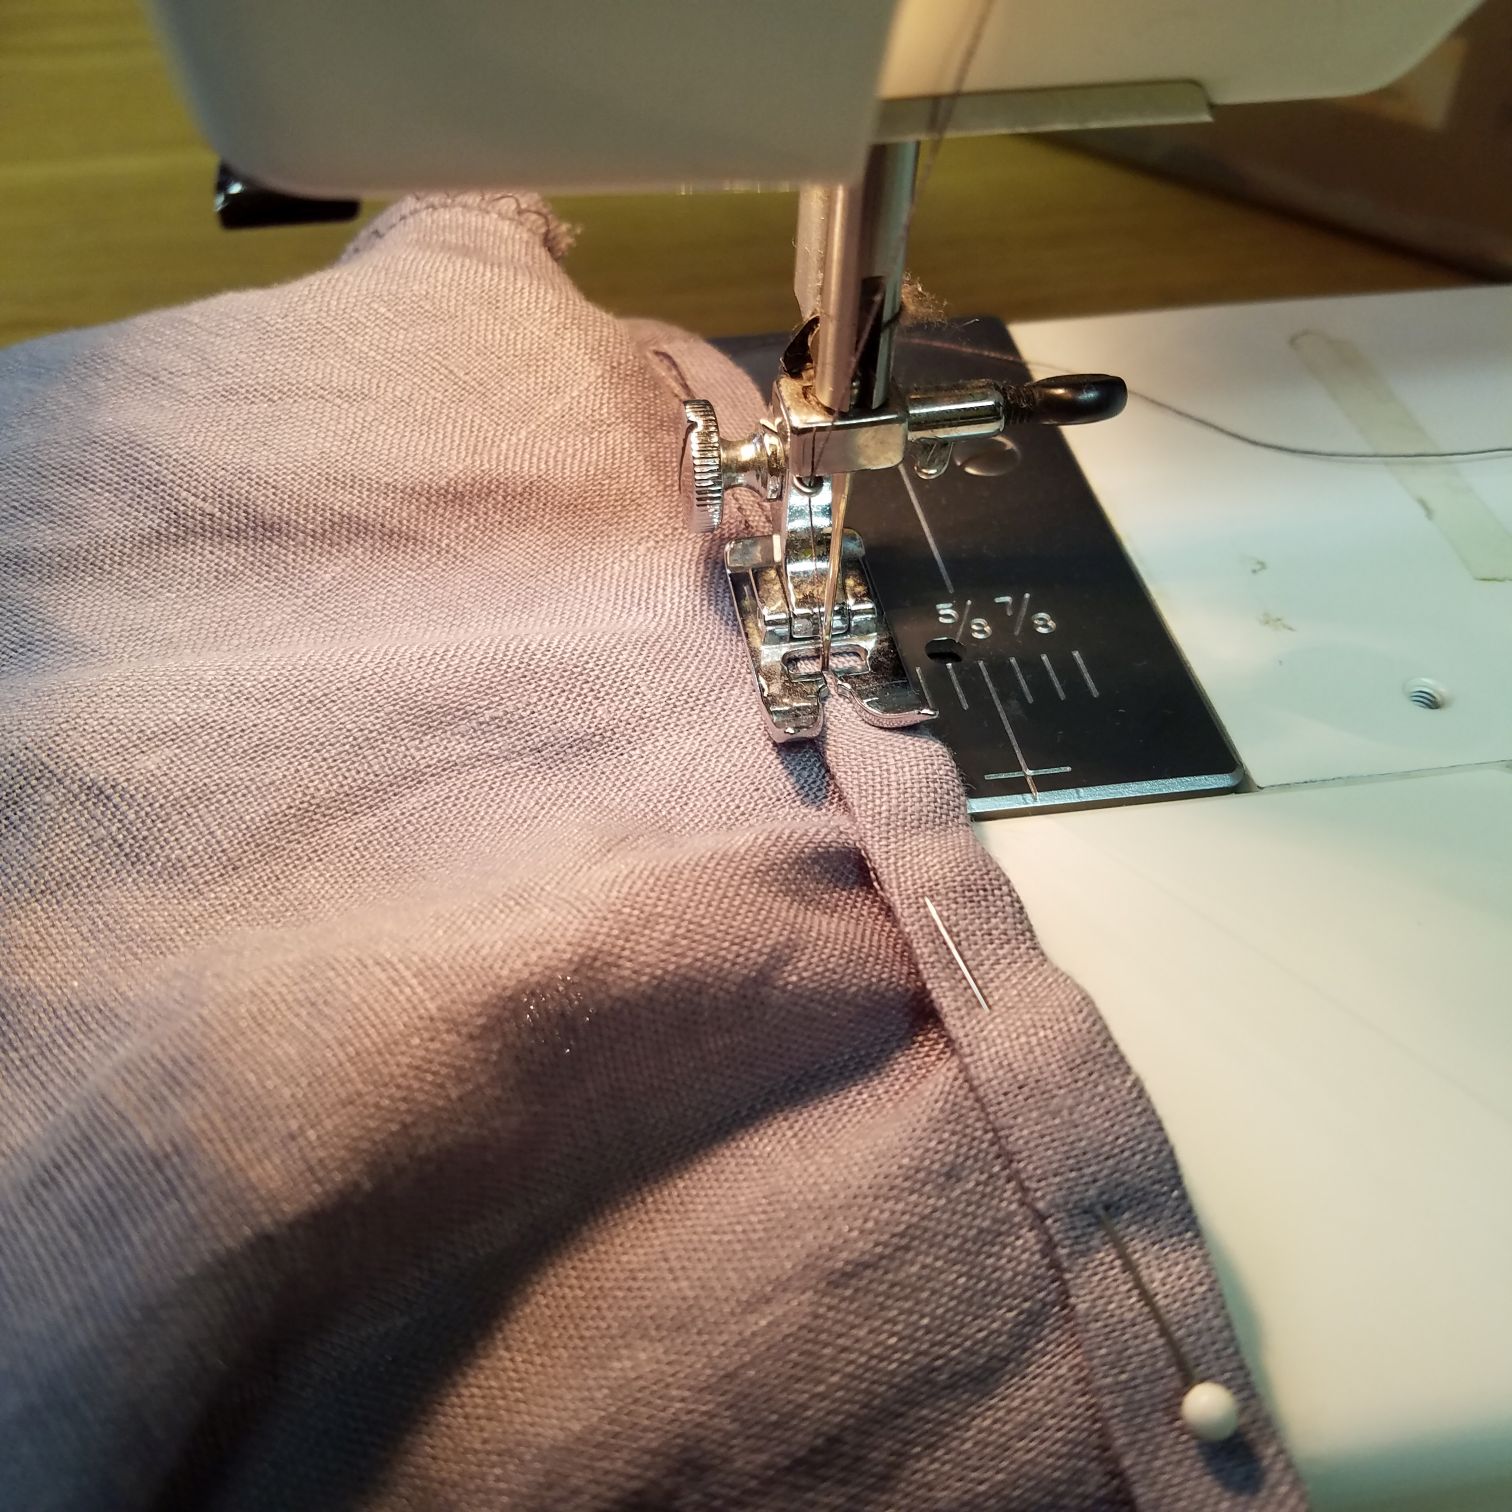
And now the trickiest part — slowly and carefully stitch your way around the neckline. The biggest thing you want to avoid is sewing any pleats into the fabric, especially ones that will show in the right side. Just keep flattening the material out, smoothing it, and convincing it this is what it wants to do. Try not to stretch it too much.
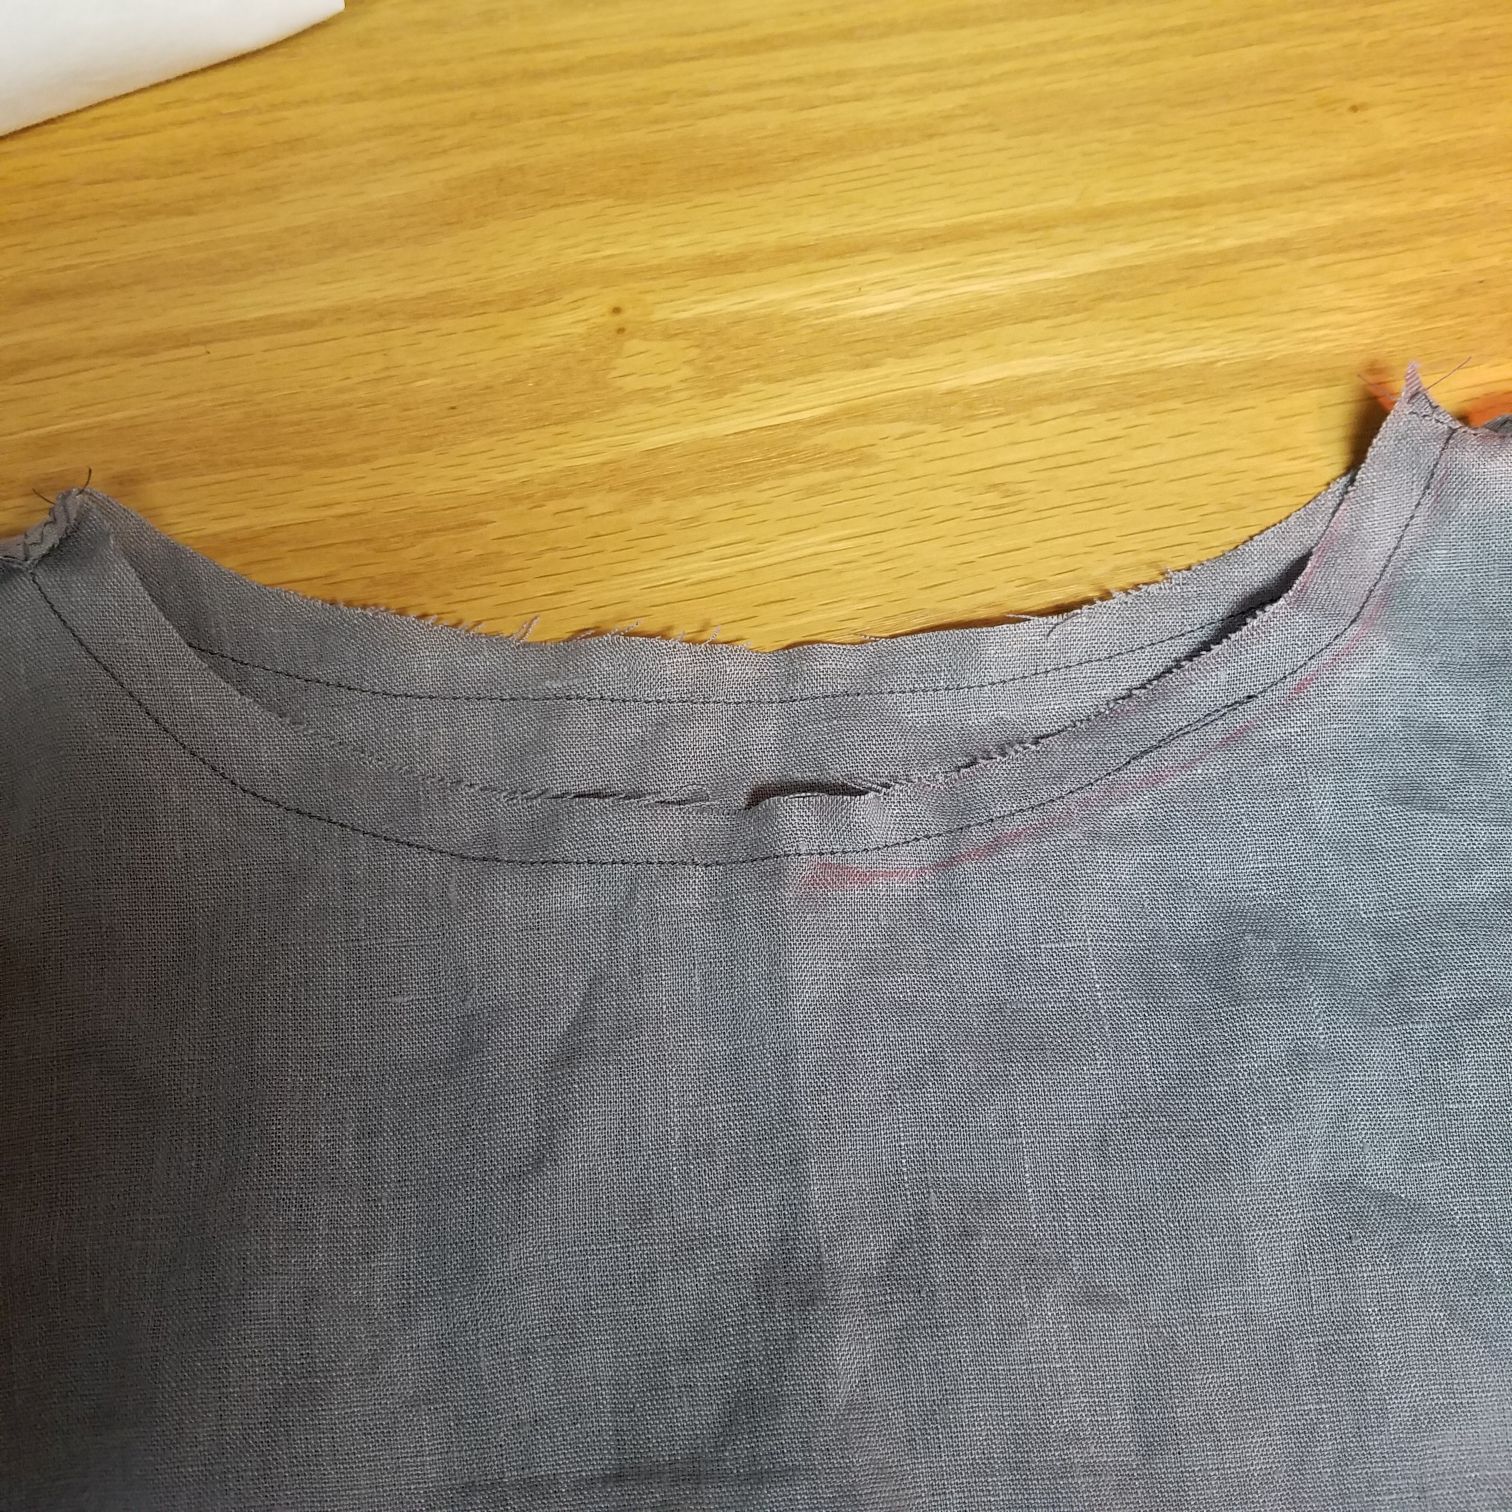
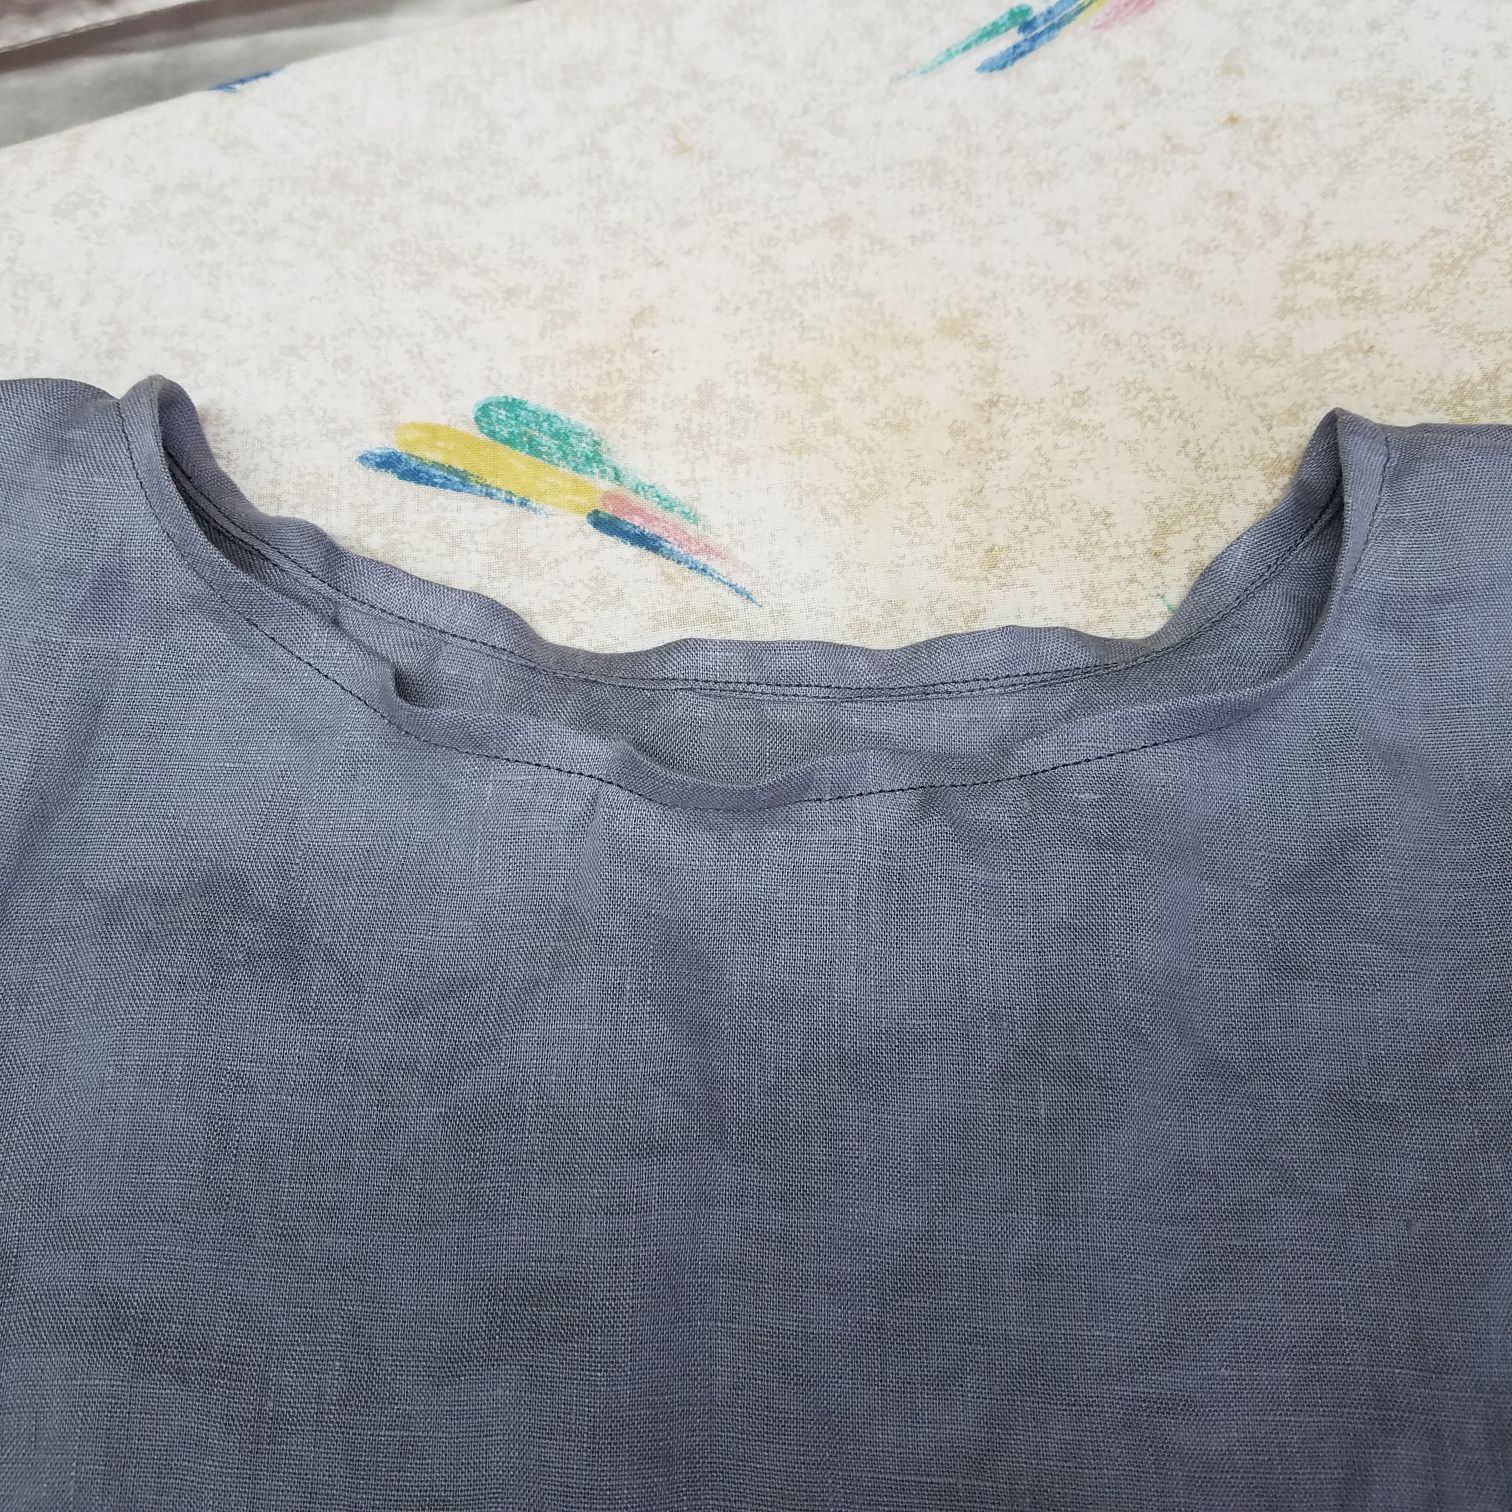
And here’s what you’ll end up with, which looks like a nightmare and is why the right way to do this is with a bias binding:
However, the trick I’ve found, at least with linen, is that a good pressing will flatten things right out. Just take the iron sideways, from the bottom towards the neckline, and press it down. Here’s how mine looked after a pressing:
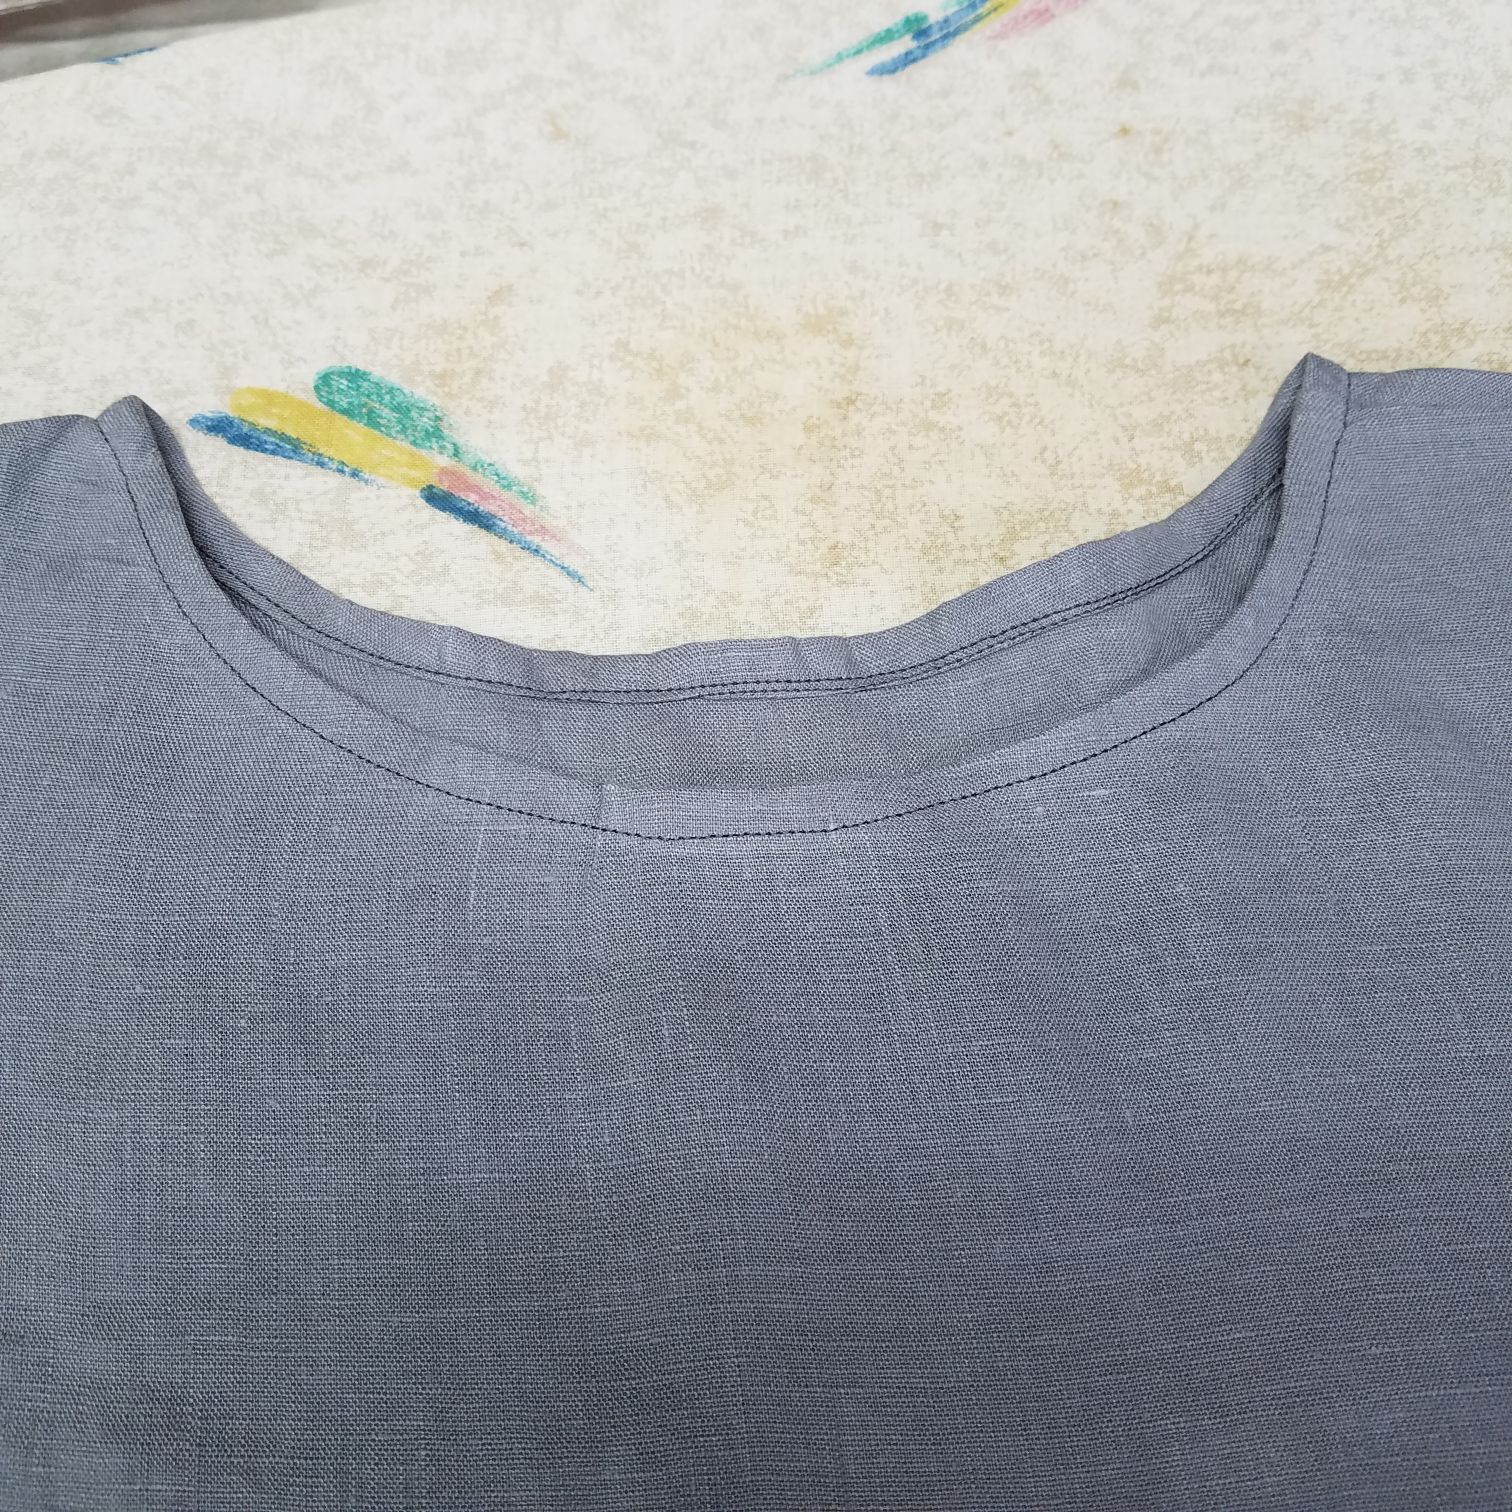
You’ll notice that, despite being careful, I managed to sew a tiny pleat in at a very noticeable place (left of center in the image.) To fix something like that, rip out the seam at the pleat and about 1/2″ to either side. Then re-sew, from the right side, overlapping with the previously existing seam line by 1/4″ on either side and making sure the fabric lays flat and doesn’t get pleated again. Then give it a good press with a hit iron. All fixed!
Step 7: Press and try it on!
Yay! Give your top the once over with your iron and try it on. I hope you love it!
If not, here are a few other tips:
- Give it a wash and another press. This really does wonders to settle all the seams in place and let the fabric know what it’s supposed to be doing. I’ve found this makes the garment hang and drape better. Wearing it around will help with this too.
- If it’s too wide or too long, you can re-sew and re-trim and of your seams. You’re the maker now, and you can edit your creation 🙂
Here’s my finished item:

Please leave a comment and let us know how it goes for you. Wear your new top with pride. You made it yourself. Who knows what you’ll make next? Happy sewing!!
Thank you so much for this tutorial !
You’re welcome! Glad you found it helpful 🙂
I want to sew a linen top with no pattern. I googled around for hours looking for just this info. I should have just entered that first sentence! Thank you so much. I know it’s not rocket science, but it sure helps to see what someone else has done.
So glad you found it helpful! Have fun sewing!
Hi, your sewing machine pictured is the exact model I’ve purchased recently second-hand. I am trying to locate a manual for it. Would you happen to know any model number I could go by? Thanks! Sue
Sure! I actually have the manual from when I bought the machine over 20 years ago (geez, that makes me sound old!) According to the manual, it’s a Sears Kenmore model 385.12514 . Enjoy!
Thank you so much for this tutorial!!! This is the exact thing I have been looking for!!!! Mine turned out great, I love love love it!
So glad you found it helpful and that you made a top for yourself! It’s so rewarding to make your own clothes!
Very very nice! Thanks
Cute top! I love the high low hem.
Thank you!
Thank you!!
Thanks a lot!
I also googled for so long before I found this.
Fabulous!!! Thank you so much ❤️❤️
This is exactly what I want for nice summer dressing! I am going to work with a pattern drafter for this top and linen pants too-to fit ME. Thanks so much for sharing. I love Pinterest,
The dimensions you show are for someone quite slim. How much wider do you make the pattern compared to your bust size?
It already fits very oversized, so you don’t necessarily need to make it bigger proportional to your bust. I wouldn’t vary that 16″ width much more than 17 or 18″, even for a very large bust. The bigger changes will be to add width in the arm hole and some length. You may need to experiment a bit. Cut it bigger than you think and you can always adjust down after you’ve sew it up 🙂
My aunt taught me to sew, back in the ’60’s. She made her own patterns out of news paper 1st, pinned them together ( or even pinned the pattern onto the clothes we were wearing ). After this 1st fitting, add a little more by taping or pinning a little more paper to your original pattern, or trim a little off, to make it fit. Most important here, DON’T USE YOUR SEWING SHEARS, on your newspaper pattern! Lol, this I was taught at a very young age! Maybe this will help. I love this idea of making your top without a pattern. I would use a top that fit me to check the size by, before cutting. Have fun!
Thank you!!!!! This tutorial is exactly what I was hoping to find to make a simple top. Your instructions are clear and encouraging.
Awesome! I’m glad you found it helpful. Have fun sewing!!
What a great simplified tutorial! Just what I was looking for and I found it on Pinterest. I have a lovely rainbow stash of linen that I have bought from Fabrics-store.com over the last year or so. They do have gorgeous stuff, many colors and weights. Sales very often to make linen more affordable. Now I know exactly what to do with it but first I will make your top from something else, cotton maybe, before I cut into my linen just to make sure I get my weird, little old lady measurements right! Thank you!
I love their linen! So many beautiful colors. Great idea to make a muslin first. Good luck!
Thanks for the suggestion to use muslin first. Then you save your good linen til you know it fits, and your have 2 Ewing tops. Thanks! I love this type of pull over top!
Glad you found it helpful! Hope your top turned out 🙂
This is just what I’m looking for! Do you think the neckline would lay flatter pre-pressing with little notches cut into it? I have seen notches around curved seams before but I can’t remember if they’re for curving out or curving in.
Hi Cristina – notches may help, but they could also make it a bit harder to get everything ‘tucked in’ when sewing around the seam. Let me know how it goes if you try it!
I haven’t tried sewing the top yet but I have made a few tops without a pattern and
I just want to say Thank You for being so generous with your time and your ideas. I love the top.
I love all the useful tips you share, they are all pearls. Coming from one who has made every mistake in the book but has reached a certain level of proficiency, I have to tip my hat and say
you are a gem.
Wow, thank you so much for the kind words! Happy sewing!
Love this tutorial. It is so simple,got to try it.
Thank you, this is a great little project. I saw a tutorial on the Janome website for using the rolled hem foot – I think I’ll try it on the neckline!
This is a great tutorial. I had already made several blouses like this, based on the traditional Mexican huipil. However, I did them all my hand, like the indigenous Mexican women do, with backstitching on the seams and decorative top stitching. So, I feel the sewing machine doesn’t have yo be the first requirement. Hand sewing is very therapeutic.
What if i don’t have a shirt to use as a guide? Measurements divided by 4 kind of?
You can always start bigger than you think and then re-sew it smaller as needed 🙂
This is definitely today’s project, so happy I found your instructions. I made wide legged trousers yesterday and want to make a top for them. Have a road trip planned and want to be comfortable. Also been purchasing used sheets from the local thrift shop so I had lots of fabric to experiment with.
That’s the most excellent idea I’ve heard, thank you! Fabric is expensive and I wanted to trial on something first 🙂 loved the tutorial
Thanks so much for sharing this method. I have favorite blouses I want to use for patterns – just not brave enough to try using them for a pattern until now. Could we have more please?
I’ll do my best to add more soon!
Hi this is lovely
Have made one for me
I would like to make these for my grand daughters
They are 4 and 6
Can you give me some idea how to make it smaller
Thanks debbie
I would just use one of their tops for some measurement ideas. You can also sew it, and then adjust it on the fly 🙂
So many thanx really understand and eager to try. Just have to start.!!
Very good instructions for a no-pattern top. I did make one a couple years ago, but I like yours for the details for the neckline and hemline specifics. Now I can make one (or more) with a better neck and especially the hi-lo hem. Thank you.
Glad it’s helpful for you!
Thank I lo e Linen, I Will definitely make my linen blouse.
Just getting back on to sewing. I can’t wait to try. How would this be with tee shirt material.
I find knits much harder to work with. I’m sure the end result would be great, but I just hate working with knits, lol!
I managed to do this in a couple of hours and that included the sewing machine breakdown. Delighted with the results.
That’s great to hear!
Great demonstration!!!
Looks fabulous!!! However, I’d recommend ironing the fabric first! It makes the rest much easier, and you’ll never have to iron it again. I’ve been sewing most of my 71 years, and I think an iron is about as important as a sewing machine. If push comes to shove, you can sew it by hand!
Yes, great point! Ironing the fabric first makes a huge difference!
Thank you for the great tutorial. Could you fold the sleeve out instead of in to form a cuff?
Any ideas for a jacket/ robe?
Sure, I think that could look great!
I have a self-drafted jacket pattern that I need to write up. I’ll try to get to it soon!
I just found your tutorial & love it. Im going to try it this weekend. Now in 2020 where do you find linens?
My favorite place to buy linen is https://fabrics-store.com/ 🙂
Cant wait to try this. I have various pieces to try. Thank you for this
Hi Karen.
This has encouraged me to have a go at making a linen top. I love how you have simplified a process.
I will use one that I already have as the template.
Much love!
Karen x
Great tutorial – I love the way the sleeves turned out so much longer than I thought they would!! Will definitely have a go at this.
Would this work in a cotton fabric? Looks like a nice tutorial, I might give it a go! Thanks, Jen 😊
Yes, I think this would work well with cotton too 🙂
Great tutorial. Can you suggest some other fabrics to use other than linen?
Thank you so much. I have just bought a remnant of a gorgeous Tangerine coloured linen and this is exactly the type of top I was looking for to go with a pair of black & white gingham trousers. Your directions are so clear. I’m super keen going to give it a go this coming weekend.
I would suggest increasing the shoulder and side seam allowances and using French seams or perhaps a flat fell seam.
I don’t know how I found your site, but you can bet I’ll mark it so I don’t lose it. Your tutorial is one of the best I’ve ever found. Thanks so much for sharing your talent and time. I can hardly wait to sew this. Do you think it can be serged?
Yes, serging would work really well 🙂
Just a quick note. When I was browsing at Nancy’s Notions, I found this wonderful little too. It has a circle wheel (no teeth) to run along the cutting line, then it has a holder for a pen or pencil, plus you can set the distance you want your seam allownce the width you.want. I don’t know if they still have it, but it has sure has saved me a lot of time.
I’ll definitely need to check that out!
I just came across this set of instructions. Wow. I am not good at seeing at all, patterns are like Greek to me. Upon reading through the instructions I feel I am ready to try this very easy looking project that has so much potential for personal adjustments and design changes. It’s a real confidence builder. Thank you so much. I think it could be easily used to make gifts for folks by simply eyeballing for different sizes. Yay! Thank you for sharing.
I’m not a novice but I was looking for something loose and comfy for the upcoming summer in DC. Whacked this out in an hour! Great tutorial. Thanks.
Just found. Hope you’re still up. Love this tute..
3 questions, please:
1). I need long sleeves. Any cutting advice?
2). The front is far too short for me. If I extend it should I extend back length by same number of inches?
3). I am very busty. Should I include darts from the bottom up to apex?
Great thanks. Holding my breath to see if you’re still out there.
Hi Lou!
For long sleeves, you could potentially just extend the sleeve part out and see how it goes. Definitely feel free to make it longer in front. Darts are a possibility, or just adding the length in front might be good enough. Best thing is to just try it and see. good luck!
Thank you for this! I just love sew-‘n-go patterns like this. I think I’ll make six of these 🙂
The pic shows larger sleeves…..I know this will sound dumb but, how would your pattern change for those?
The pic is actually from the exact measurements in the pattern. They look longer because the top is so wide 🙂
the best simple instructions i have come across, especially for a wobbly beginner. have made two tops, made them hip length and am SO pleased with result. had lots of pure cotton given to me and now have two tops at no cost, brill.!! thank you so much x
Yay! So glad to hear it!