As I mentioned in my 2018 January through March purchases post, my biggest oops of the year so far was a $160 Elizabeth Suzann nude Georgia dress. I never intended to wear it as a dress. The idea was that I would shorten it into a top because I regretted having sold my nude Georgia top last year. However, when it showed up, it had quite a few faint stains, and I didn’t think it was wearable, either as a dress or a top.
I was stymied until I reflected that I had been considering buying or making a navy linen Georgia dress for the summer. So I came upon the idea of dyeing the dress. I’ve dyed items before and they’ve come out quite well, so I decided to just go for it.
Here’s how the dress looked originally:
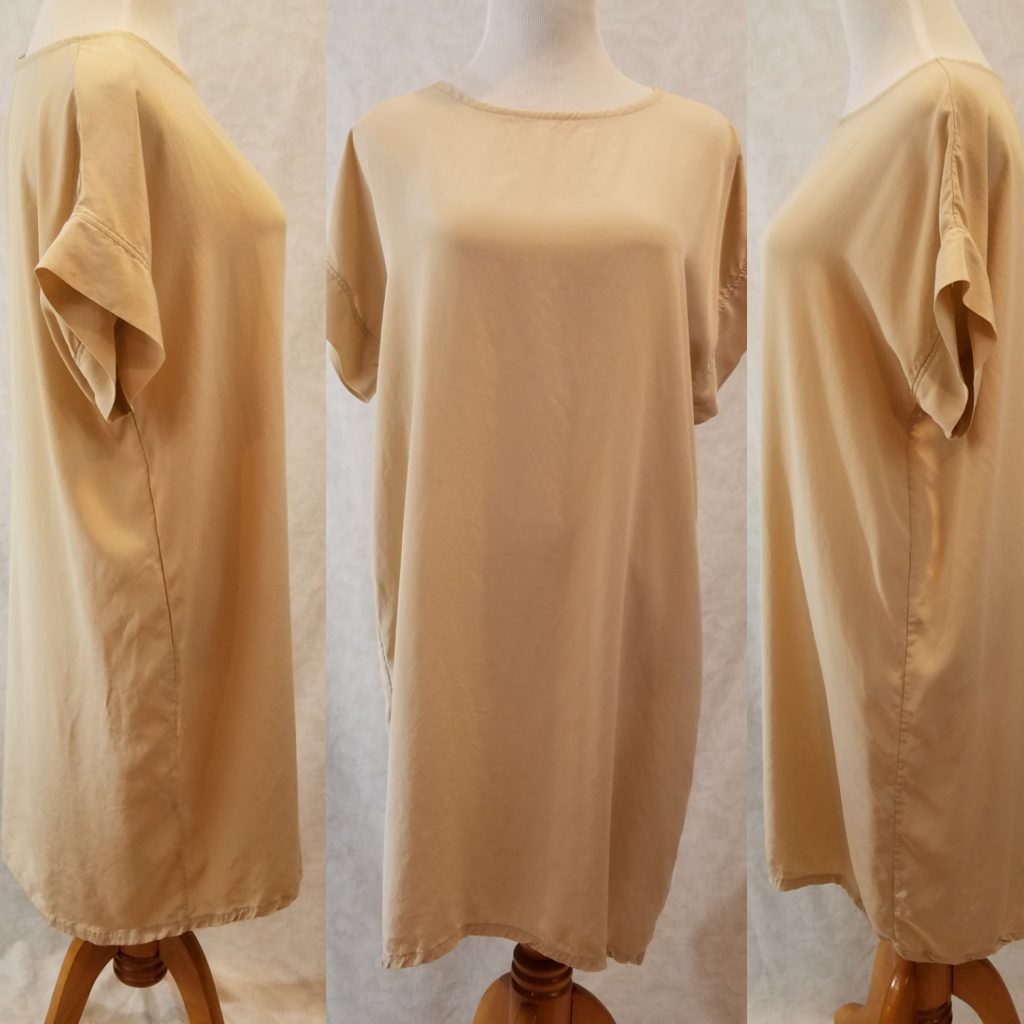
Of course, it’s a beautiful dress and looks great in these pictures, but, as mentioned, there were faint stains (like oil stains) on several parts of the dress.
So here’s what I did to dye the dress:
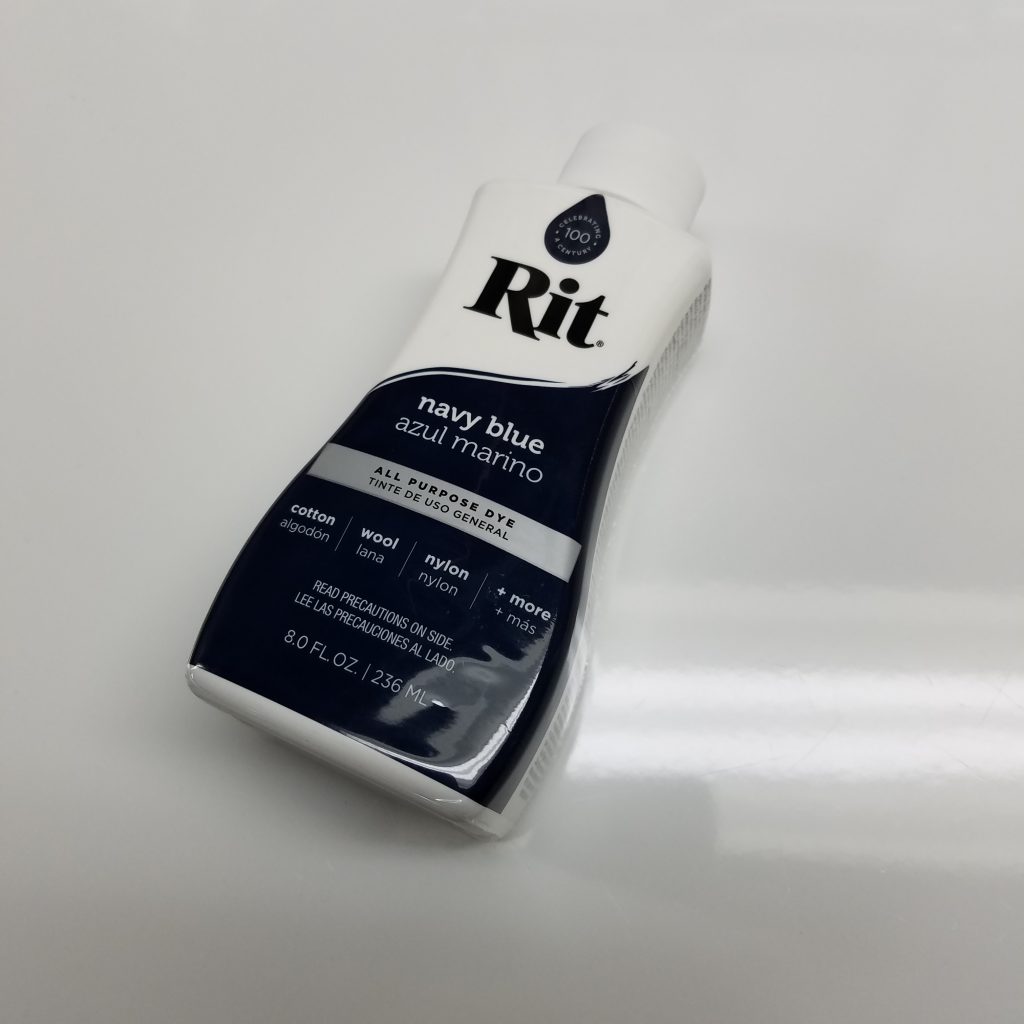
Step 1: Acquire the dye
There are better acid dyes out there, but I’ve found that liquid Rit dye does fine for jobs like this. Most other high-quality acid dyes are powders, so you have to ensure they are entirely dissolved to avoid pinpoints of darker pigment. Starting with a liquid dye just makes things easier.
Since I wanted navy, I just bought the navy Rit dye. There are tons of colors and they also have color recipes on their site if you’re looking for something they don’t have pre-mixed.
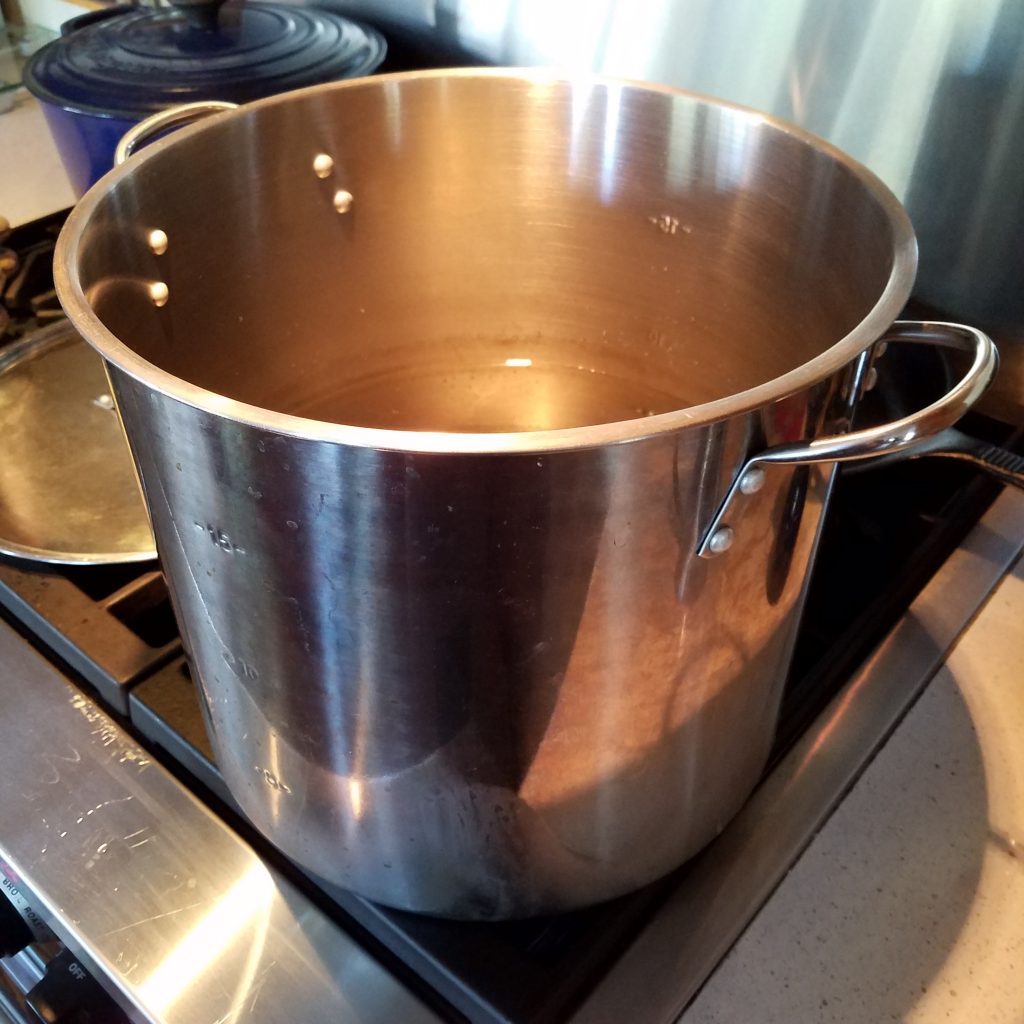
Step 2: Boil some water
You can dye on the stovetop, but you would need to use a pot reserved only for dyeing (not cooking.) I decided to dye in a bucket, but first I had to boil up a big pot of water. Since only water touched the pot, it can still be used for cooking.
Step 3: Fill the bucket
I filled my bucket about half full and carefully lugged it down to the basement and placed it in our utility sink.
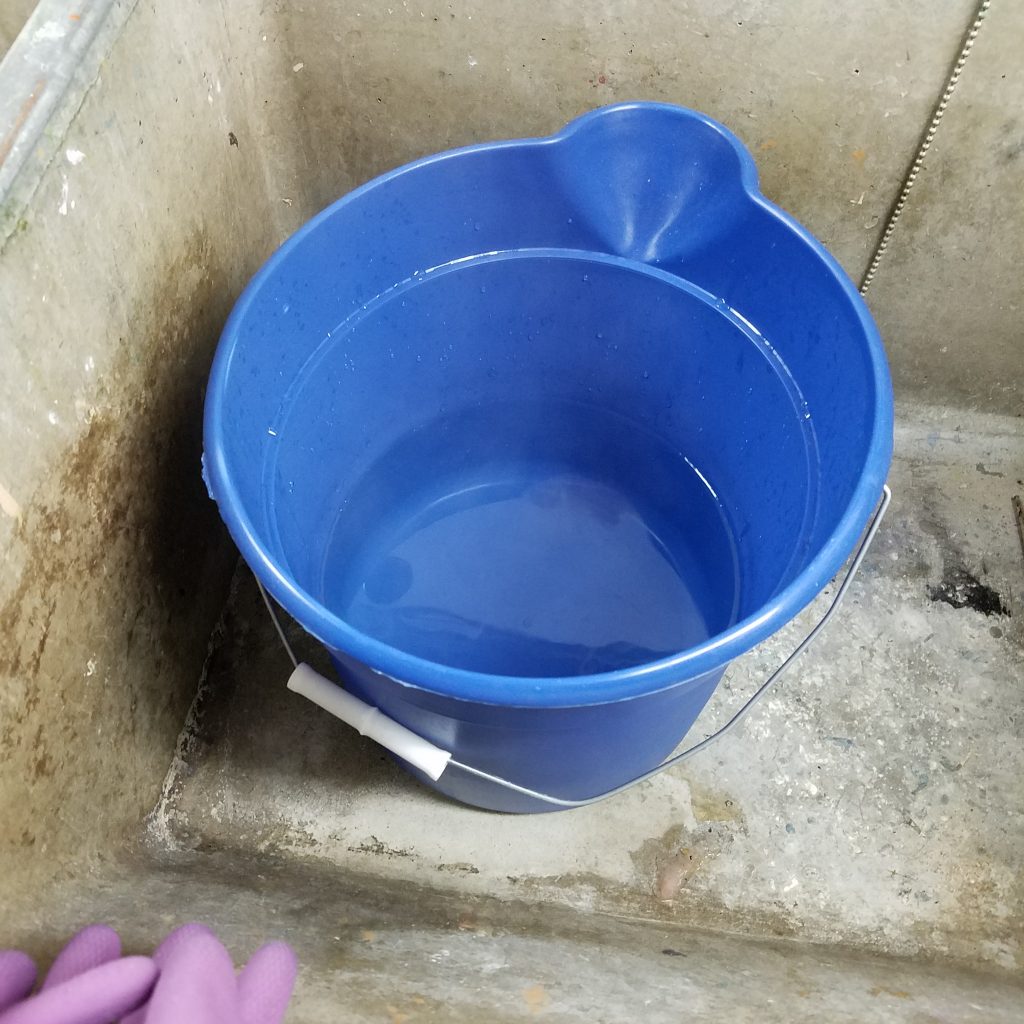
I then added about a cup of vinegar (the acidity is needed when dyeing animal-based fibers like wool or silk) and about half of the bottle of Rit dye.
Step 4: Get the garment soaking wet
This is a really important step. If you don’t do this, it’s likely that the dye job will come out uneven. Get the item completely soaking wet. I had my hands full at this point, so I didn’t get a chance to take a picture, but don’t forget this step!
Step 5: Place the garment in the bucket
Carefully place the item in the bucket, poking it down and stirring it around with a spatula or stick (I used a chopstick.)
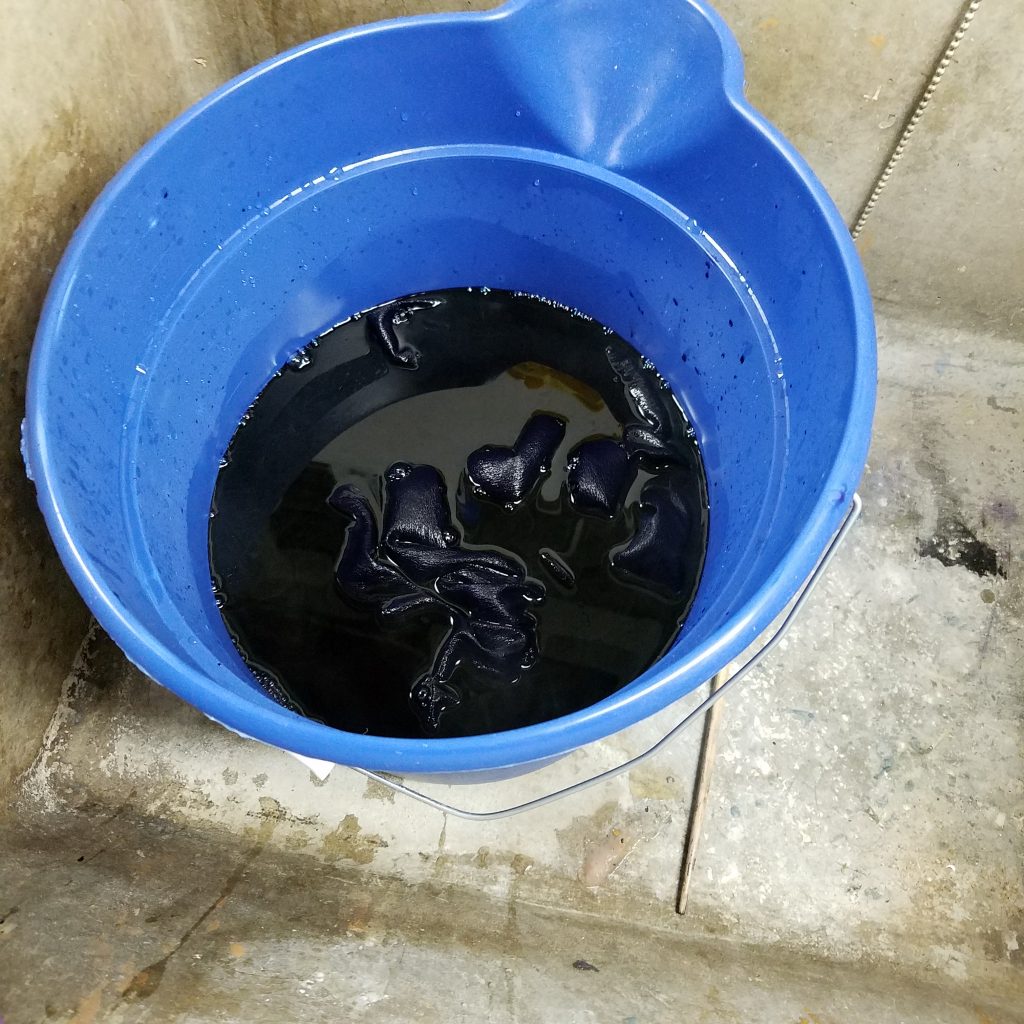
Step 6: Soak and stir
The Rit dye instructions tell you to let the item soak for about an hour. I’ve heard everything from that, to letting it soak overnight (especially if you’re dyeing something black.) I pretty much stuck with the hour, stirring every 10 minutes or so.
Step 7: Rinse, and rinse, and rinse
After the soaking period, I carefully poured out the dye water (directly into the utility sink), and then refilled the bucket, with the dress in it, with fresh water from the top. I stirred and squeezed water through the dress (wearing rubber gloves), then dumped the water out and repeated.
I did this over and over until the water started running relatively clear. This is the most time consuming part. I probably went through 10 buckets of water or so during the rinsing part.
Step 8: Wash and dry
I then washed the dress like I usually would — cold delicate with a bit of gentle detergent. Then dried as usual.
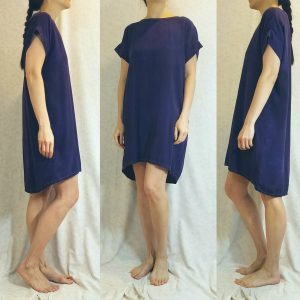
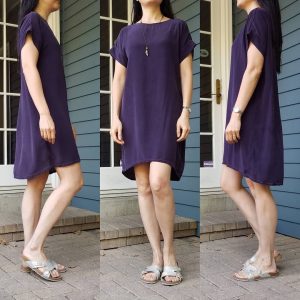
Here’s how it turned out:
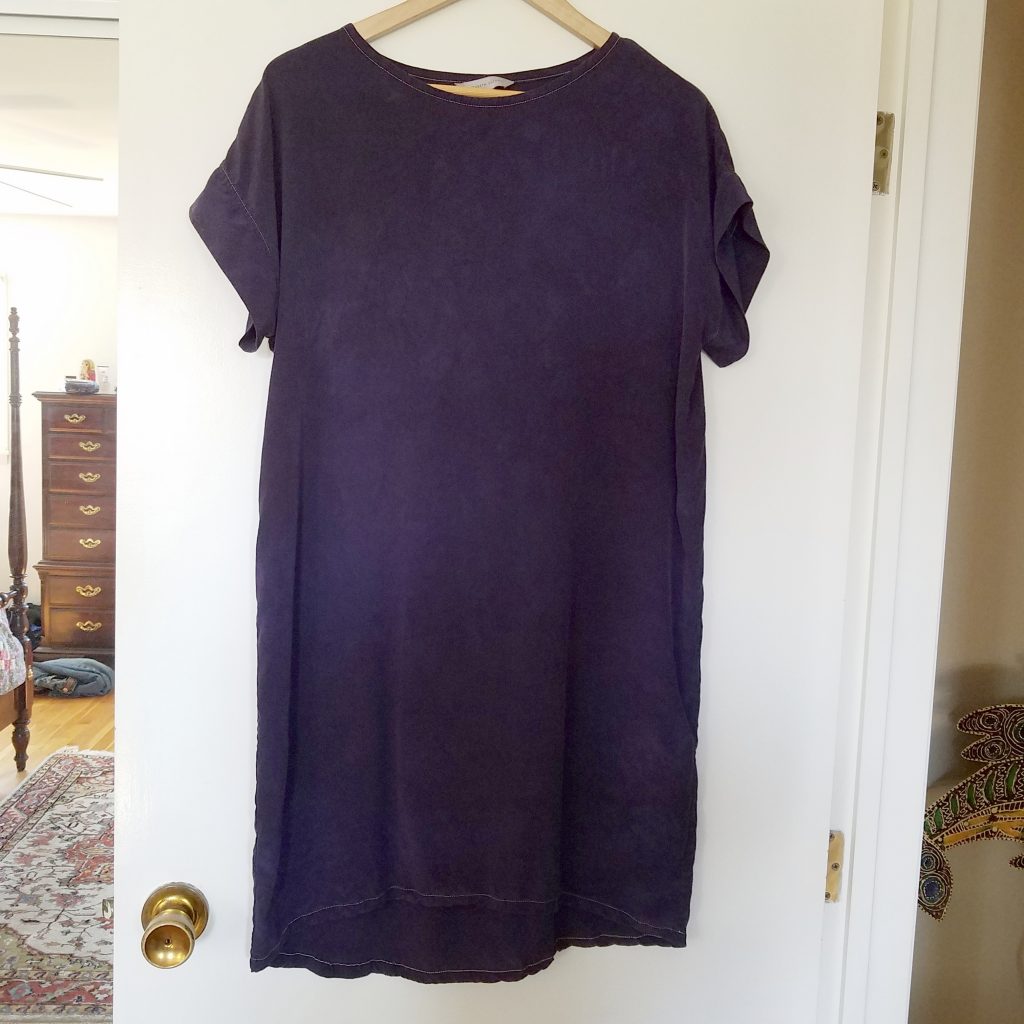
It’s not perfect. I think I should have stirred more, and maybe soaked longer. However, I kind of like the depth the slightly mottled dyeing gives it. It’s definitely wearable, especially around the house on the weekends.
The color is also much better on me. As you can see from these pics, the dress shrank by about an inch. So that’s something to watch for when dyeing — you will probably lose some size because of the boiling hot water.
Have fun with dyeing your own items! It’s best to start with items that are already unwearable for some other reason, especially with expensive pieces like Elizabeth Suzann. But once you get the hang of it, you’ll have the confidence to dye anything 🙂
*UPDATE* July 2018:After my success with re-dyeing the Georgia top, I decided to re-dye this dress at all, to get rid of the mottling and un-evenness. So I did the same thing, using the Rit dye color remover. Imagine my absolute horror when, after placing the dress in the bucket with the color remover, it turned an eye-searing shade of bright, hunter orange. Like safety orange. Like the last color you would *ever* want to dye your Elizabeth Suzann piece.
I couldn’t believe it. It didn’t seem likely that overdyeing it with navy would be successful. Orange plus blue would, in my estimation, end up in either a muddy brown or a dark olive green. But, having gotten as far as I had, I went ahead and tried it, to see what would happen.
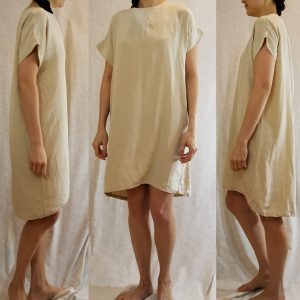
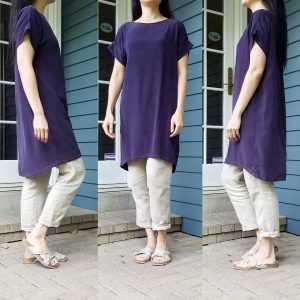
Surprise, surprise, it came out perfectly! I did the constant stirring thing for about 45 minutes. Then rinsed and washed, and it is now a nice, even shade of very dark navy.
What I’ve noticed in looking at the pictures above is that the dress shrank at first, but, after a few wears, seemed to relax to a slightly larger size. I’m hoping that will happen again as it’s just a smidge smaller than I would like. But the color is totally even and I wouldn’t hesitate to wear the dress out of the house now. Just goes to show, sometimes, when in doubt, just carry on!
Here are a few views of the re-dyed dress:

Great result! Dyeing natural fabrics has become one of my new favorite things. Philadelphia summers mean much sweating, and silk crepe can prove very troublesome in such a climate. I’ve taken to using shibori techniques to make my silk crepe more wearable. Organic patterning obscures sweat in delightful and super useful ways, making this otherwise troublesome fabric a delight in sticky temperatures. I spent this July evening in a park watching a play with my kid while wearing a delightful silk crepe maxi and had no concerns about sweat or juice box splatters 🙂 Dive onto the dye train!
Help! I am considering dyeing an ivory silk Mara Jumpsuit. I am looking to dye it grey, but am not sure if I should go with the dark or light RIT grey colour. Also I am scared of ruining a beautiful ES piece! I have a couple of questions: How neat does your second dye job look ? It is hard to tell in the photos. I wanted to wear the jumpsuit to a few formal weddings and don’t I don’t want to look sloppy – like I dyed a suit myself. Secondly, how does the contrasting stitching really look? I believe you have a Mara – do you personally think a medium – grey silk jumpsuit with white stitching will look shabby? I don’t have the jumpsuit yet so I am not sure where all the visible stitching lies. Any more in-depth advice would be greatly appreciated!
I think the second dye job is pretty good. Definitely keep stirring when dyeing as it makes all the difference. Also, I find the white stitching is not an issue at all. The ES seamstresses to such a good job with sewing that the item looks very professional and finished even if the stitching shows. Good luck!
Hello! I read your story and it gave me some hope…so it turns out that due to a combination of hard water and some unexpectedly too hard laundry detergent while hand-washing, my Jaime + the Jones slate blank top now has a white-ish discoloration. I do not wish to rid myself of this top, and I am thinking of perhaps giving it a dye job as a last resort. Have you ever tried dyeing raw silk? Since the fabric is already a dark-ish blue, I was thinking of going dark blue or just black. Thanks!